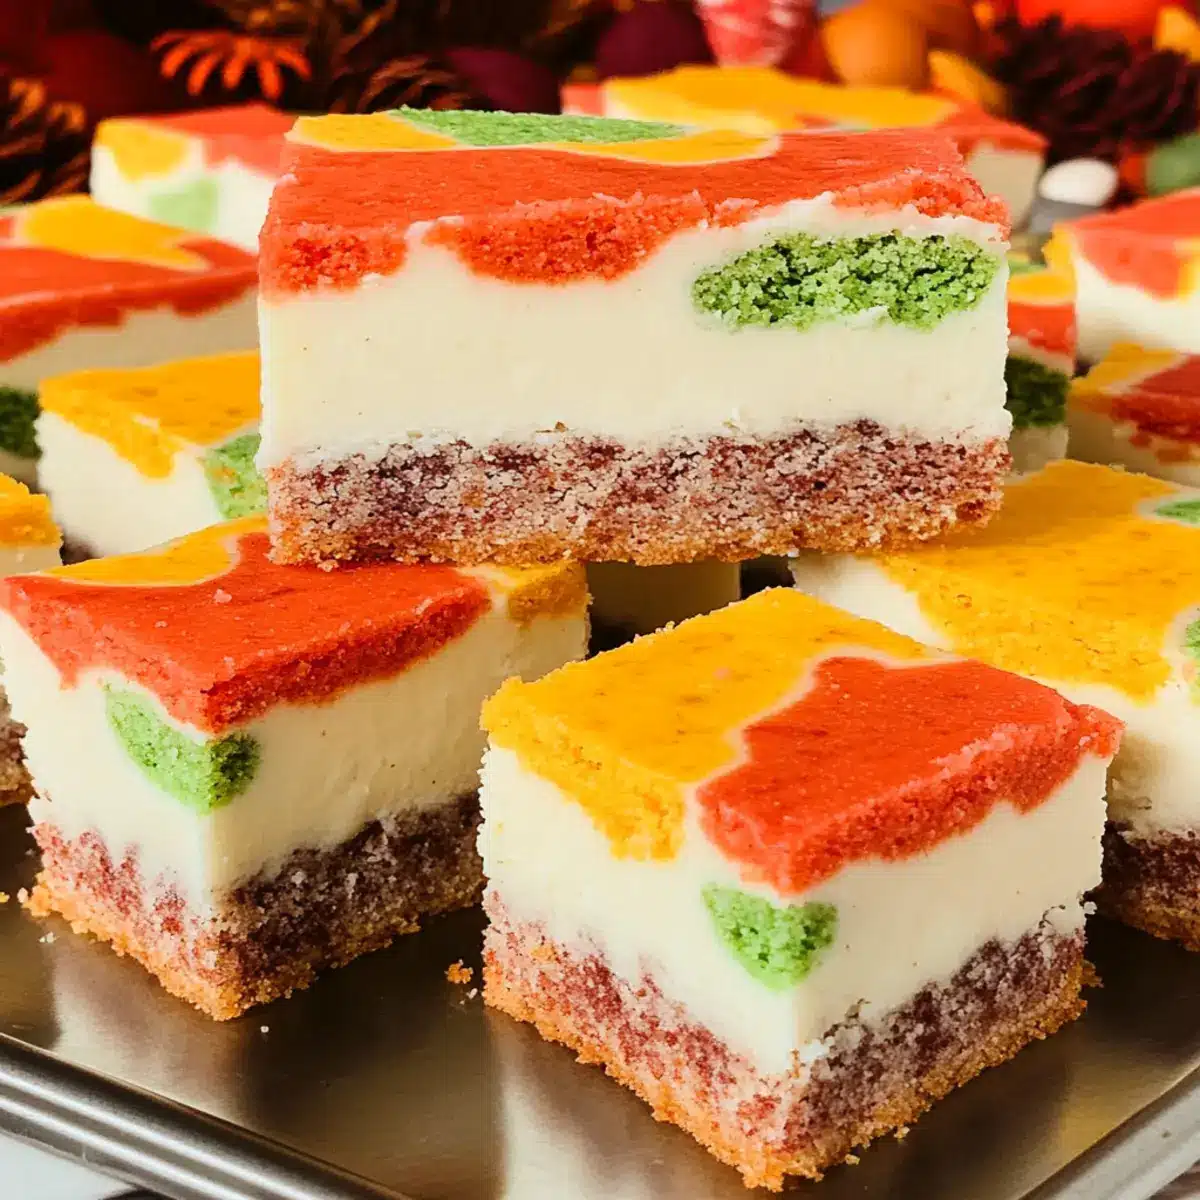
As I stood in my kitchen, the unmistakable aroma of cinnamon and nutmeg danced in the air, instantly transporting me to a cozy fall afternoon. These Harvest Marble Sugar Cookie Bars are more than just a seasonal delight; they blend the warmth of traditional sugar cookies with vibrant hues that celebrate the beauty of autumn. Picture a buttery, chewy texture adorned with velvety buttercream frosting—perfect for your Thanksgiving gatherings or any occasion that calls for a touch of sweetness. These delightful bars come together quickly, making them an effortless addition to your autumn baking repertoire. Plus, they’re a guaranteed crowd-pleaser, sure to earn you compliments from family and friends. So, are you ready to fill your home with the enchanting scents of fall while impressing your loved ones? Let’s dive into this festive treat!
Why are Harvest Marble Sugar Cookie Bars irresistible?
Vibrant Colors: Each bar showcases stunning fall hues, transforming ordinary cookies into a festive centerpiece for your table.
Buttery Texture: The soft, chewy nature of these bars melts in your mouth, making every bite a delightful experience.
Quick and Easy: With straightforward steps, you can whip these up in no time, allowing you more time to enjoy with your loved ones.
Crowd-Pleaser: Whether it’s a Thanksgiving gathering or a cozy coffee morning, these cookie bars are sure to impress.
Versatile Topping: Choose between rich buttercream or a tangy cream cheese frosting, adapting the treat to your taste or occasion!
Great with Beverages: Pair them with a warm apple cider or pumpkin spice latte for the perfect fall indulgence.
Harvest Marble Sugar Cookie Bars Ingredients
For the Cookie Bars
- Butter (1 cup, softened) – Adds richness and moisture; ensure it’s at room temperature for easy creaming.
- Granulated Sugar (2 cups) – Provides sweetness and structure; can substitute with coconut sugar for a caramel-like flavor.
- Eggs (4 large) – Binds the ingredients together and adds moisture; use flax eggs for a vegan option.
- Vanilla Extract (2 teaspoons) – Enhances the flavor of the cookies; pure vanilla is preferred for the best taste.
- All-Purpose Flour (5 cups) – Main structural component; for a gluten-free version, substitute with a gluten-free flour blend.
- Baking Soda (1/2 teaspoon) – Leavening agent that helps the bars rise; ensure it’s fresh for the best results.
For the Buttercream Frosting
- Butter (1/2 cup, softened) – Essential for a creamy texture; make sure it’s softened to allow for easy mixing.
- Powdered Sugar (4 cups) – Adds sweetness and stability; sift before measuring for a smoother frosting.
- Milk (2-3 tablespoons) – Helps achieve a spreadable consistency; adjust to your desired texture.
- Vanilla Extract (1 teaspoon) – Enhances the flavor of the frosting; consider adding a touch of cinnamon for a fall twist.
For Garnish
- Festive Sprinkles – Perfect for topping and adding a fun, seasonal touch; choose colors that reflect autumn!
These Harvest Marble Sugar Cookie Bars are not only a feast for the eyes but also a treat for your taste buds!
Step‑by‑Step Instructions for Harvest Marble Sugar Cookie Bars
Step 1: Preheat the Oven
Begin by preheating your oven to 375°F (190°C). This ensures your Harvest Marble Sugar Cookie Bars bake evenly and reach the perfect golden hue. While the oven heats, prepare your baking sheet by lining it with parchment paper to prevent sticking and allow for easy removal after baking.
Step 2: Cream Butter and Sugar
In a large mixing bowl, combine 1 cup of softened butter with 2 cups of granulated sugar. Using an electric mixer, beat the mixture on medium speed until it becomes light and fluffy, which should take about 2-3 minutes. This step is crucial for a tender texture, setting the stage for your delicious cookie bars.
Step 3: Add Eggs and Vanilla
Next, add 4 large eggs and 2 teaspoons of vanilla extract to the creamed butter and sugar mixture. Beat on low speed until all ingredients are well-combined, taking care not to overmix. The eggs will help bind the ingredients together, resulting in a rich and flavorful base for your Harvest Marble Sugar Cookie Bars.
Step 4: Incorporate Dry Ingredients
Gradually add in 5 cups of all-purpose flour and 1/2 teaspoon of baking soda to the wet mixture. Mix on low speed until just combined, ensuring no flour pockets remain. The dough should be thick and slightly sticky, forming the perfect consistency for marbleizing with vibrant colors in the next steps.
Step 5: Divide and Color Dough
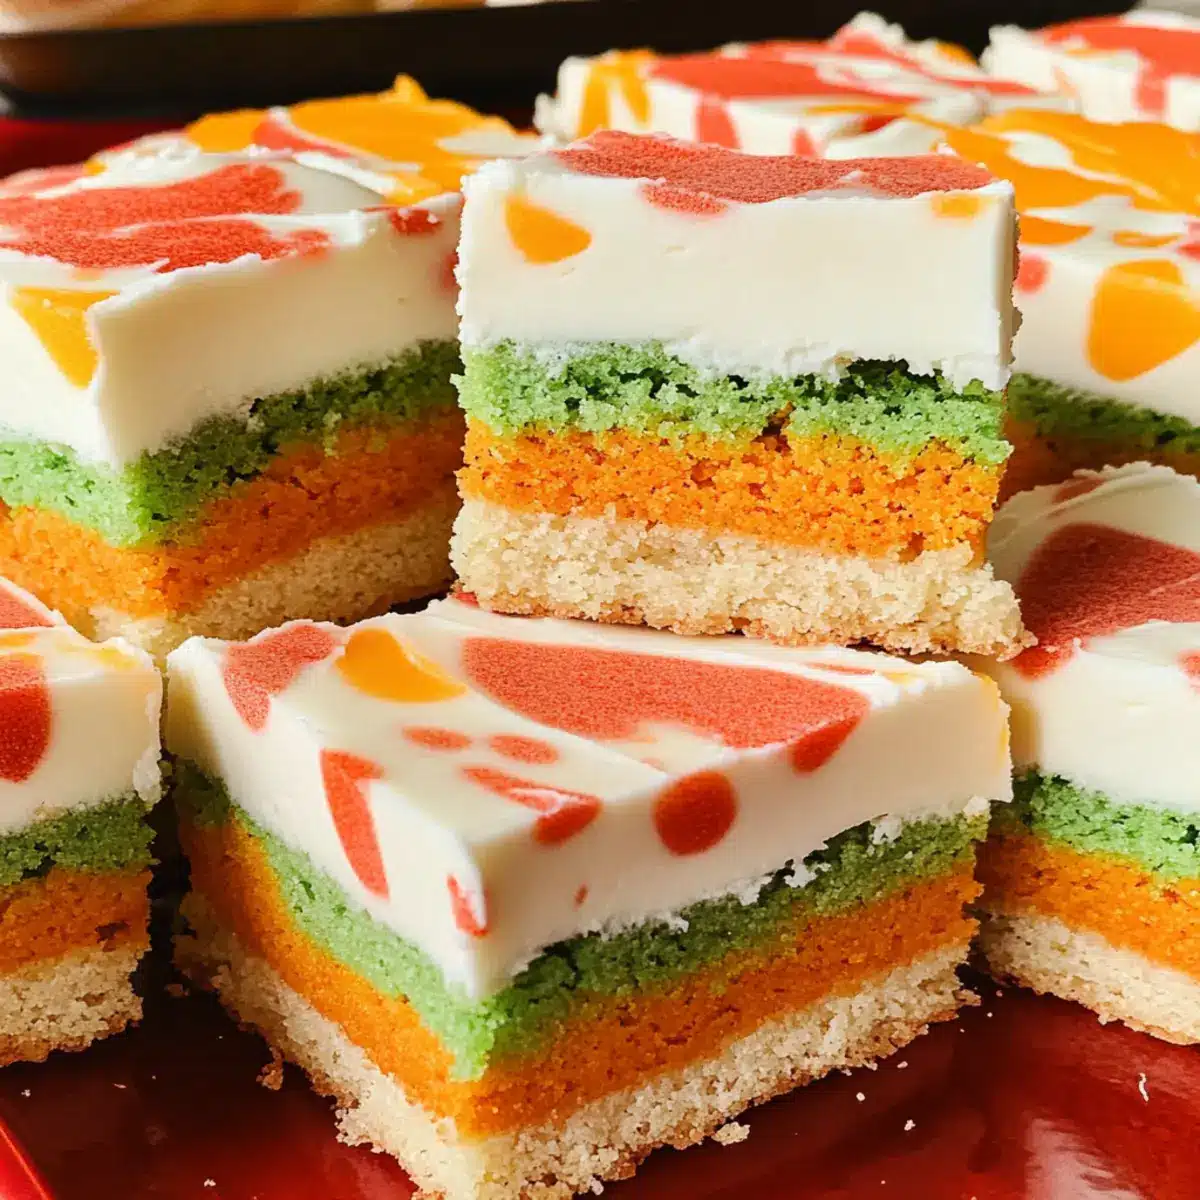
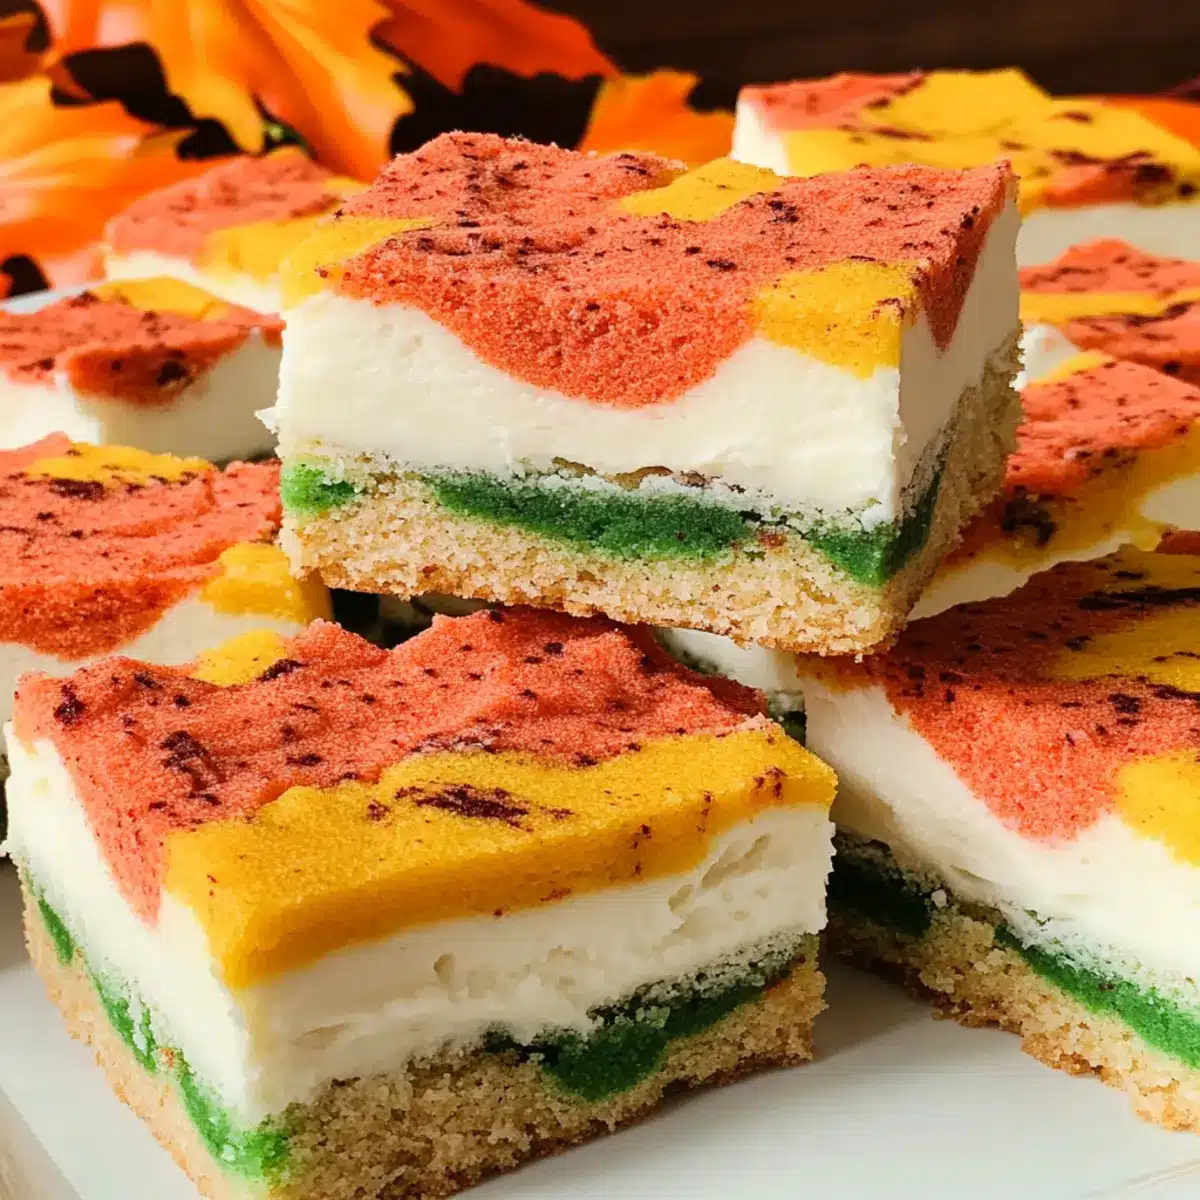
Once your dough is ready, divide it into five equal sections. Leave one portion untouched (the white dough) and color the remaining four portions with food gel in vibrant shades of red, orange, gold, and sage. Avoid over mixing to preserve the individual colors, creating beautiful marbled patterns in your Harvest Marble Sugar Cookie Bars.
Step 6: Prepare the Baking Sheet
With your dough colored and ready, remove your lined baking sheet. Begin by placing pieces of the white dough randomly across the parchment, allowing for a patchwork of color. This step creates visual interest and a delightful surprise in each bite of your cookie bars.
Step 7: Layer Colored Dough
Next, add the colored dough pieces on top of the white dough, gently pressing them down to form an even layer. Aim for a thickness of approximately 3/4 inch. Use your hands or a spatula for a uniform spread, ensuring each color overlaps slightly to achieve that stunning marbled effect.
Step 8: Cover and Press
Take a second piece of parchment paper and place it over the layered dough. Press down evenly to flatten and meld the colors together without disturbing the marbling. This technique helps achieve a more cohesive texture in the final baked cookie bars and ensures even baking.
Step 9: Bake
Now, it’s time to bake your cookie bars! Place the baking sheet in the oven and set the timer for 10-15 minutes. Keep an eye on them; they should look slightly underbaked when you take them out, as they’ll continue to set while cooling. A toothpick inserted into the center should come out clean.
Step 10: Cool Completely
Once baked to perfection, remove the cookie bars from the oven and let them cool in the baking sheet for about 10 minutes. Then, transfer them to a wire rack to cool completely before frosting. This will ensure that the buttercream adheres properly without melting.
Step 11: Prepare the Buttercream Frosting
While the bars cool, prepare your buttercream frosting. In a bowl, beat together 1/2 cup softened butter, 4 cups powdered sugar, and 2-3 tablespoons of milk until you achieve a creamy, spreadable consistency. Add 1 teaspoon of vanilla extract for flavor, and mix until combined.
Step 12: Frost the Cookie Bars
Once the Harvest Marble Sugar Cookie Bars have cooled completely, spread the prepared buttercream frosting evenly over the top using a spatula. This sweet layer will complement the rich flavors of the bars and add an extra touch of indulgence to your festive treat.
Step 13: Garnish and Slice
Finally, sprinkle festive fall sprinkles over the frosted surface for a pop of color and seasonal charm. Then, using a sharp knife, slice the bars into squares for serving. These beautiful Harvest Marble Sugar Cookie Bars are now ready to delight friends and family at your next gathering!
Storage Tips for Harvest Marble Sugar Cookie Bars
Room Temperature: Keep your Harvest Marble Sugar Cookie Bars in an airtight container at room temperature for up to 1 week to maintain their soft, chewy texture.
Fridge: If you want to extend freshness, store the bars in the refrigerator. Properly sealed, they can last up to 2 weeks, but be sure to bring them to room temperature before serving for the best flavor.
Freezer: For longer storage, freeze the cookie bars in a freezer-safe container for up to 3 months. Layer parchment paper between bars to prevent sticking. Simply thaw at room temperature before enjoying.
Reheating: If you prefer your bars warm, simply microwave individual pieces for about 10-15 seconds. This helps restore their delightful softness and makes them extra comforting!
Expert Tips for Harvest Marble Sugar Cookie Bars
-
Room Temperature Butter: Ensure your butter is softened at room temperature to achieve the perfect creamy texture and consistent mixing. Cold butter can lead to dense bars.
-
Coloring Dough: When adding food gel to the dough, do it gradually. This prevents overmixing and allows the vibrant colors to remain distinct, enhancing the marble effect.
-
Baking Time Check: Keep a close eye towards the end of the baking time. Bars should look slightly underbaked when removed from the oven; they’ll firm up as they cool, ensuring a soft, chewy texture.
-
Frosting Consistency: For the buttercream frosting, add milk gradually. This lets you achieve the desired spreadable consistency without it becoming too thin.
-
Storage Matters: To keep your Harvest Marble Sugar Cookie Bars fresh, store them in an airtight container. This helps retain moisture and prevents them from getting hard.
-
Creative Garnishing: Experiment with various sprinkles or even drizzles of chocolate to make your bars visually striking and tailored to any occasion!
Harvest Marble Sugar Cookie Bars Variations
Feel free to add your personal touch to these delightful cookie bars, enhancing them to match your taste!
-
Dairy-Free: Swap butter with coconut oil and use non-dairy milk for a deliciously creamy frosting that caters to dairy-free diets. You’ll still enjoy that melt-in-your-mouth texture without compromising flavor.
-
Gluten-Free: Replace all-purpose flour with a gluten-free flour blend to make these cookie bars suitable for gluten-sensitive friends. Just ensure to check for a good blend that offers similar texture!
-
Nutty Delight: Fold in crushed pecans or walnuts into the dough before baking to give an added crunch and rich flavor. This twist adds a delightful texture you won’t want to skip!
-
Choco-Pumpkin: Add 1/2 cup of pumpkin puree and 1/2 cup of cocoa powder to the dough blend for a seasonal chocolate twist. The combination of flavors offers a unique, delicious experience—perfect for autumn!
-
Spiced Up: Enhance the cookie flavor by adding cinnamon, nutmeg, or even ginger to the dough for a spicier profile. Just a teaspoon of your favorite spice can elevate the bars to festive heights!
-
Fruity Fusion: Sprinkle in dried cranberries or chopped apples into the dough for bursts of vibrant flavor in every bite. This fruity addition complements the buttery texture beautifully.
-
Chocolate Drizzle: After frosting, drizzle melted dark chocolate over the top of the bars for an extra luxurious touch. The chocolate’s bitterness contrasts perfectly with the sweet frosting.
-
Seasonal Sprinkles: For a fun twist, switch up your sprinkles according to the season. Use yellow and orange for fall, vibrant greens for spring, or red and white for festive holidays. It adds a personal touch to your presentation!
These variations assure that you can tailor your Harvest Marble Sugar Cookie Bars based on your and your guests’ preferences. Get creative, and watch these bars become everyone’s new favorite! And if you’re in the mood for more festive treats, try our Harvest Thanksgiving Cupcakes or our Biscoff Cookie Butter Brownies for more delightful ideas!
What to Serve with Harvest Marble Sugar Cookie Bars
These cookie bars are not just a treat on their own; they create the perfect sweet symphony when paired with delicious accompaniments.
-
Warm Apple Cider: The spices in hot apple cider beautifully complement the sweet flavors of the bars, providing a cozy feel.
-
Pumpkin Spice Latte: A classic fall drink that enhances the festive vibe, this latte’s creaminess pairs wonderfully with the buttery texture of the bars.
-
Whipped Cream: A dollop of fresh whipped cream adds a light, airy contrast that’s both rich and refreshing alongside each bite.
-
Vanilla Ice Cream: Creamy vanilla ice cream melts into the warm bars, creating a delectable contrast of textures that everyone will love.
-
Chocolate Drizzle: A simple drizzle of melted chocolate adds an indulgent touch, ramping up both flavor and visual appeal for special occasions.
-
Cream Cheese Frosting: Swap out the traditional frosting for cream cheese for a tangy twist that beautifully balances the sweetness of the bars.
-
Pecan Pie: For a dessert spread, serve with mini pecan pies to offer a classic autumn flavor alongside your yummy Harvest Marble Sugar Cookie Bars.
Enjoy experimenting and finding your own favorite pairings this fall!
Make Ahead Options
These Harvest Marble Sugar Cookie Bars are perfect for busy home cooks looking to save time without sacrificing flavor! You can prepare the cookie dough up to 24 hours in advance by following the initial steps through Step 4, then wrap the dough tightly in plastic wrap and refrigerate it to keep it fresh. On the day you’re ready to bake, simply take the dough out, let it soften slightly, and continue with Steps 5 through 13. For the best results, avoid coloring the dough too far in advance, as this helps maintain the vibrancy of the colors. This way, you can enjoy homemade, festive treats with minimal effort, keeping your Thanksgiving gatherings stress-free and delightful!
Harvest Marble Sugar Cookie Bars Recipe FAQs
What kind of butter should I use for the cookie bars?
Absolutely! It’s best to use unsalted butter that has been softened to room temperature. This ensures it blends smoothly with the sugar, creating a light and fluffy mixture. If your butter is still cold, it’ll be difficult to cream properly, which can affect the texture of your cookie bars.
How do I store Harvest Marble Sugar Cookie Bars to keep them fresh?
To keep your Harvest Marble Sugar Cookie Bars fresh, store them in an airtight container at room temperature for up to 1 week. If you prefer them to last longer, you can refrigerate them for up to 2 weeks. Just make sure you allow them to return to room temperature before serving for the best taste and texture!
Can I freeze the cookie bars, and if so, how?
Certainly! To freeze your Harvest Marble Sugar Cookie Bars, let them cool completely, then cut them into squares. Layer pieces of parchment paper between the bars in a freezer-safe container to prevent sticking. They can be frozen for up to 3 months. When you want to enjoy them, simply thaw at room temperature or microwave them for 10-15 seconds to regain their delightful softness.
What should I do if my cookie bars turn out too dry?
If you notice that your cookie bars are too dry, it could be due to overbaking. To prevent this, always keep an eye on them in the last few minutes of baking. They should look slightly underbaked when removed from the oven, as they’ll firm up while cooling. If they’re already baked and too dry, consider serving them with a scoop of ice cream or a drizzle of warm chocolate sauce to enhance moisture.
Are these cookie bars suitable for people with nut allergies?
Yes, the Harvest Marble Sugar Cookie Bars can be made nut-free! Just make sure to check that all your ingredients, like baking powder and any food coloring, do not contain traces of nuts. If you plan to add any variations, like nuts or chocolate, skip that to keep them safe for those with nut allergies.

Harvest Marble Sugar Cookie Bars: Your Fall Dessert Delight
Ingredients
Equipment
Method
- Preheat the oven to 375°F (190°C) and prepare a baking sheet by lining it with parchment paper.
- Combine 1 cup of softened butter with 2 cups of granulated sugar in a large mixing bowl and beat until light and fluffy.
- Add 4 large eggs and 2 teaspoons of vanilla extract to the mixture and beat until well combined.
- Gradually add 5 cups of flour and 1/2 teaspoon of baking soda, mixing until just combined.
- Divide the dough into five portions, coloring four with food gel in vibrant shades.
- Place pieces of the white dough randomly across the parchment-lined baking sheet.
- Add the colored dough pieces on top, pressing them down to form an even layer.
- Cover with parchment paper and press down evenly to flatten.
- Bake for 10-15 minutes, ensuring they look slightly underbaked before removing.
- Cool in the baking sheet for 10 minutes before transferring to a wire rack.
- Prepare buttercream by mixing 1/2 cup softened butter, 4 cups powdered sugar, and 2-3 tablespoons milk until creamy.
- Frost the cooled cookie bars evenly with the buttercream frosting.
- Garnish with festive sprinkles and slice into squares for serving.
Leave a Reply