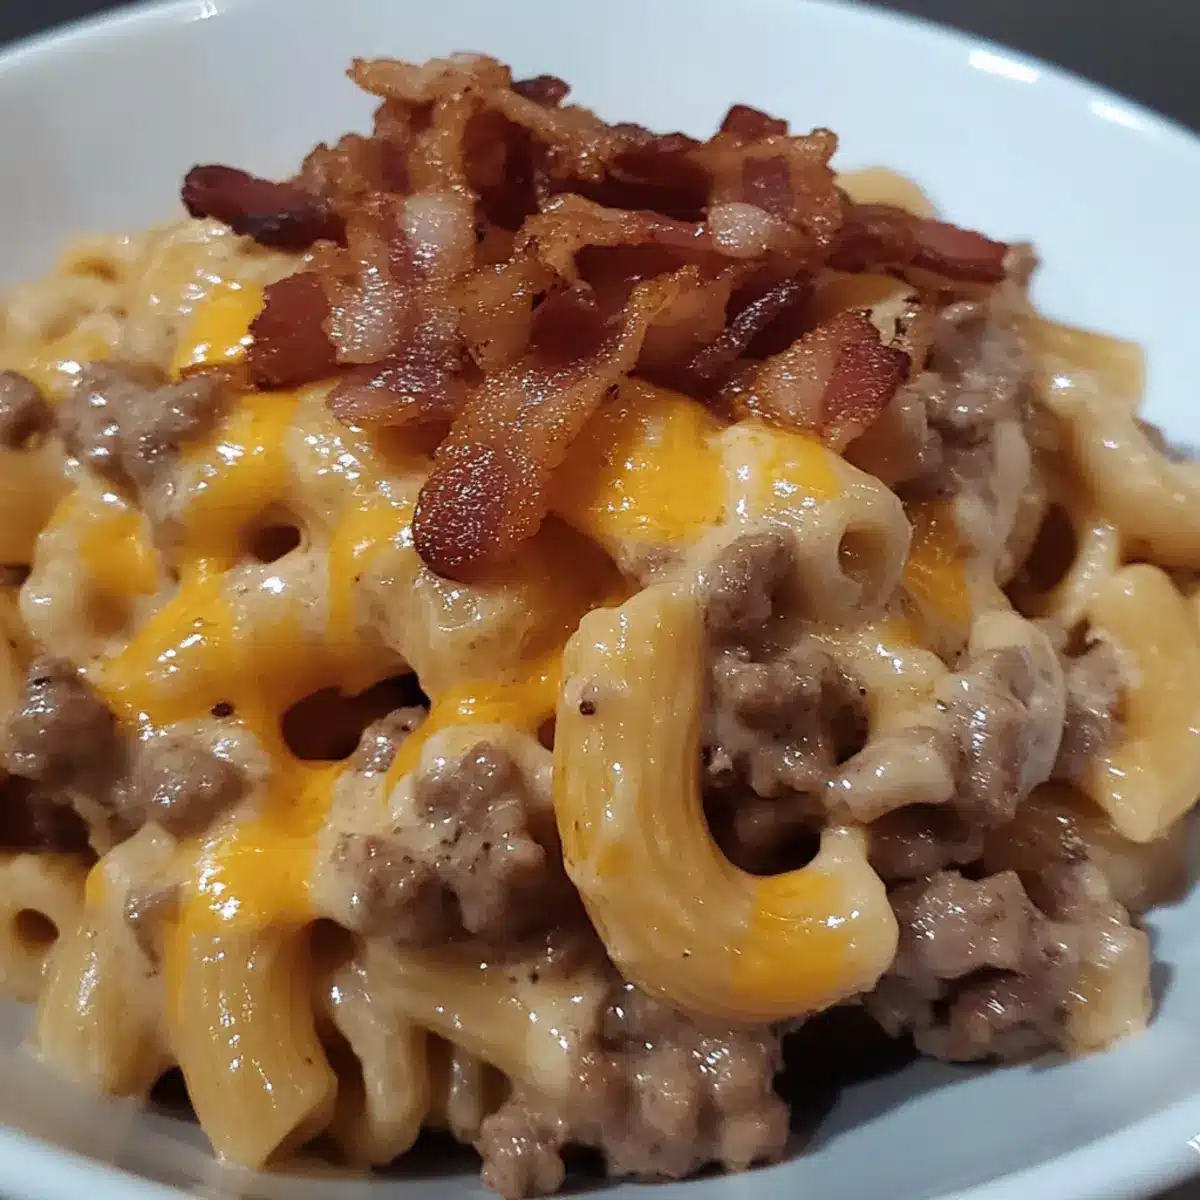
“Why settle for a mundane weeknight meal when you can indulge in a creamy Loaded Bacon Cheeseburger Pasta?” You only need one pot and a handful of pantry staples to create this comforting dish that transforms the classic flavors of a burger into a delightful pasta experience. Every bite is a dance of savory ground beef, crispy bacon, and luscious melted cheese wrapped in a rich sauce, making it perfect for those cozy evenings when you crave something both hearty and satisfying. Not only does it come together in a flash, but it’s also a crowd-pleaser that even picky eaters will devour. Ready to impress your family with minimal effort? Let’s dive into this delicious recipe!
Why Is This Pasta Recipe So Irresistible?
Comforting Flavor Explosion: The rich combination of ground beef, crispy bacon, and melty cheese ensures every bite is bursting with flavor that feels like a warm hug.
One-Pot Convenience: With everything cooked in one pot, clean-up is a breeze, giving you more time to enjoy your meal.
Customizable Creations: Feel free to swap in turkey, chicken, or even add veggies to cater to your family’s taste preferences. This dish is a canvas for your culinary creativity!
Time-Saving Delight: Ready in just 30 minutes, it’s perfect for busy weeknights when you want something easy, yet satisfying.
Family Favorite: From kids to adults, everyone will love this dish—just like my French Onion Pasta that also pleases picky eaters!
Loaded Bacon Cheeseburger Pasta Ingredients
• Discover the simple components that make this creamy dish spectacular!
For the Pasta
- Pasta – Use any favorite shape like penne or fusilli for a hearty base.
For the Protein
- Bacon – Adds crunch and savory flavor; turkey bacon is a great lighter option.
- Ground Beef – The main protein source that imparts rich flavor; consider turkey or chicken for a healthier alternative.
For the Sauce
- Flour – Helps create a roux for a luscious sauce; switch to gluten-free flour if needed.
- Milk – Brings creaminess to the sauce; opt for plant-based milk for a dairy-free version.
- Ketchup – Adds sweetness and tang, or use BBQ sauce for a flavorful twist.
- Worcestershire Sauce – Elevates umami notes; soy sauce is a fine substitute if that’s what you have on hand.
For the Cheese
- Cheese – Any melty cheese like cheddar or mozzarella works wonders; mixing different types can create an amazing flavor profile.
Elevate your weeknight dinners with this Loaded Bacon Cheeseburger Pasta that’s sure to please the whole family!
Step‑by‑Step Instructions for Loaded Bacon Cheeseburger Pasta
Step 1: Cook the Bacon
In a large frying pan over medium heat, add chopped bacon and cook until crispy, about 5–7 minutes. Keep an eye on it to prevent burning, and stir occasionally for even cooking. Once browned, transfer the bacon to a paper towel-lined plate to drain excess grease, but reserve a tablespoon of the drippings in the pan for the next steps.
Step 2: Boil the Pasta
In a large pot, bring salted water to a boil, then add your favorite pasta shape such as penne or fusilli. Cook according to package instructions, usually around 8–10 minutes, until al dente. Once cooked, drain the pasta and set it aside, making sure to save a cup of the pasta water for later use.
Step 3: Brown the Ground Beef
In the same frying pan where the bacon drippings are, add ground beef over medium heat. Cook it until browned, about 6–8 minutes, breaking it apart with a spatula and seasoning with salt and pepper. Ensure the beef is fully cooked with no pink remaining; it should look nicely browned and crumbly.
Step 4: Make the Sauce Base
Sprinkle flour over the browned beef and stir for about 1–2 minutes to create a roux, ensuring the flour doesn’t taste raw. This will help thicken your Loaded Bacon Cheeseburger Pasta sauce. The mixture should be a golden color and have a slightly thickened texture, indicating it’s ready for the next step.
Step 5: Add the Liquids
Gradually whisk in milk, stirring continuously until the sauce starts to thicken, which will take about 2–3 minutes. Next, mix in ketchup and Worcestershire sauce to elevate the flavor, creating a beautiful creamy sauce that coats the beef and flour. The sauce should be smooth and creamy with a lovely sheen.
Step 6: Combine Everything
Lower the heat to medium-low, then add the drained pasta to the beef mixture. Gently stir all ingredients together for about 2–3 minutes until everything is well coated and heated through. The pasta should be enveloped in that luscious sauce, transforming your dish into the ultimate Loaded Bacon Cheeseburger Pasta delight.
Step 7: Melt the Cheese
Add most of the cheese into the pasta mixture and stir until melted and creamy, about 1–2 minutes. Sprinkle the reserved cheese on top along with the crispy bacon. Allow it to sit for just a minute over low heat until the cheese is beautifully melted and gooey, creating a warm, inviting top layer full of flavor.
Step 8: Serve and Enjoy
Spoon the Loaded Bacon Cheeseburger Pasta into serving bowls, ensuring an even distribution of cheese and bacon. It’s best served immediately while warm and creamy. Optionally, you can garnish with chopped fresh herbs or additional cheese for an extra touch.
Expert Tips for Loaded Bacon Cheeseburger Pasta
-
Perfect Pasta: Cook your pasta al dente to ensure it holds its shape and doesn’t become mushy when mixed with the creamy sauce.
-
Bacon Crunch: For extra crunch, cook the bacon until it’s nicely crisp but not burnt, enhancing the texture of your Loaded Bacon Cheeseburger Pasta.
-
Sauce Consistency: If your sauce thickens too much, add a splash of reserved pasta water or milk to adjust the texture back to creamy.
-
Cheese Melting: Stir cheese in gradually and over low heat to avoid clumping, ensuring a smooth, creamy finish that clings to every bite.
-
Storage Savvy: Refrigerate leftovers in an airtight container for up to 3 days. When reheating, add a bit of milk to bring back the creamy consistency.
Loaded Bacon Cheeseburger Pasta Variations
Feel free to tweak this recipe to match your flavor cravings or dietary needs!
- Dairy-Free: Substitute the milk with your favorite plant-based milk and use vegan cheese for a delicious dairy-free option.
- Pasta Shape Change: Use macaroni, shells, or any pasta shape you have on hand; it always turns out wonderfully no matter the form!
- Extra Veggies: Toss in diced bell peppers, spinach, or mushrooms while browning the beef for a nutritious bump and added flavor.
- Heat Boost: Spice it up by adding a pinch of red pepper flakes or your favorite hot sauce to the sauce mixture for a delightful kick.
- Meal Prep Convenience: Make a big batch and freeze portions for busy nights; it reheats beautifully, just like my Creamy Chicken Pot Pie Pasta!
- Herb Infusion: Stir in fresh or dried herbs like oregano or basil to the sauce for an aromatic flavor twist that elevates the dish.
- Cheese Variety: Experiment with different melty cheeses like Gouda or Pepper Jack for a unique flavor profile that adds excitement to every bite.
- Chickpea Swap: For a vegetarian protein boost, swap the ground beef with crumbled chickpeas or lentils, making it both hearty and wholesome.
Let your creativity shine as you customize this Loaded Bacon Cheeseburger Pasta to your taste!
How to Store and Freeze Loaded Bacon Cheeseburger Pasta
Fridge: Store leftovers in an airtight container for up to 3 days. Ensure it’s completely cool before sealing to maintain freshness.
Freezer: This dish can be frozen for up to a month. Portion it into freezer-safe containers, allowing some room for expansion.
Thawing: For best results, thaw in the refrigerator overnight before reheating. This helps preserve the creamy texture.
Reheating: Gently reheat on the stovetop or in the microwave, adding a splash of milk to bring back the luxurious creaminess of your Loaded Bacon Cheeseburger Pasta.
What to Serve with Loaded Bacon Cheeseburger Pasta
Enhance your dining experience with delightful sides that complement the rich flavors of your creamy pasta masterpiece.
- Garlic Bread: A classic favorite, its toasted crunch makes each bite even more enjoyable while soaking up the delicious sauce.
- Crunchy Side Salad: A refreshing mix of greens with a tangy vinaigrette will provide a light contrast to the creamy richness of your dish.
- Steamed Broccoli: Bright green and tender, this veggie adds a pop of color and nutrition, perfectly balancing the hearty pasta.
- Coleslaw: The crisp, tangy slaw offers a refreshing crunch that contrasts beautifully with the smooth texture of the pasta.
- Onion Rings: These crispy delights add a fun twist, bringing extra crunch and flavor that echoes the burger theme.
- Pickle Chips: A small side of pickles introduces a zesty bite, cutting through the richness of the cheese and bacon.
- Sweet Tea or Lemonade: Refreshing drinks like sweet tea or a zesty lemonade will cleanse your palate and complement the hearty meal beautifully.
- Chocolate Chip Cookies: End on a sweet note with warm cookies, creating a comforting finish that echoes the cozy vibe of your dinner.
Make Ahead Options
These Loaded Bacon Cheeseburger Pasta creations are perfect for meal prep enthusiasts! You can prepare the pasta and sauce up to 24 hours in advance, allowing the flavors to meld beautifully. Cook your pasta al dente, drain, and toss it with a little olive oil to prevent sticking before refrigerating. The sauce can also be made ahead; simply allow it to cool completely before storing it in an airtight container in the fridge. When you’re ready to serve, reheat the sauce over medium-low heat, add the pasta, and stir in cheese until melted, ensuring a fresh and creamy experience just like when it was first made. Enjoy the time-saving benefits without sacrificing taste!
Loaded Bacon Cheeseburger Pasta Recipe FAQs
What type of pasta is best for this dish?
Absolutely! Any pasta shape works wonderfully—you could use penne, fusilli, or even macaroni. Just remember to cook it al dente so it retains its texture when mixed with the creamy sauce.
How long can I store leftovers?
You can store your Loaded Bacon Cheeseburger Pasta in the refrigerator in an airtight container for up to 3 days. Just be sure it’s cooled down before sealing it, to keep it fresh and tasty!
Can I freeze this pasta dish?
Yes, you can freeze Loaded Bacon Cheeseburger Pasta for up to a month! Simply portion it into freezer-safe containers, leaving a little room for expansion. Thaw it overnight in the refrigerator before reheating for the best texture and flavor.
What should I do if the sauce gets too thick?
If your sauce thickens more than you’d like while cooking, don’t worry! Just add a splash of reserved pasta water or milk gradually while stirring until you reach your desired creamy consistency. This step is key to making sure every bite stays luscious!
Are there any alternatives for the meat or dairy?
Of course! You can easily substitute the ground beef for turkey or chicken, and use turkey bacon if you’re looking for a lighter option. For a dairy-free version, try almond or oat milk in place of regular milk and a dairy-free cheese! This way, everyone can enjoy this comforting dish.
Is there anything I should know about allergens?
Yes, if you’re serving guests with allergies, be sure to check all labels for potential allergens. The dish contains gluten (from the flour and pasta) and dairy (from the milk and cheese). You can make it gluten-free with proper substitutes and opt for non-dairy products for a safe, inclusive meal.
Creamy Loaded Bacon Cheeseburger Pasta for Comfort Food Bliss
Ingredients
Equipment
Method
- Cook chopped bacon in a large frying pan over medium heat until crispy, about 5–7 minutes, then transfer to a paper towel-lined plate.
- In a large pot, bring salted water to a boil, add pasta, and cook according to package instructions, about 8–10 minutes, then drain and reserve a cup of pasta water.
- In the frying pan, add ground beef and cook over medium heat, breaking apart and seasoning until browned, about 6–8 minutes.
- Sprinkle flour over the browned beef and stir for 1–2 minutes to create a roux, ensuring the flour doesn’t taste raw.
- Gradually whisk in milk and stir continuously until the sauce thickens, about 2–3 minutes, then add ketchup and Worcestershire sauce.
- Lower heat, add drained pasta, and stir to combine, cooking for about 2–3 minutes.
- Add most of the cheese to the mixture, stirring until melted and creamy, then top with remaining cheese and crispy bacon.
- Serve in bowls and enjoy while warm, optionally garnished with fresh herbs or extra cheese.
Leave a Reply