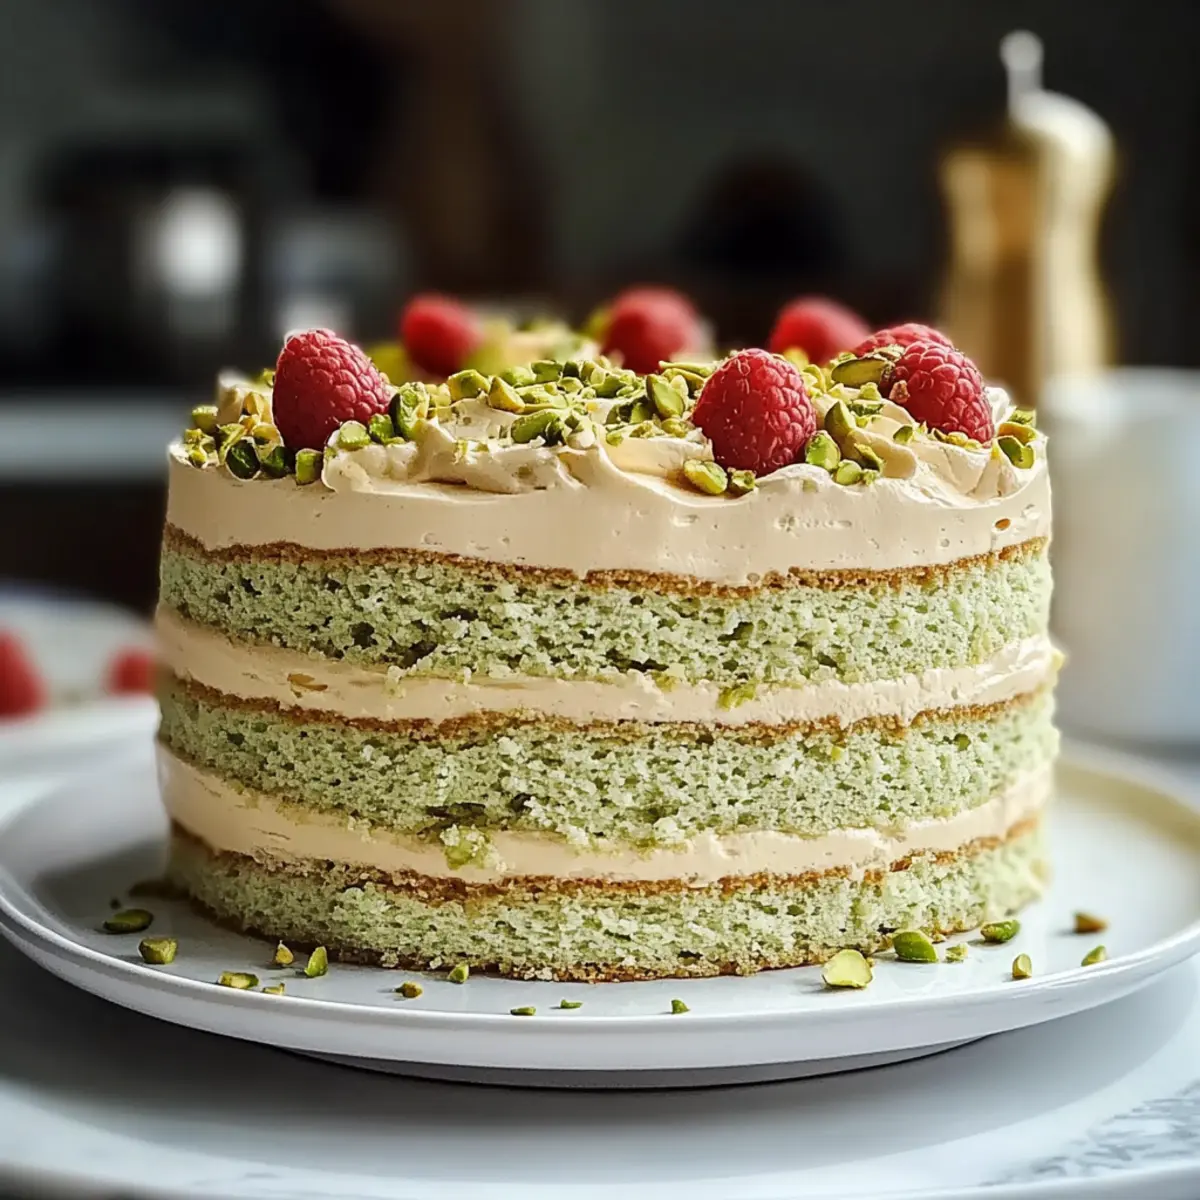
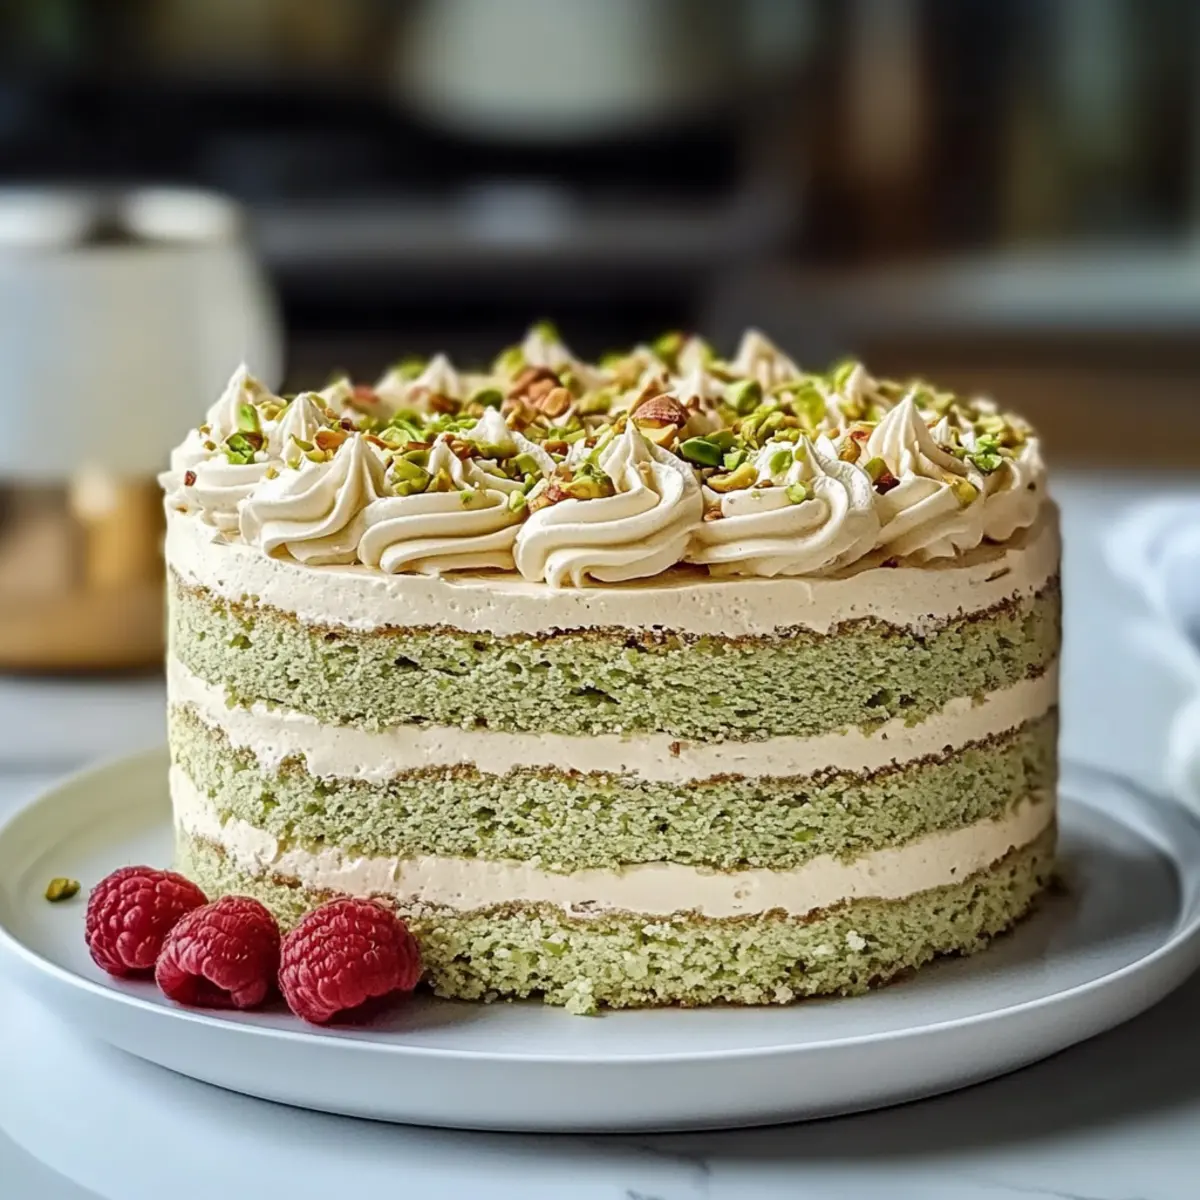
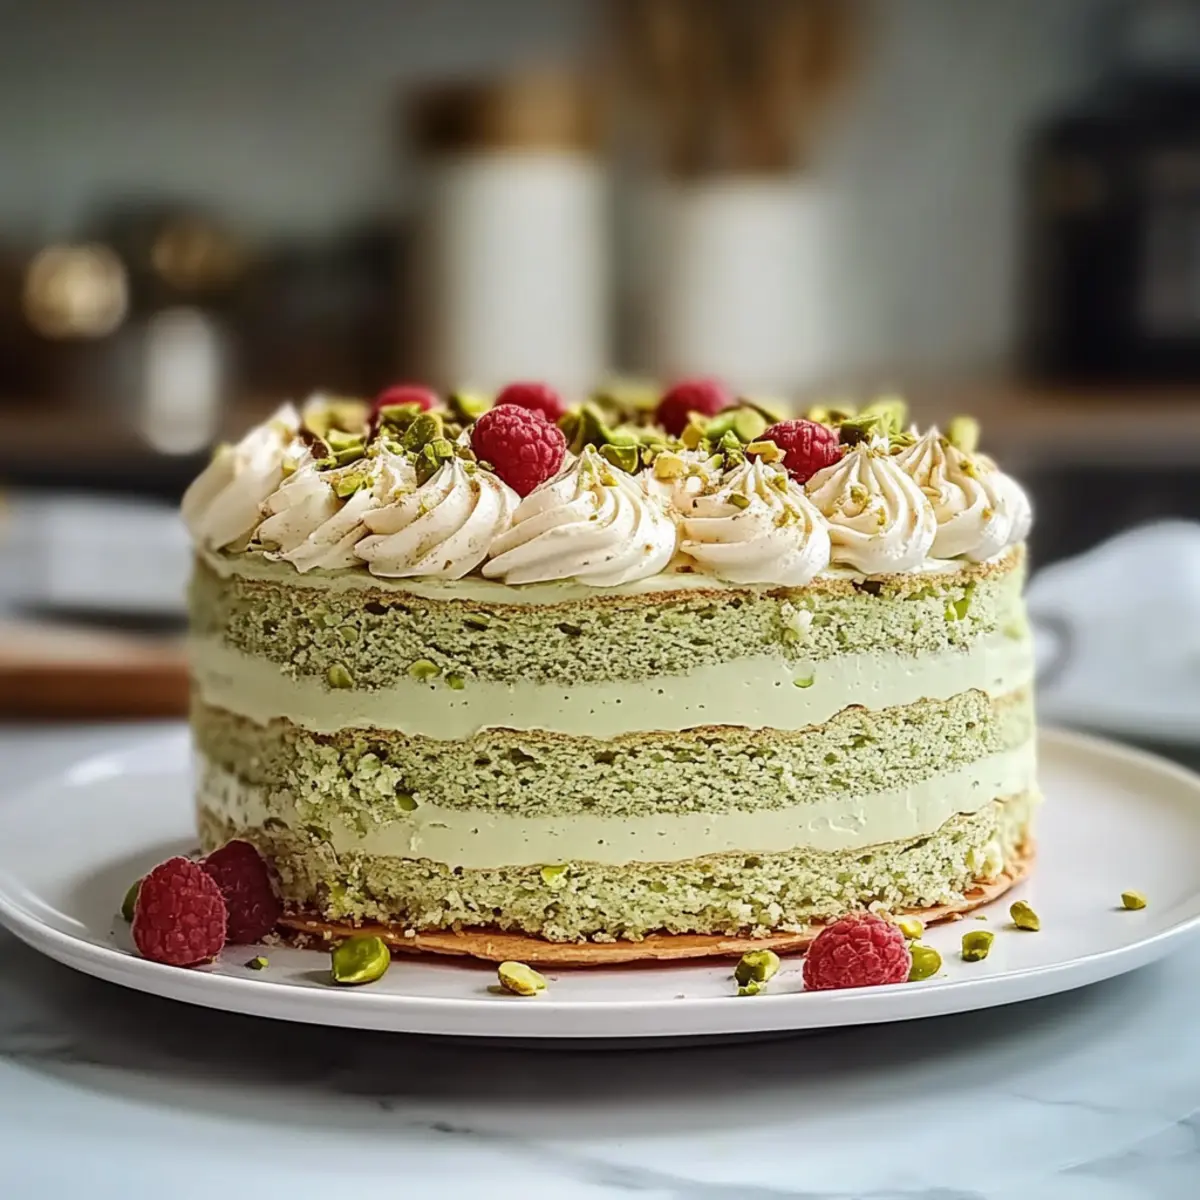
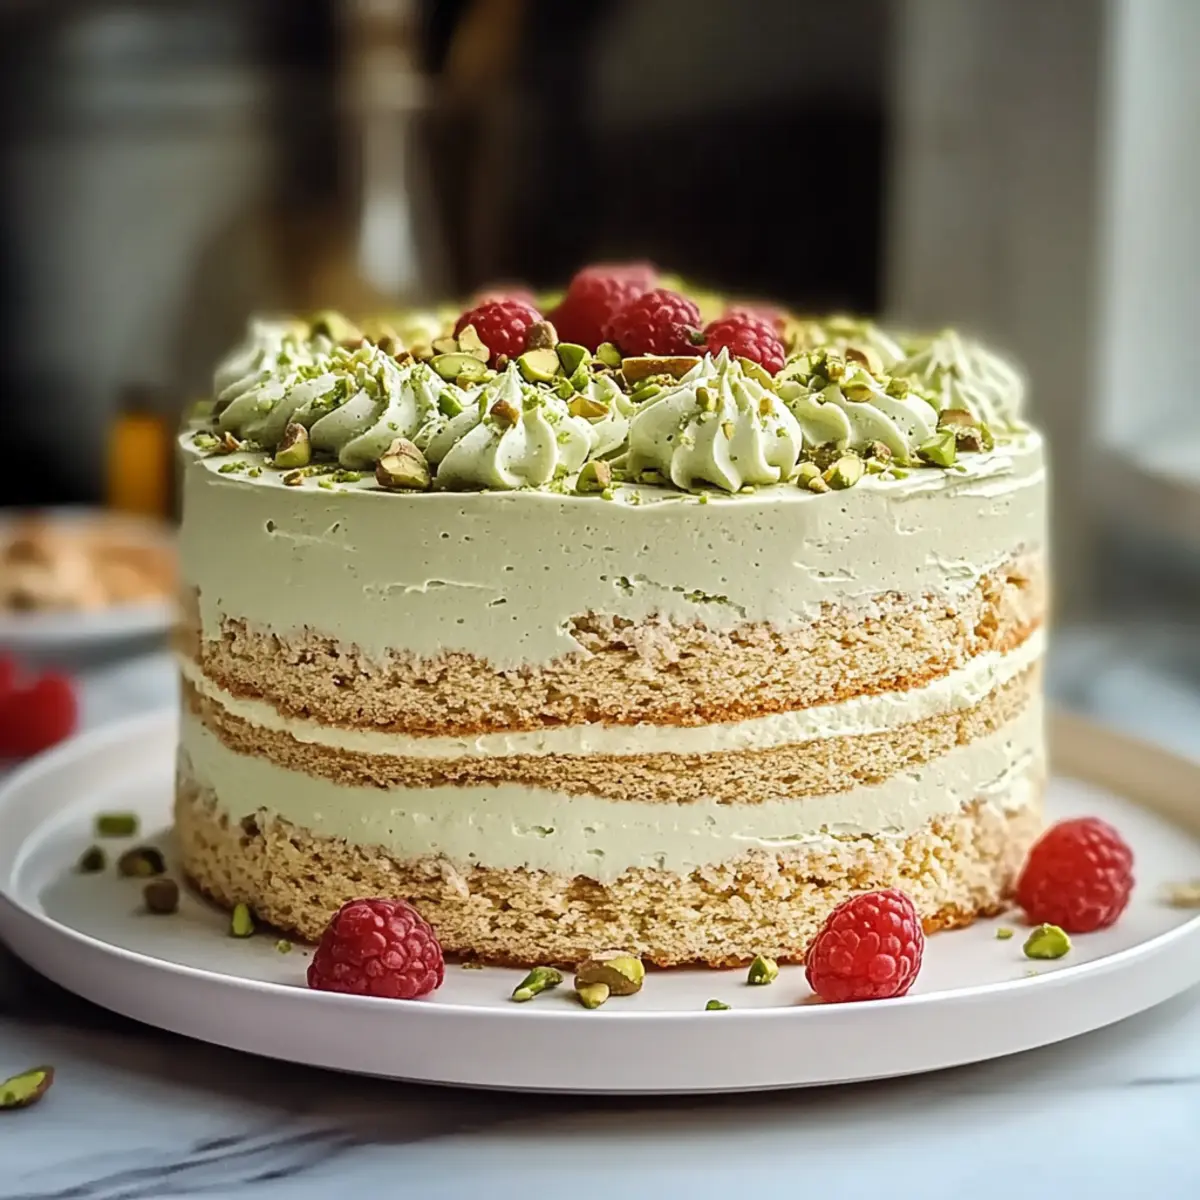
Stepping into my kitchen, the aromatic allure of roasted pistachios fills the air; this begins my journey to crafting a Pistachio Dacquoise Cake that promises to impress. With its elegantly layered design and a crisp texture enveloping a creamy, dreamy filling, this dessert not only captivates the senses but also elevates any celebration. Whether you’re planning a special occasion or just craving a sophisticated treat, this cake is an enchanting choice. Another delightful perk? It’s a gluten-free option depending on your flour selection, making it accessible to those with dietary considerations. How could anyone resist this fabulous treat? So, ready to master this indulgent French dessert with me? Let’s dive in and create a slice of magic!
Why is Pistachio Dacquoise Cake a Must-Try?
Indulgent flavors await you with every bite of this exquisitely layered cake. The crispy meringue contrasts beautifully with rich, creamy buttercream, creating a delightful experience. Versatile options let you customize fillings or garnishes, making it suitable for any occasion. Plus, this cake is gluten-free based on your flour choice, appealing to a wider audience. Whether it’s a birthday or an elegant dinner, this stunning dessert is bound to be the highlight—alongside treats like Coconut Cream Cake and Caramel Apple Cake!
Pistachio Dacquoise Cake Ingredients
For the Meringue Layers
- Egg Whites – Ensure they are at room temperature for better whipping and increased volume.
- Granulated Sugar – Sweetens and stabilizes the meringue for a perfect texture.
- Cream of Tartar – Optional but helps stabilize the egg whites for a firmer structure.
- Salt – Enhances the overall flavor profile of the meringue.
- Finely Ground Pistachios – Adds a rich nutty flavor and texture; can be substituted with almond or hazelnut flour for a different taste.
- Powdered Sugar – Provides sweetness and contributes to the crisp texture of the meringue.
- Cake Flour – Supports a light and tender meringue; using gluten-free flour will keep the Pistachio Dacquoise Cake gluten-free.
For the Buttercream Filling
- Egg Yolks – Adds creaminess and richness to this luscious buttercream.
- Unsalted Butter – Must be at room temperature for a smooth and creamy texture.
- Pistachio Paste – Infuses the buttercream with a delightful pistachio flavor; use store-bought or homemade.
- Vanilla Extract – Enhances depth and richness of flavor in the buttercream.
- Green Gel Food Coloring – Optional, but gives a vibrant appearance that dazzles on the plate.
For the Raspberry Coulis (Optional)
- Fresh/Frozen Raspberries – Used to make a bright, tart coulis that pairs perfectly with the cake.
- Granulated Sugar – Sweetens the coulis for balanced flavor.
- Fresh Lemon Juice – Adds brightness and acidity to the coulis.
- Cornstarch (Optional) – Thickens the coulis for a more luxurious consistency.
For Garnishing
- Chopped Pistachios – Provides a crunchy texture and a visual appeal to the finished cake.
- Fresh Raspberries – A beautiful garnish that complements both taste and aesthetics.
- Edible Gold Leaf (Optional) – For a touch of luxury and a stunning presentation at special occasions.
Step‑by‑Step Instructions for Pistachio Dacquoise Cake
Step 1: Prepare Dacquoise Layers
Preheat your oven to 300°F (150°C) and line two baking sheets with parchment paper, drawing circles as guides. In a bowl, whisk together powdered sugar, finely ground pistachios, and cake flour until well combined. In another bowl, whip room-temperature egg whites with cream of tartar and salt until soft peaks begin to form. Gradually add granulated sugar while continuing to whip until you achieve stiff peaks, then gently fold in the dry ingredients. Pipe the meringue onto the parchment circles and bake for 30 minutes, reducing the temperature to 250°F (120°C) for an additional 30-45 minutes until golden and firm. Allow the layers to cool completely.
Step 2: Make Buttercream
While the dacquoise layers cool, prepare the buttercream. In a small saucepan, combine sugar and water, cooking over medium heat until it reaches 240°F (115°C). Meanwhile, whip the egg yolks in a mixing bowl until fluffy and light in color. Once the syrup is ready, slowly drizzle it into the egg yolks while whisking continuously until the mixture cools down. Gradually add the room-temperature unsalted butter, mixing until smooth and creamy. Finally, incorporate pistachio paste and vanilla extract, and if desired, add a drop of green gel food coloring for a vibrant hue.
Step 3: Prepare Raspberry Coulis (Optional)
For a delicious raspberry coulis, combine fresh or frozen raspberries with granulated sugar and lemon juice in a saucepan. Cook over medium heat until the mixture breaks down and becomes syrupy, about 10-15 minutes. To achieve a smoother texture, strain the mixture through a fine mesh sieve to remove seeds. If you prefer a thicker coulis, mix a tiny amount of cornstarch with water to create a slurry and stir it in, cooking until thickened. Set aside to cool.
Step 4: Assemble Cake
Once the dacquoise layers are completely cool, begin the assembly. Place one meringue layer on a serving plate. Pipe a ring of buttercream around the edges to create a dam, and fill the center with a layer of raspberry coulis. Gently place the second dacquoise layer on top, repeating the buttercream dam and coulis filling, then add the third layer. Apply a thin crumb coat of buttercream around the entire cake to seal in any crumbs and refrigerate until firm. After chilling, use the remaining buttercream to frost the cake evenly.
Step 5: Garnish and Serve
For the final touch, garnish your Pistachio Dacquoise Cake with chopped pistachios and fresh raspberries on top. If you’re feeling luxurious, add edible gold leaf for an elegant finish. Chill the assembled cake in the refrigerator for about 30 minutes before slicing. This will set the buttercream and make serving easier. When you’re ready to enjoy, slice with a sharp, warm knife for clean edges and serve your stunning cake at your next celebration!
Make Ahead Options
The Pistachio Dacquoise Cake is a fantastic choice for meal prep, allowing you to save time and impress your guests! You can prepare the dacquoise layers up to 24 hours in advance; simply cool them completely and store them in an airtight container at room temperature to maintain their crispiness. The buttercream can also be made ahead up to 3 days prior; refrigerate it, then allow it to come to room temperature before re-whipping for fluffiness. Assemble the cake just a few hours before serving, and when ready, simply layer the meringue, buttercream, and raspberry coulis, then chill briefly. Following these steps ensures your dessert will be just as delightful and fresh!
Expert Tips for Pistachio Dacquoise Cake
-
Egg Whites Matter: Make sure your egg whites are completely free of yolk and at room temperature for optimal volume when whipping.
-
Gentle Folding: Be cautious when folding the dry ingredients into the meringue; overmixing can deflate the mixture, compromising the lightness of your Pistachio Dacquoise Cake.
-
Measure Carefully: Accurate measuring of ingredients, especially sugar and pistachios, is crucial to achieving the right texture and flavor balance in each layer.
-
Cool Meringue Completely: Allow the dacquoise layers to cool fully before assembling to prevent melting the buttercream when layering.
-
Crumb Coat Tip: Applying a thin crumb coat before the final frosting helps seal any loose crumbs, ensuring a smooth finish for your cake.
-
Serve with Style: Use a sharp, warm knife to cut the cake, which will create clean, beautiful slices, enhancing the overall presentation.
What to Serve with Pistachio Dacquoise Cake?
The perfect dessert deserves the perfect companions to round out your meal experience, creating a symphony of flavors.
- Fresh Berries: A mix of strawberries and blueberries adds a burst of freshness and tartness that contrasts beautifully with the cake’s richness.
- Crème Fraîche: A dollop of this tangy cream balances the sweetness, enhancing the cake’s nutty flavor while adding a luscious creaminess.
- Espresso: The dark, robust flavors of a freshly brewed espresso pair wonderfully with the sweetness of the cake, creating a delightful after-meal treat.
- Lemon Sorbet: The light, refreshing citrus notes of sorbet cleanse the palate and provide an invigorating counterpoint to the dense, creamy layers of the dacquoise.
- Chocolate Ganache: A silky drizzle of ganache brings a rich, indulgent element to the cake, perfect for chocolate lovers looking to enhance their dessert experience.
- Almond Biscotti: Crunchy and slightly sweet, these can be served alongside for added texture, making each bite of cake even more delightful.
- Mint Tea: Brewed mint tea offers a refreshing, herbal note that perfectly complements the earthy pistachio flavor, cleansing the palate and soothing the senses.
- Caramel Sauce: Drizzling warm caramel adds a touch of lusciousness and richness that pairs beautifully with the nutty sweetness of the dacquoise.
- Vanilla Ice Cream: A scoop of creamy vanilla ice cream melts into the cake, creating a delightful combination of textures that is simply irresistible.
How to Store and Freeze Pistachio Dacquoise Cake
Fridge: Keep the assembled Pistachio Dacquoise Cake in an airtight container in the refrigerator for up to 3 days. This helps maintain its delicate texture and flavors.
Freezer: If you wish to freeze the cake, wrap each meringue layer separately in plastic wrap followed by aluminum foil. It can be stored in the freezer for up to 2 months.
Reheating: For best results, allow the cake to thaw in the fridge overnight before serving. If desired, add fresh ganache or frosting once thawed for a touch of freshness.
Garnishing: Hold off on adding any fresh garnishes such as raspberries or pistachios until just before serving to keep them fresh and vibrant.
Pistachio Dacquoise Cake Variations & Substitutions
Feel free to let your imagination run wild as you customize your Pistachio Dacquoise Cake to fit your flavor preferences and dietary needs!
-
Nut-Free: Replace finely ground pistachios with sunflower seed flour for a nut-free version that still delivers excellent texture.
-
Dairy-Free: Use dairy-free butter and substitute with a dairy-free cream for the buttercream, ensuring a smooth, creamy consistency.
-
Gluten-Free: Swap cake flour with a gluten-free 1:1 flour blend to keep this cake accessible for gluten-sensitive guests.
-
Flavor Infusion: Experiment with different nut pastes, such as hazelnut or almond, to create unique variations of the creamy buttercream filling.
-
Fruit Variations: For the raspberry coulis, try swapping in seasonal fruits like strawberries or blackberries for a vibrant twist that matches your celebration.
-
Mini Delights: Create individual mini dacquoise cakes for a charming presentation that’s perfect for gatherings; simply adjust the baking time for smaller layers.
-
Zesty Buttercream: Introduce a refreshing twist by adding lemon or orange zest to the buttercream for a fragrant flavor addition that contrasts beautifully with the pistachio.
-
Luxury Finish: Elevate your presentation by incorporating edible flowers along with the gold leaf for a stunning artistic effect that will wow your guests!
As you explore these variations, don’t forget to check out delightful inspirations like Homemade Gingerbread Cake for festive flavors or the Luscious Banana Chocolate Plumcake for a delightful chocolatey twist! Enjoy crafting your very own masterpiece!
Pistachio Dacquoise Cake Recipe FAQs
What type of pistachios should I use for the recipe?
Absolutely! Use unsalted, roasted pistachios to elevate the flavor of your Pistachio Dacquoise Cake. Opt for finely ground pistachios to ensure they incorporate seamlessly into the meringue layers. If you’re in a pinch, almond flour or hazelnut flour makes a lovely alternative.
How should I store the Pistachio Dacquoise Cake?
For optimal freshness, store your assembled Pistachio Dacquoise Cake in an airtight container in the refrigerator for up to 3 days. If you’re making it ahead of time, components like the meringue layers and buttercream can be prepared separately and stored before assembly.
Can I freeze the Pistachio Dacquoise Cake?
Absolutely! To freeze, wrap each meringue layer separately in plastic wrap, then in aluminum foil. This will keep them protected from freezer burn—your cake can safely sit in the freezer for up to 2 months. When ready to enjoy, thaw the layers in the fridge overnight.
What if my meringue layers didn’t rise or stay stiff?
Very common! Ensure your egg whites are completely free from yolk and whipped at room temperature until stiff peaks form. If they are under-whipped, try whipping them longer until firm—this ensures your meringue layers maintain their structure when baking.
Is this cake gluten-free?
Yes, indeed! Depending on your choice of flour, you can make your Pistachio Dacquoise Cake gluten-free by substituting the cake flour with a gluten-free alternative. Be sure to check that your other ingredients, like baking powder, are gluten-free as well.
Can my pet eat any part of this cake?
Not advisable! Although pistachios are not toxic to dogs, the high fat content can upset their stomach. Plus, the sugar and buttercream are not suitable for pets. It’s best to keep this guy as a treat for the humans only!
Pistachio Dacquoise Cake: A Dreamy Delight for Any Celebration
Ingredients
Equipment
Method
- Preheat your oven to 300°F (150°C) and line two baking sheets with parchment paper, drawing circles as guides.
- In a bowl, whisk together powdered sugar, finely ground pistachios, and cake flour until well combined.
- In another bowl, whip room-temperature egg whites with cream of tartar and salt until soft peaks form.
- Gradually add granulated sugar while continuing to whip until stiff peaks form, then gently fold in the dry ingredients.
- Pipe the meringue onto the parchment circles and bake for 30 minutes, then reduce to 250°F (120°C) for an additional 30-45 minutes until golden.
- Allow the meringue layers to cool completely.
- In a saucepan, combine sugar and water, cooking over medium heat until it reaches 240°F (115°C) for the buttercream.
- Whip the egg yolks until fluffy and light in color; slowly drizzle the syrup into the yolks while whisking.
- Gradually add unsalted butter, mixing until smooth; then incorporate pistachio paste and vanilla extract.
- For raspberry coulis, cook raspberries with sugar and lemon juice until syrupy, about 10-15 minutes; strain if desired.
- Assemble the cake by layering the meringue, piping buttercream and adding coulis between layers; frost with remaining buttercream.
- Garnish with chopped pistachios and fresh raspberries; chill for 30 minutes before slicing.
Leave a Reply