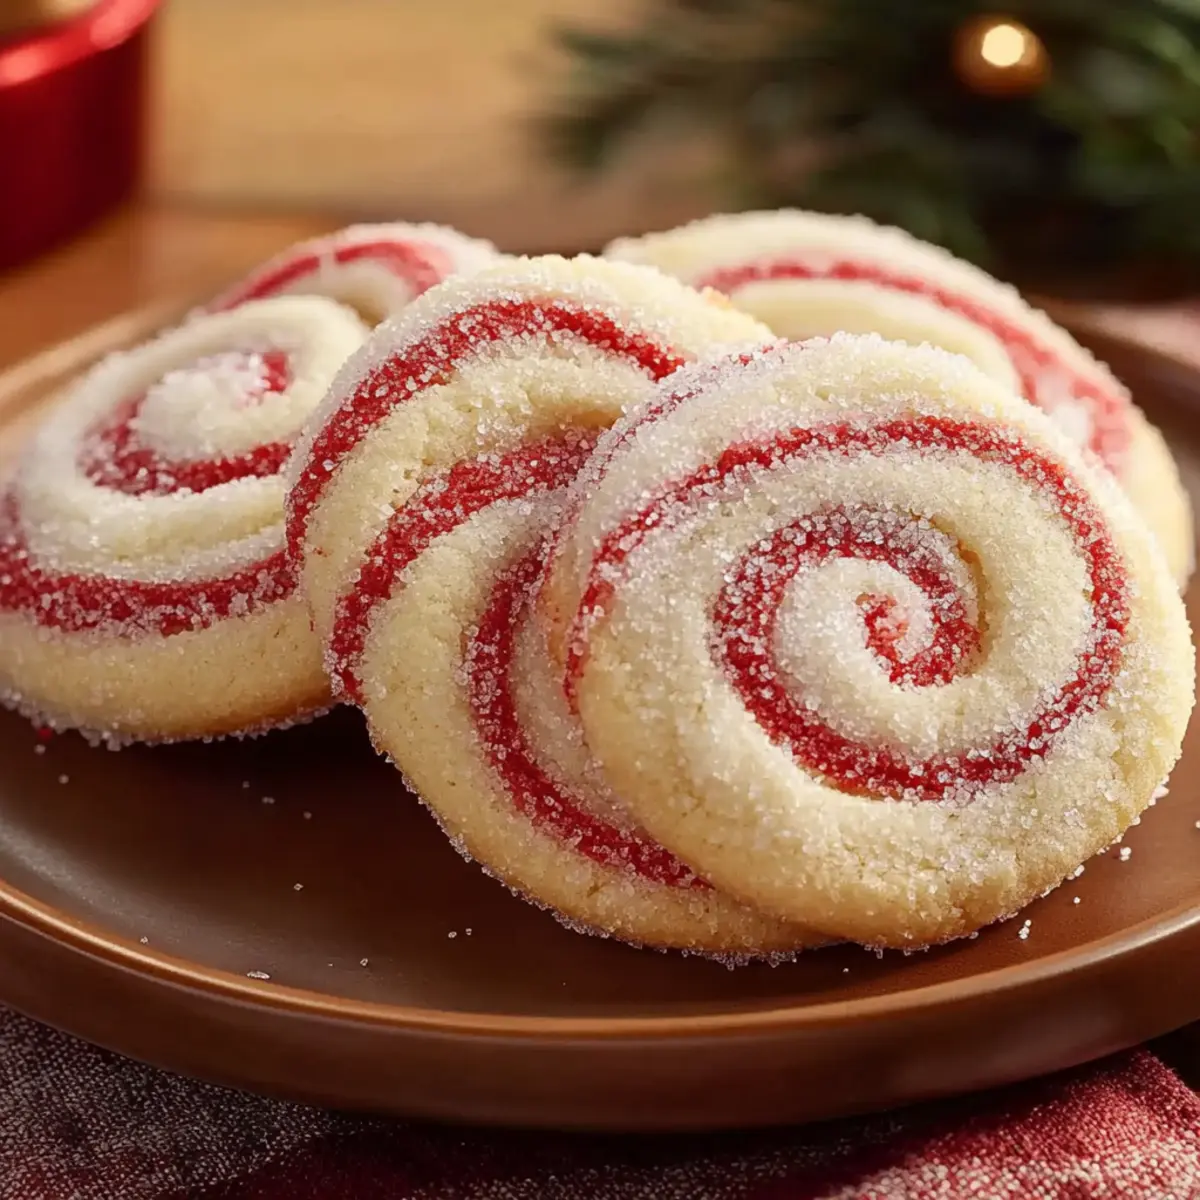
As I stood in my kitchen, the aroma of sweet peppermint filled the air, instantly whisking me away to memories of holiday gatherings. These Peppermint Swirl Cookies are more than just festive treats; they embody the spirit of togetherness and cheerful celebrations. With their vibrant red and white swirls, these cookies promise not only a feast for the eyes but also a cool mint flavor paired with a tender, buttery texture that melts in your mouth. What’s even better? This recipe is beginner-friendly, ensuring that anyone can bake up a batch that’s perfect for sharing (or indulging in yourself). Plus, they make thoughtful gifts for loved ones, embodying the warmth of homemade cooking. Are you ready to add some festive cheer to your holiday baking? Let’s dive into the magic of Peppermint Swirl Cookies!
Why Are Peppermint Swirl Cookies Irresistible?
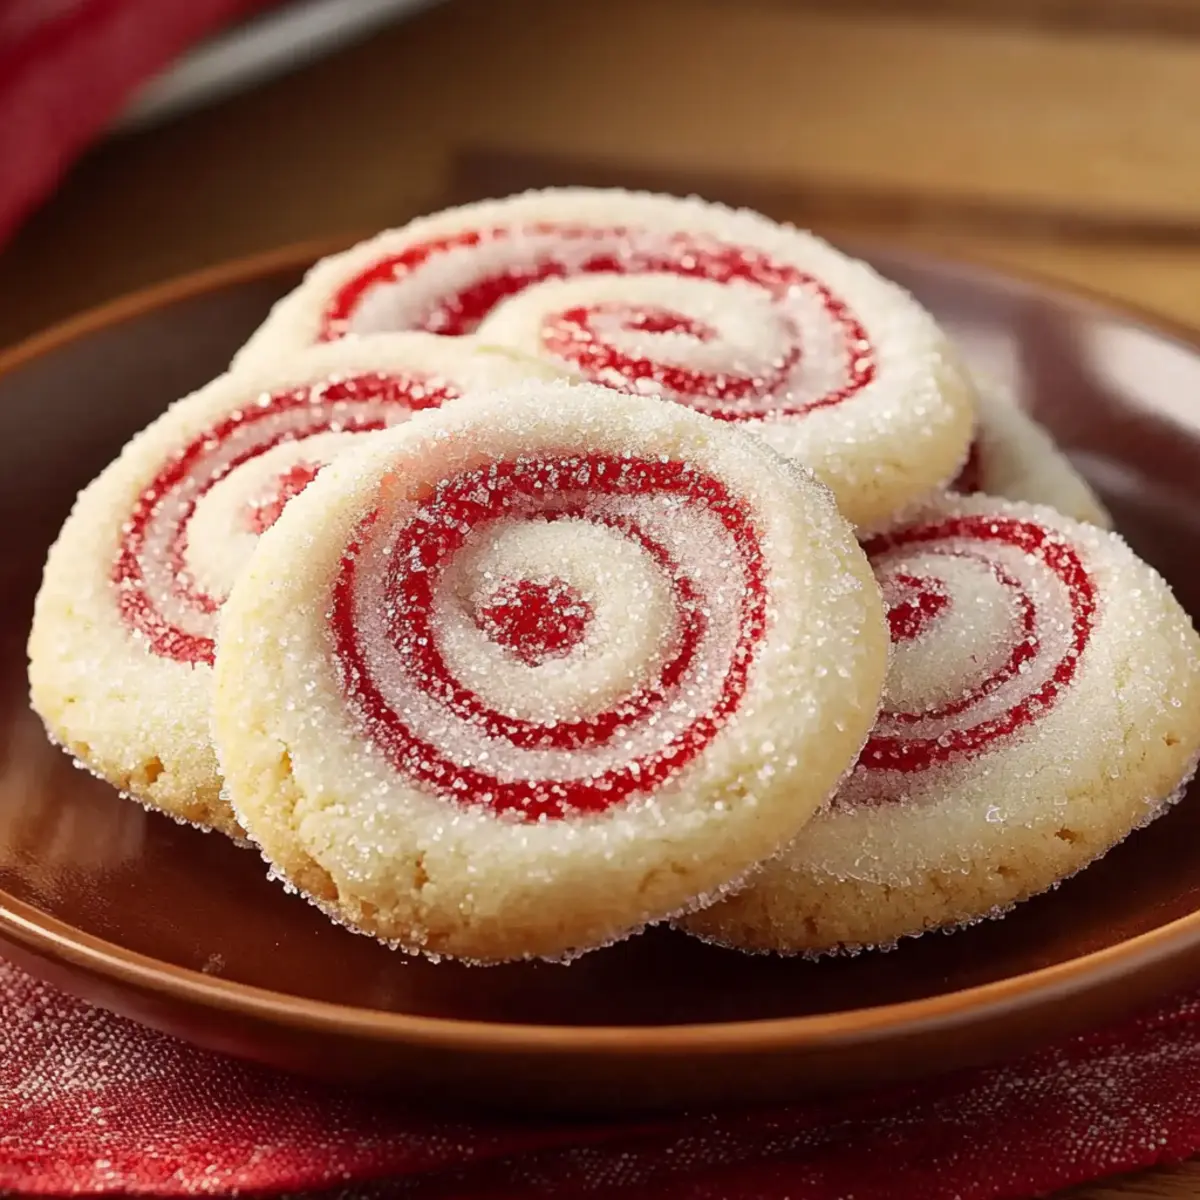
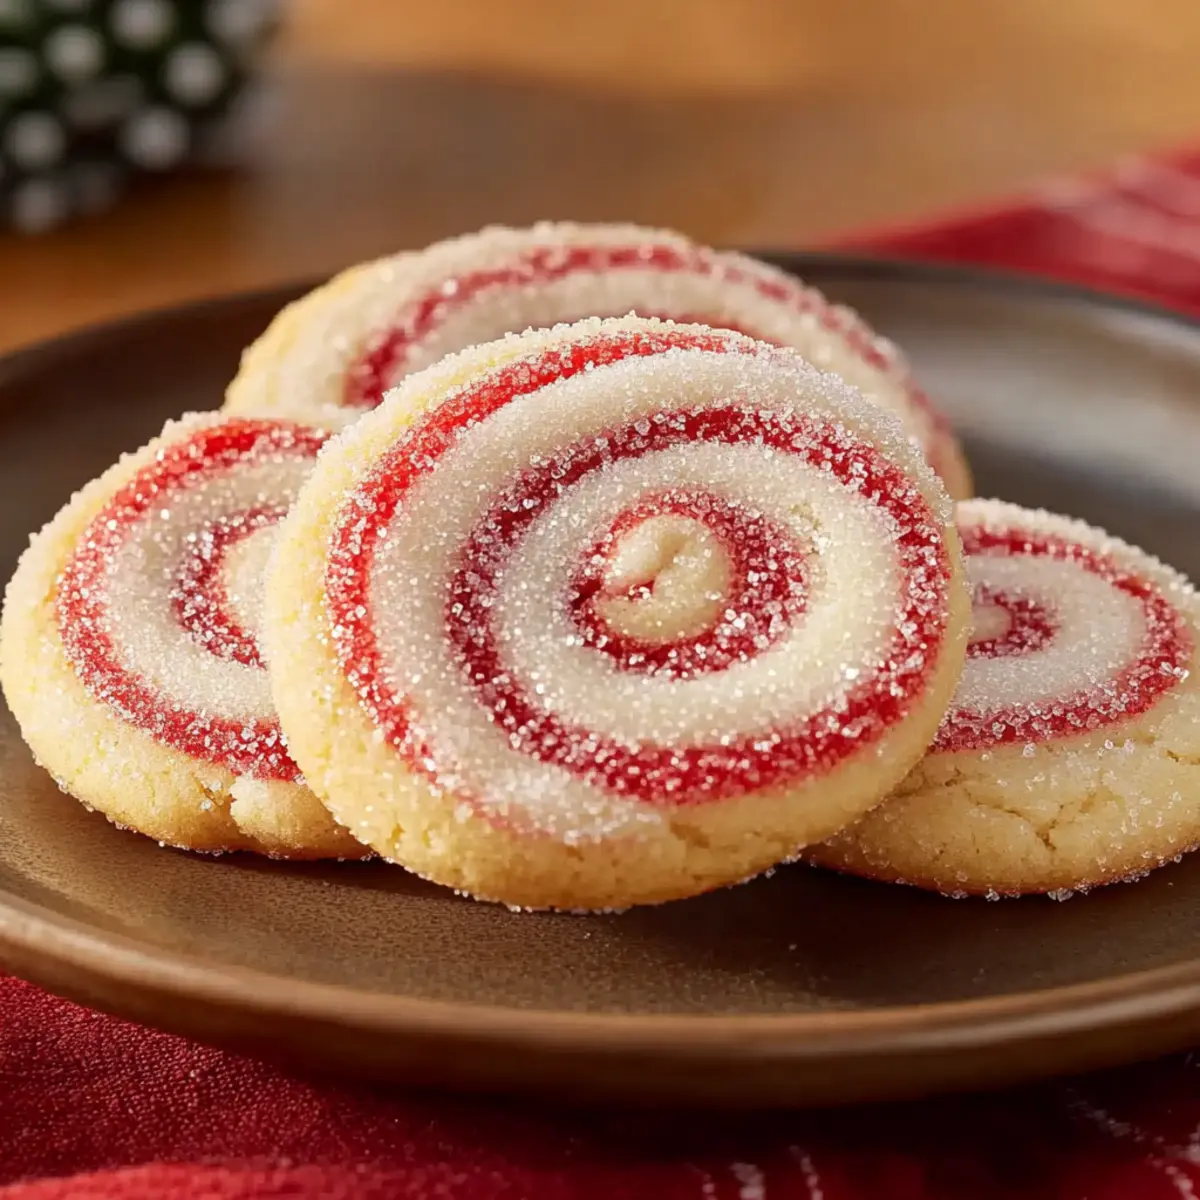
Festive Colors: The striking red and white swirls not only brighten up your holiday platter but also make these cookies a visual delight at parties.
Minty Freshness: Each bite delivers a cool peppermint flavor that’s perfect for the season, bringing joy and nostalgia to your celebrations.
Easy to Make: Even novice bakers will find joy in this straightforward recipe, ensuring that everyone can partake in the festive fun.
Versatile Treat: Use them as a delightful pairing with hot cocoa or coffee, or consider gifting them to friends and family for a personal touch.
Crowd-Pleaser: With their unique flavor and beautiful presentation, these cookies are sure to impress guests, making them the perfect addition to any holiday gathering. For more must-try recipes, check out these Tiramisu Christmas Cookies and Christmas Mini Cookies.
Peppermint Swirl Cookies Ingredients
For the Dough
- All-purpose flour – Provides structure; substitute with a gluten-free flour blend for a gluten-free option.
- Baking powder – Acts as a leavening agent to keep cookies light without being cakey.
- Salt – Enhances the overall flavor of the cookies.
- Unsalted butter – Ensures a tender crumb and rich flavor; make sure it is softened for easy creaming.
- Granulated sugar – Sweetens the cookies and contributes to a light, fluffy texture when creamed.
- Large egg – Binds ingredients together and adds moisture to the dough.
- Vanilla extract – Balances the minty freshness with a warm, inviting depth.
- Peppermint extract – Gives these cookies their signature cool and refreshing mint flavor.
For the Visual Appeal
- Red gel food coloring – Creates vibrant swirls without adding excess moisture; recommended over liquid food coloring.
- Coarse sugar or crushed peppermint candies – Adds a festive sparkle and crunch, perfect for garnishing your Peppermint Swirl Cookies.
These dreamy Peppermint Swirl Cookies are a must-have for your holiday baking lineup, bringing both visual delight and a refreshing taste that screams festive cheer!
Step‑by‑Step Instructions for Peppermint Swirl Cookies
Step 1: Prep Dry Ingredients
In a medium bowl, whisk together 2 cups of all-purpose flour, 1 teaspoon of baking powder, and 1/4 teaspoon of salt until well combined. This ensures even distribution of leavening agents. Set this mixture aside as you prepare the buttery base for your delightful Peppermint Swirl Cookies.
Step 2: Cream Butter and Sugar
Using an electric mixer, beat together 1 cup of softened unsalted butter and 1 cup of granulated sugar in a large mixing bowl. Mix on medium speed until the mixture is light and fluffy, about 3-5 minutes. The texture should be pale and creamy, indicating that enough air has been incorporated for a tender cookie.
Step 3: Combine Wet Ingredients
Add 1 large egg, 1 teaspoon of vanilla extract, and 1/2 teaspoon of peppermint extract to the creamed mixture. Beat everything together on low speed until fully integrated, about 1-2 minutes. The addition of these ingredients will enhance the cookie’s flavor, creating a delightful balance with the peppermint.
Step 4: Combine Wet and Dry Ingredients
Gradually introduce the dry flour mixture into your wet ingredients, mixing on low speed until just combined. Be cautious not to overmix, as this can lead to tough cookies. The dough should be slightly sticky but hold together as you prepare to create the vibrant swirls of your Peppermint Swirl Cookies.
Step 5: Divide Dough
Carefully split the dough in half, placing one half in a separate bowl. Leave this half plain for the white swirls while adding a few drops of red gel food coloring to the other half. Mix well until the color is uniformly incorporated, creating a striking red dough that will pair beautifully with the white.
Step 6: Chill Dough
Wrap each portion of dough in plastic wrap and chill in the refrigerator for at least 30 minutes. This step is crucial as it firm up the dough, making it easier to roll later and ensuring that the Peppermint Swirl Cookies retain their shape during baking.
Step 7: Roll Dough
Once chilled, roll out the white dough on a lightly floured surface into a rectangle measuring approximately 10×12 inches with a thickness of 1/4 inch. Repeat the process with the red dough, ensuring both pieces are uniform in size for perfect layering.
Step 8: Layer Dough
Carefully place the red dough on top of the white dough, pressing gently so they adhere. Begin rolling the combined dough tightly from one of the long sides, forming a log. Wrap the log in plastic wrap and chill again for at least 2 hours to firm up, preparing it for slicing.
Step 9: Preheat Oven
While the dough is chilling, preheat your oven to 375°F (190°C) and line your baking sheets with parchment paper. This ensures an even bake and prevents the cookies from sticking, making your Peppermint Swirl Cookies easier to transfer once they’re ready.
Step 10: Slice and Coat
Remove the chilled dough log from the refrigerator and brush the outside lightly with water or beaten egg white. Roll the log in coarse sugar or crushed peppermint candies for a festive crunch and shimmer before slicing it into 1/4-inch rounds.
Step 11: Bake Cookies
Place the sliced cookies on the prepared baking sheets, spacing them about 1 inch apart. Bake in the preheated oven for 8-10 minutes, or until the edges are lightly golden. Keep an eye on your cookies and remove them from the oven once they reach that desirable doneness for perfect Peppermint Swirl Cookies!
Step 12: Cool and Serve
Allow the baked cookies to cool on the baking sheets for a few minutes before transferring them to a wire rack to cool completely. This will ensure they set appropriately, maintaining their beautiful swirls while you prepare to indulge in these festive treats!

What to Serve with Peppermint Swirl Cookies
As the holiday season envelops us, let’s create a delightful spread that pairs beautifully with these enchanting cookies, inviting warmth and cheer to every gathering.
-
Hot Cocoa: The rich, creamy chocolate complements the cool peppermint, creating a comforting, festive drink that warms both hands and heart.
-
Peppermint Bark: For those who adore minty flavors, this crunchy, chocolatey treat echoes the cookie’s essence, making it a perfect addition to your dessert tray.
-
Vanilla Ice Cream: The creamy, smooth texture of vanilla ice cream balances the lightness of the cookies, providing a delightful contrast that’ll have everyone reaching for seconds.
-
Coffee or Espresso: A cup of brewed coffee adds depth to the sweet peppermint, enhancing the flavor experience and lending a cozy vibe to your gatherings.
-
Cheesecake Bites: Mini cheesecake bites offer a tangy bite that contrasts nicely with the sweetness of the cookies, adding variety to your dessert lineup.
-
Fruit Salad: A vibrant fruit salad with fresh berries and citrus can brighten your table and provide a refreshing, sweet balance to the richness of peppermint cookies.
-
Christmas Punch: A fruity, sparkling punch adds merriment to the table and is a festive, fun drink that pairs wonderfully with any sweet treat.
-
Holiday Platter: Create a stunning platter filled with assorted holiday cookies, nuts, and chocolates for a visually appealing selection that showcases the season’s spirit.
How to Store and Freeze Peppermint Swirl Cookies
Airtight Container: Store baked Peppermint Swirl Cookies in an airtight container at room temperature for up to 5–7 days to maintain their delicious freshness and delightful texture.
Slice of Bread: To keep the cookies crisp, place a slice of bread in the container. This helps absorb moisture, ensuring your cookies stay perfect during storage.
Freezing Raw Dough: If you’d like to make them ahead of time, freeze the unbaked dough log wrapped tightly in plastic wrap for up to 2–3 months. Thaw overnight in the refrigerator before slicing and baking.
Reheating: For a just-baked experience, reheat the cookies in a 350°F (175°C) oven for about 5 minutes. Enjoy the comforting aroma as they refresh!
Expert Tips for Peppermint Swirl Cookies
-
Soften Butter Properly: Make sure your unsalted butter is adequately softened to room temperature for perfect creaming, which ensures a tender texture in the cookies.
-
Chill for Clean Cuts: Don’t skip chilling the dough! This step helps maintain the shape of your Peppermint Swirl Cookies and keeps the swirls beautifully defined.
-
Use a Sharp Knife: For slicing the log of dough, a very sharp knife is essential. This helps achieve clean, even cuts without squishing the swirls.
-
Watch the Bake Time: Keep a close eye on your cookies as they bake. Look for lightly golden edges and remove them promptly to avoid overbaking.
-
Experiment with Flavors: Feel free to add variations! Different extracts, like almond or orange zest, can add a unique twist to your Peppermint Swirl Cookies while keeping the festive spirit alive.
Peppermint Swirl Cookies Variations
Feel free to get creative with your Peppermint Swirl Cookies by exploring these delightful variations!
-
Gluten-Free: Use a gluten-free flour blend that contains xanthan gum to keep the tender texture while accommodating dietary needs.
-
Dairy-Free: Swap unsalted butter for coconut oil or a vegan butter alternative to make these cookies dairy-free without losing any flavor.
-
Choco-Peppermint Swirls: Incorporate cocoa powder into one half of the dough for a chocolatey twist that pairs beautifully with peppermint.
-
Add Crunch: Mix in chopped nuts such as walnuts or pecans to provide an extra texture that complements the softness of the cookies.
-
Mint Chocolate Chip: Fold in mini chocolate chips along with the peppermint extracts to introduce a rich chocolate layer that will elevate each delightful bite.
-
Citrus Zest: Add a teaspoon of orange or lemon zest to the dough for a refreshing citrusy zing that harmonizes beautifully with the mint flavor.
-
Play with Temperatures: Adjust baking time for smaller or larger cookie sizes. Remember, smaller cookies will bake quicker, while larger ones might need a little more time.
Feel free to share your creative spins on these Peppermint Swirl Cookies! If you’re looking for more festive inspiration, don’t miss out on making these Chocolate Brownies Peppermint or Christmas Mini Cookies for a complete holiday spread.
Make Ahead Options
These Peppermint Swirl Cookies are a fantastic choice for busy bakers looking to streamline their holiday preparations! You can make the dough up to 3 days in advance by following these steps: prepare the dough, divide it, and color one half with red food coloring as stated in the recipe. Wrap each portion tightly in plastic wrap and refrigerate. When you’re ready to bake, simply roll, slice, and coat the cookies as usual. To maintain their delightful quality, ensure they are well-wrapped to prevent drying out. Not only will this save you time on the day you plan to serve them, but your Peppermint Swirl Cookies will come out just as delicious!
Peppermint Swirl Cookies Recipe FAQs
How do I select the right peppermint extract?
Absolutely! When selecting peppermint extract, look for high-quality extracts that contain natural flavors without artificial additives. The more authentic the peppermint oil, the more intense and delightful the flavor will be in your cookies. Avoid extract that has a strong artificial scent; a good extract should have a fresh, minty aroma.
How should I store Peppermint Swirl Cookies?
Very well! Store your baked Peppermint Swirl Cookies in an airtight container at room temperature for 5–7 days. To keep them crisp and fresh, place a slice of bread inside the container. This little trick helps absorb moisture and keeps your cookies tasting just baked!
Can I freeze the dough for Peppermint Swirl Cookies?
Absolutely! Freezing the raw dough is a fantastic idea for future baking. Simply wrap the log of uncooked dough tightly in plastic wrap, place it in a freezer-safe bag, and freeze for up to 2–3 months. When you’re ready to bake, thaw the dough in the refrigerator overnight before unwrapping, slicing, and baking as directed.
What if I don’t have red gel food coloring?
No problem! If you don’t have red gel food coloring, you can use a few drops of liquid food coloring instead; just keep in mind that it may impact the texture of your dough slightly. Alternatively, consider using crushed freeze-dried strawberries or raspberries for a natural color and flavor boost, creating a beautiful pink hue while enhancing the festive flavor of your cookies.
Can my pets have Peppermint Swirl Cookies?
It’s best to avoid sharing these cookies with your furry friends. Peppermint can be harmful to pets, especially dogs, as it can upset their stomachs. Additionally, ingredients like sugar and butter are not suitable for their diets, so it’s better to keep these delightful sweets just for the humans.
What should I do if my dough is too sticky?
If you find your dough is too sticky to work with, don’t worry! Chill it in the refrigerator for an additional 15 to 30 minutes. This will firm up the dough, making it easier to roll and shape. If it’s still sticky after chilling, you can add a bit more flour, a tablespoon at a time, until it reaches a workable consistency. Just be cautious not to overdo it, as that can result in tougher cookies.
Irresistible Peppermint Swirl Cookies for Holiday Cheer
Ingredients
Equipment
Method
- In a medium bowl, whisk together 2 cups of all-purpose flour, 1 teaspoon of baking powder, and 1/4 teaspoon of salt until well combined.
- Using an electric mixer, beat together 1 cup of softened unsalted butter and 1 cup of granulated sugar in a large mixing bowl for about 3-5 minutes.
- Add 1 large egg, 1 teaspoon of vanilla extract, and 1/2 teaspoon of peppermint extract to the creamed mixture.
- Gradually introduce the dry flour mixture into your wet ingredients, mixing on low speed until just combined.
- Carefully split the dough in half, leaving one half plain and mixing red gel food coloring into the other half.
- Wrap each portion of dough in plastic wrap and chill in the refrigerator for at least 30 minutes.
- Roll out the white dough on a floured surface into a 10x12 inch rectangle. Repeat with the red dough.
- Layer the red dough on top of the white dough and roll tightly from one of the long sides.
- Wrap the log in plastic wrap and chill again for at least 2 hours.
- Preheat your oven to 375°F (190°C) and line your baking sheets with parchment paper.
- Remove the chilled dough log from the refrigerator and coat the outside with water or beaten egg white, then roll in coarse sugar or crushed peppermint candies.
- Slice the log into 1/4-inch rounds and place them on the prepared baking sheets.
- Bake in the preheated oven for 8-10 minutes or until the edges are lightly golden.
- Allow the cookies to cool on the baking sheets for a few minutes before transferring them to a wire rack to cool completely.
Leave a Reply