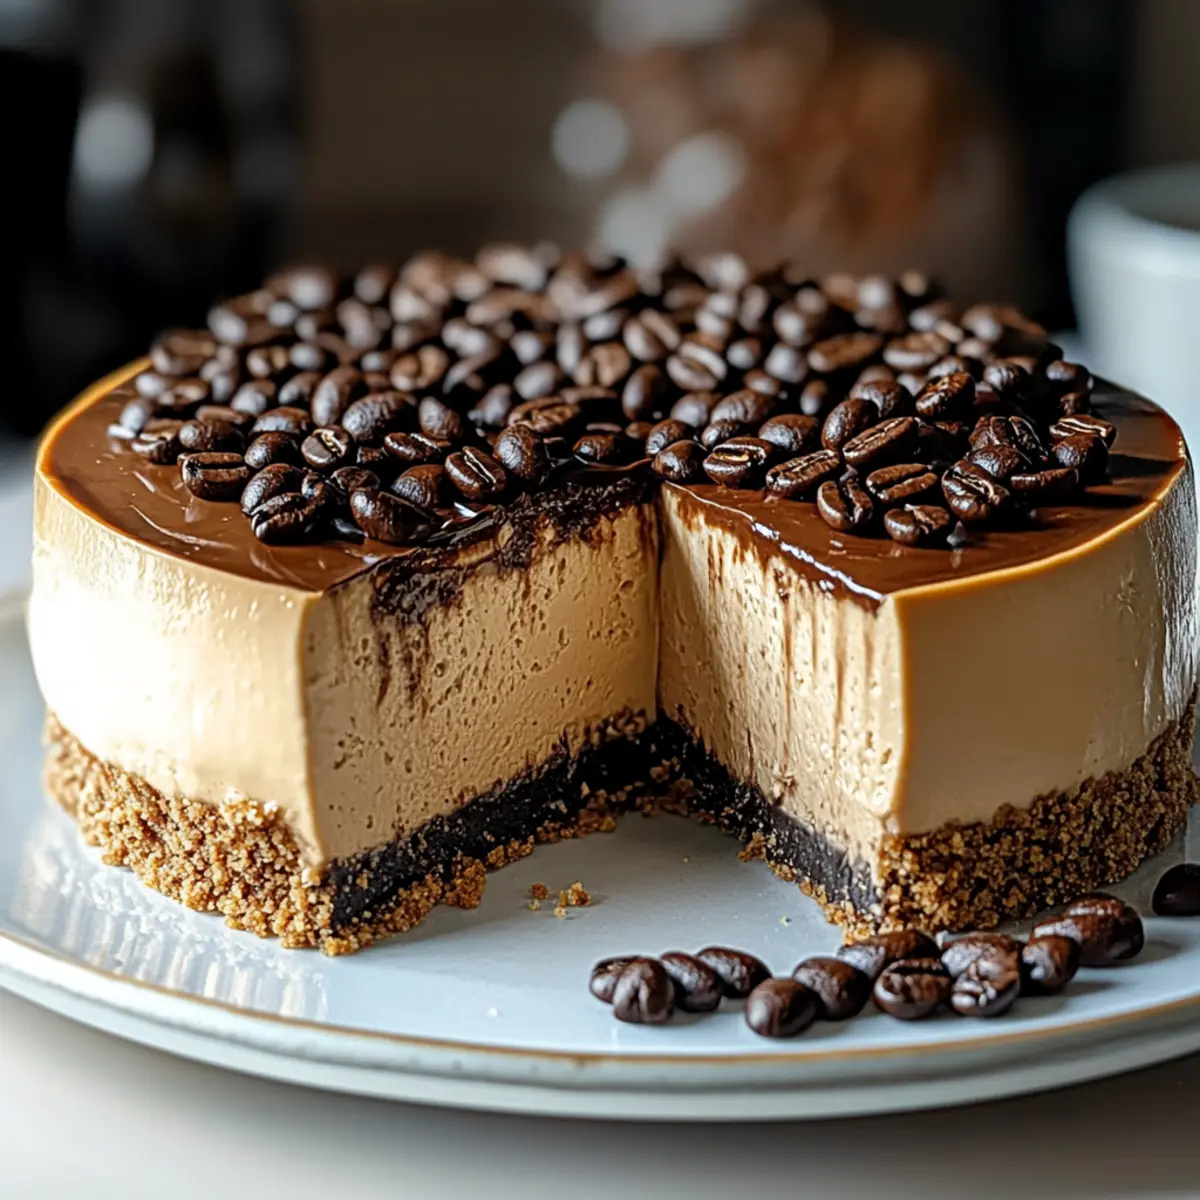
As I walked through the local café, the rich aroma of freshly brewed espresso enveloped me, sparking a craving I couldn’t resist. That craving led me to create my own indulgent masterpiece—an Espresso Cheesecake that seamlessly merges the bold essence of coffee and the creamy comfort of dessert. This decadent treat is perfect for any coffee lover and makes a stunning centerpiece for your next gathering. What truly excites me about this cheesecake is not just its heavenly taste but how easy it is to prepare. With a buttery graham cracker crust and a luscious chocolate ganache topping, it’s a crowd-pleaser that’s surprisingly quick to whip up, and it offers a gluten-free option with a simple swap. Are you ready to elevate your dessert game and bring a taste of café luxury into your home? Let’s dive into this delightful recipe together!
Why is Espresso Cheesecake a must-try?
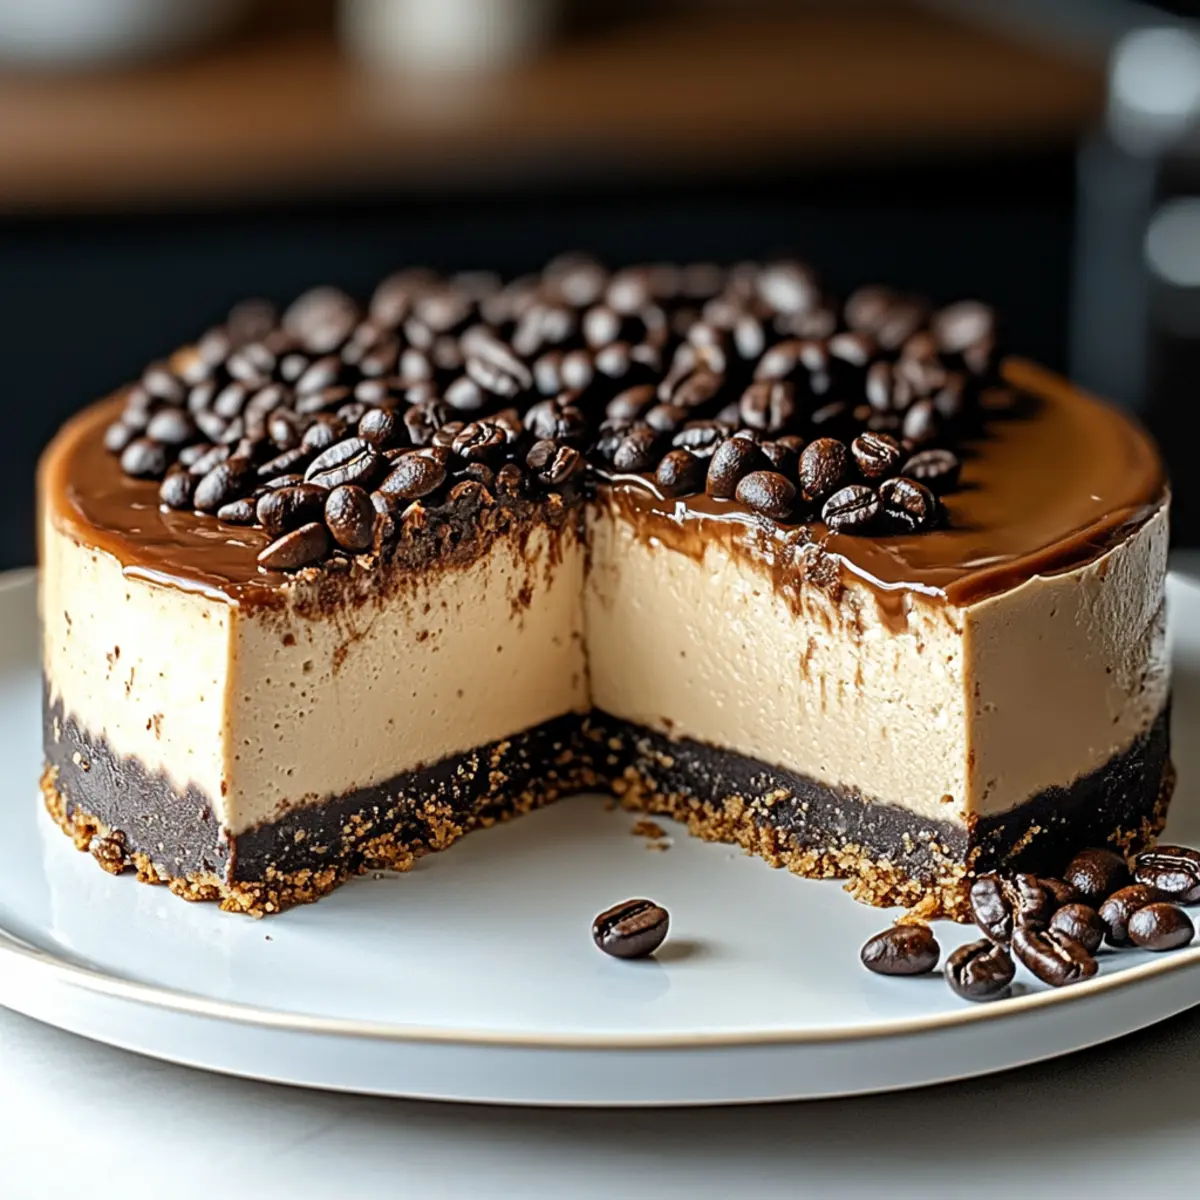
Indulgence at Its Finest: This rich and creamy Espresso Cheesecake is the dessert you didn’t know you were missing! Easy to Make: With straightforward steps, anyone can become a cheesecake pro in no time, even if baking isn’t your forte. Flavor Explosion: The combination of coffee and chocolate results in a rich taste that delights your palate. Versatile and Customizable: Add your own twist by incorporating flavored extracts or toppings like crushed espresso beans, allowing for personalized touches. Impressive Presentation: Topped with luscious chocolate ganache, this cheesecake is sure to receive oohs and aahs at your gatherings. For other delicious treats, try my delightful Strawberry Cheesecake Protein or indulge in a creamy Bake Biscoff Cheesecake. Let’s make something extraordinary!
Espresso Cheesecake Ingredients
• Get ready to create a delicious Espresso Cheesecake with these essential ingredients!
For the Crust
• Graham Cracker Crumbs – Provides a buttery base for the crust; substitute with gluten-free graham crackers for a gluten-free option.
• Unsalted Butter – Binds crumbs together for a firm crust; make sure it’s melted for easier mixing.
• Granulated Sugar – Sweetens both the crust and cheesecake filling; can be replaced with brown sugar for a richer flavor.
• Vanilla Extract – Adds depth to the crust and filling; opt for pure vanilla for the best taste.
For the Cheesecake Filling
• Cream Cheese – The main component providing creaminess and structure; ensure it’s softened to room temperature for smooth blending.
• Sour Cream – Adds richness and a tangy flavor; Greek yogurt is a healthier substitute.
• Heavy Cream – Enhances the creamy texture; light cream works too, but the texture may change slightly.
• Espresso Powder – Infuses a bold coffee flavor throughout the cheesecake; regular coffee grounds can work but may create a grainy texture.
• Hot Water – Helps dissolve the espresso powder for smoother mixing.
For the Ganache Topping
• Semi-Sweet Chocolate – Creates a rich chocolate ganache topping; dark chocolate can be used for an intense flavor.
• Chocolate Shavings and Espresso Beans – Optional garnishes that not only enhance the dessert’s appearance but also its flavor complexity.
This rich and creamy Espresso Cheesecake will be the highlight of your dessert table, with the perfect blend of coffee essence and irresistible sweetness!
Step‑by‑Step Instructions for Espresso Cheesecake
Step 1: Preheat the Oven
Begin by preheating your oven to 350°F (175°C). This step is crucial as it ensures that your Espresso Cheesecake bakes evenly. While the oven is heating, gather your ingredients and prepare your 9-inch springform pan to get ready for the delicious crust.
Step 2: Prepare the Crust
In a mixing bowl, combine graham cracker crumbs, melted unsalted butter, granulated sugar, and vanilla extract. Mix until the crumbs are evenly coated and resemble wet sand. Press this mixture firmly into the bottom of your springform pan, creating an even layer. Bake the crust for 10 minutes, or until lightly golden and fragrant, then remove it from the oven and allow it to cool completely.
Step 3: Create the Filling
In a large mixing bowl, beat the softened cream cheese with an electric mixer on medium speed until smooth and creamy. Gradually add in the sugar and vanilla extract, mixing until blended. This step is essential for achieving a silky texture in your Espresso Cheesecake. Scrape down the sides as needed to ensure all ingredients are well combined.
Step 4: Incorporate the Espresso
Dissolve espresso powder in hot water; this helps integrate the coffee flavor smoothly into the filling. Pour the dissolved espresso into the cream cheese mixture and mix thoroughly until fully incorporated. The rich aroma will fill your kitchen, promising a delightful flavor in every bite of your cheesecake.
Step 5: Add the Eggs
With the mixer set to low speed, add the eggs one at a time, mixing just until fully incorporated after each addition. Be careful not to overmix, as this can introduce air into the batter, which may cause the cheesecake to crack during baking. Your espresso cheesecake batter should remain thick and creamy.
Step 6: Fold in the Cream
Gently fold in the sour cream and heavy cream with a spatula until the mixture is smooth and well combined. The addition of these creams lends richness to the filling, enhancing the overall texture of your Espresso Cheesecake. Avoid overmixing here to maintain a light consistency.
Step 7: Assemble and Bake
Pour the cheesecake filling over your cooled crust in the springform pan, smoothing the top with a spatula. To bake the cheesecake, wrap the springform pan in aluminum foil and place it inside a larger baking dish filled with hot water—a technique known as a water bath. Bake for 60-70 minutes, or until the edges are set, but the center jiggles slightly.
Step 8: Cool Gradually
Once baking is complete, turn off the oven and leave the cheesecake inside with the door ajar for about 1 hour. This gradual cooling prevents cracks. After that, allow it to cool to room temperature before transferring it to the refrigerator for at least 4 hours or preferably overnight for full flavor development.
Step 9: Prepare the Ganache
To make the ganache, heat heavy cream in a saucepan until just simmering, then pour it over chopped semi-sweet chocolate in a bowl. Let it sit for a minute to soften the chocolate, then stir until smooth and glossy. For an added coffee kick, mix in a bit of espresso powder and sugar, then set aside until ready to use.
Step 10: Finish and Garnish
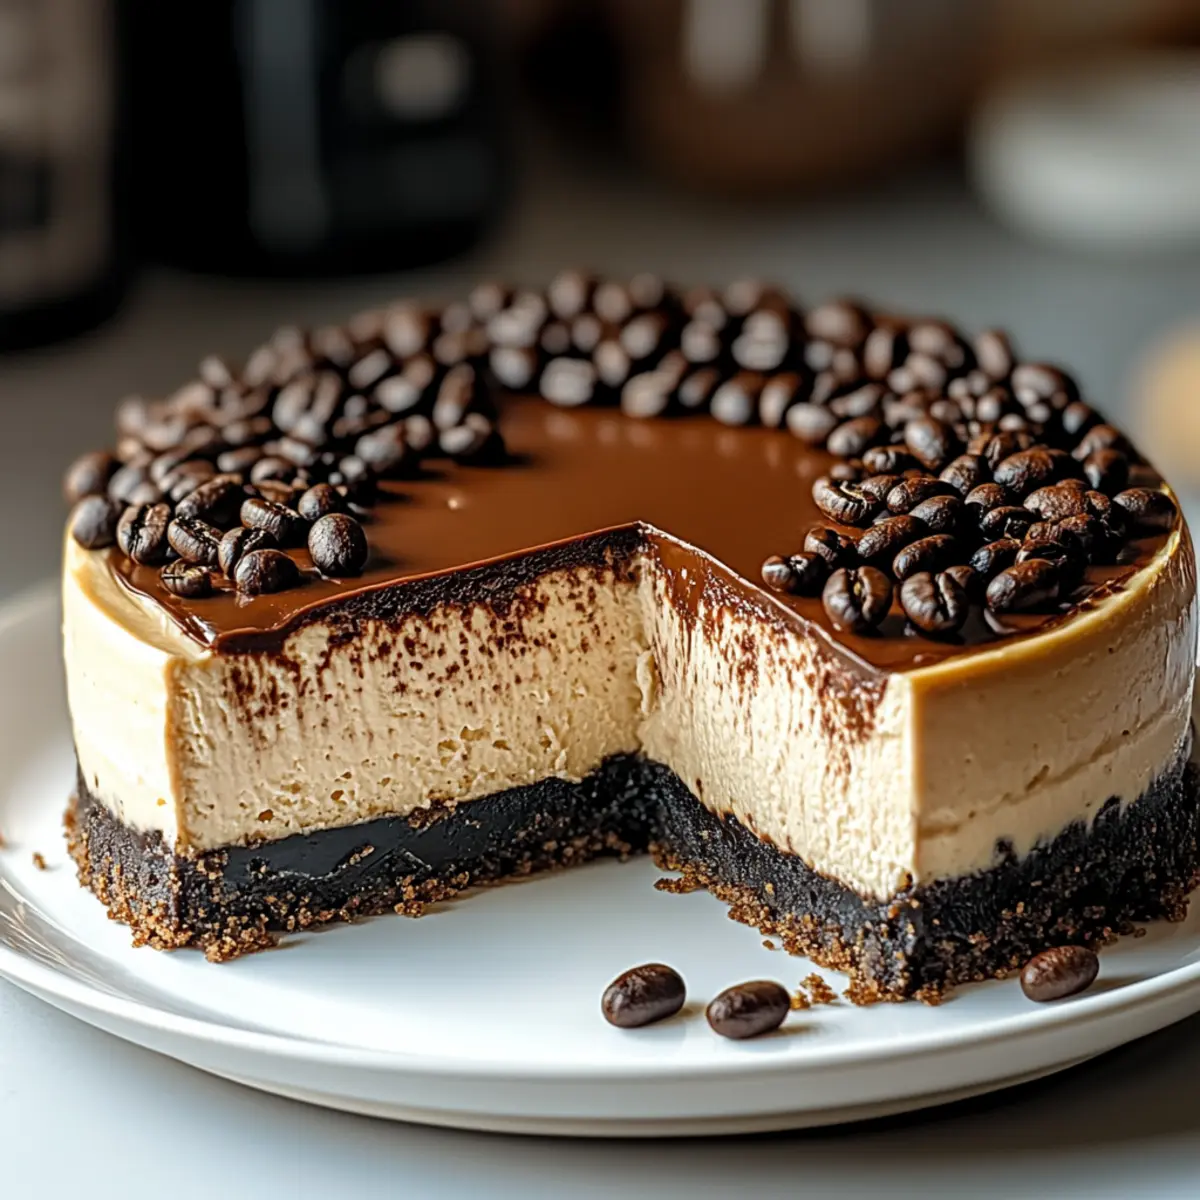
Once the cheesecake is chilled and set, carefully pour the chocolate ganache over the top, letting it cascade down the edges for an elegant look. If desired, garnish your Espresso Cheesecake with chocolate shavings or espresso beans. Allow the ganache to firm up before slicing into this indulgent treat.
What to Serve with Decadent Espresso Cheesecake
Indulge in the perfect blend of flavors that pairs beautifully with this creamy dessert, creating a memorable dining experience.
-
Fresh Berries: Their natural sweetness and juicy texture provide a refreshing contrast to the rich cheesecake, adding a pop of color to your plate. Serve strawberries or raspberries on the side for an inviting, light touch.
-
Whipped Cream: A dollop of freshly whipped cream adds a creamy, airy element that beautifully complements the dense texture of the cheesecake. Enhance with a sprinkle of cocoa powder for extra flair!
-
Chocolate-Covered Espresso Beans: These delightful bite-sized treats enhance the coffee flavor while providing a crunchy texture. They offer a fun way to keep the coffee theme running through your dessert.
-
Chocolate Sauce Drizzle: Elevate your cheesecake by drizzling warm chocolate sauce over each slice. The chocolate enhances the dessert’s rich flavors, creating a decadent experience for chocolate lovers.
-
Vanilla Ice Cream: A scoop of vanilla ice cream adds a creamy, cold contrast to the warm flavors of the cheesecake. This classic combination is a comforting classic that never disappoints.
-
Coffee or Espresso: Pairing your cheesecake with a hot cup of coffee or espresso intensifies the coffee flavor and acts as a perfect accompaniment for those who delight in a caffeinated treat.
-
Nutty Biscotti: The crunch of biscotti provides a satisfying texture contrast. Dipping them into your espresso after enjoying a slice of cheesecake creates a delightful coffee experience!
-
Caramel Sauce: A drizzle of caramel sauce adds an irresistible sweetness that pairs well with both the coffee and chocolate components, making each bite a moment of pure bliss.
-
Mint Leaves: A sprig of fresh mint not only adds a beautiful garnish but also offers a refreshing taste that lightens the overall indulgence of the cheesecake.
-
Cheese Board Additions: For a dessert spread, consider serving assorted cheeses alongside your espresso cheesecake. The variety of flavors and textures creates an impressive and gourmet experience.
Make Ahead Options
These Decadent Espresso Cheesecakes are perfect for meal prep enthusiasts and can save you valuable time during busy weeknights! You can prepare the crust and filling up to 24 hours in advance. Simply create the graham cracker crust and pour the filling into the springform pan as directed, then cover tightly with plastic wrap and refrigerate. To maintain the cheesecake’s luscious texture, only pour the ganache over the cheesecake just before serving or storing; it keeps the flavors fresh and delightful. When ready to enjoy, bake and cool as instructed, allowing for a stunning dessert with minimal last-minute effort. Just imagine serving your guests, knowing you prepared your Espresso Cheesecake ahead of time!
Espresso Cheesecake Variations & Substitutions
Inviting you to explore some delightful twists and substitutions for your Espresso Cheesecake!
-
Gluten-Free: Swap conventional graham crackers for gluten-free alternatives to create a delicious crust that everyone can enjoy.
-
Brown Sugar: Use brown sugar instead of granulated sugar for a richer flavor profile that complements the espresso beautifully.
-
Greek Yogurt: Substitute sour cream with Greek yogurt for a tangy flavor and a healthier twist; your cheesecake will still be wonderfully creamy!
-
Flavored Extracts: Experiment with different flavored extracts like almond or hazelnut to enhance the taste; these additions can truly elevate your espresso experience.
-
Crushed Espresso Beans: Stir in crushed espresso beans into the filling for added crunch and a more intense coffee flavor that takes your cheesecake to the next level.
-
Chocolate Variations: Switch semi-sweet chocolate for dark chocolate in your ganache for a bolder, less sweet topping that pairs perfectly with the coffee notes.
-
Whipped Cream Topper: Add a layer of whipped cream on top right before serving for an extra creamy texture and a beautiful presentation.
Craving more dessert ideas? You might also enjoy my indulgent Strawberry Cream Cheesecake or the irresistible Bake Biscoff Cheesecake. Enjoy customizing your espresso cheesecake to make it uniquely yours!
Expert Tips for the Best Espresso Cheesecake
• Room Temperature Ingredients: Using softened cream cheese and eggs at room temperature ensures a smooth batter that blends seamlessly, preventing lumps in your Espresso Cheesecake.
• Don’t Overmix: Mixing on low speed, especially after adding eggs, helps prevent too much air in the batter, which can lead to cracks during baking.
• Water Bath Method: Baking your cheesecake in a water bath ensures gentle heat, leading to a creamy texture and reducing the chance of cracks as it bakes.
• Cool Gradually: Gradually cooling your cheesecake in the oven with the door ajar allows for a smoother surface and minimizes cracking due to sudden temperature changes.
• Chill Before Serving: For the best flavor and texture, refrigerate the cheesecake for at least 4 hours or overnight before serving—it only gets better!
• Garnish Wisely: Enhance the presentation and flavor by adding chocolate shavings or espresso beans on top, elevating your Espresso Cheesecake to a dessert worthy of any gathering.
Storage Tips for Espresso Cheesecake
Room Temperature: Once cooled, your Espresso Cheesecake can sit at room temperature for about 1-2 hours before serving; it’s best enjoyed chilled, though!
Fridge: Store leftovers in an airtight container in the refrigerator for up to one week to maintain freshness and flavor.
Freezer: If you want to keep it longer, the cheesecake can be frozen for up to 3 months. Wrap it tightly in plastic wrap and aluminum foil to prevent freezer burn.
Reheating: To enjoy frozen cheesecake, transfer it to the fridge to thaw overnight before serving. No need to reheat, as it’s best enjoyed chilled!
Espresso Cheesecake Recipe FAQs
How do I choose ripe ingredients for the cheesecake?
Absolutely! For the best flavor, always choose ingredients like cream cheese that are at room temperature. This helps achieve a smooth filling. Check your eggs for freshness by water-testing; if they sink, they’re fresh. For sour cream, opt for a brand with a clean label and no preservatives for an authentic taste.
What is the best way to store leftover Espresso Cheesecake?
Store leftovers in an airtight container in the refrigerator for up to one week. Make sure to cover the cheesecake properly to prevent it from absorbing any odors. When ready to enjoy, let it sit at room temperature for about 15 minutes for the ideal texture.
Can I freeze Espresso Cheesecake?
Very much! Espresso Cheesecake can be frozen for up to 3 months. Wrap it tightly in plastic wrap, followed by aluminum foil to shield it from freezer burn. When you’re ready to savor it, transfer the cheesecake to the refrigerator to thaw overnight. No reheating necessary; it’s best served chilled!
Why is my cheesecake cracking, and how can I prevent this?
One common culprit for cracks is overmixing the batter, particularly after adding eggs. To avoid this, mix on low speed and incorporate eggs one at a time until just blended. Another essential step is using a water bath during baking, as this creates a gentle steam environment, helping the cheesecake to bake evenly and reducing crack formation.
Are there any dietary considerations for pets or allergies?
Always consider your guests’ dietary needs! This recipe contains dairy and gluten, so for gluten-sensitive individuals, make sure to use gluten-free graham cracker crumbs. If you’re serving anyone with lactose intolerance, consider substituting cream cheese and sour cream with lactose-free versions to keep everyone happy!
How should I garnish my Espresso Cheesecake for an impressive presentation?
A simple and elegant way to garnish is by adding chocolate shavings or espresso beans on top right after pouring the ganache. This not only enhances the visual appeal but also adds a lovely crunch and coffee flavor dimension. Serving with a dollop of whipped cream or a drizzle of chocolate sauce can elevate your presentation even further!

Rich and Creamy Espresso Cheesecake to Satisfy Your Cravings
Ingredients
Equipment
Method
- Preheat your oven to 350°F (175°C). Prepare your 9-inch springform pan.
- Combine graham cracker crumbs, melted unsalted butter, granulated sugar, and vanilla extract. Press the mixture into the bottom of the springform pan and bake for 10 minutes. Allow it to cool completely.
- Beat softened cream cheese with an electric mixer on medium speed until smooth. Gradually add in sugar and vanilla extract, mixing until blended.
- Dissolve espresso powder in hot water and pour into the cream cheese mixture, mixing thoroughly.
- With the mixer set to low speed, add the eggs one at a time, mixing until fully incorporated.
- Fold in sour cream and heavy cream until the mixture is smooth. Avoid overmixing.
- Pour the cheesecake filling over the cooled crust. Bake wrapped in aluminum foil in a water bath for 60-70 minutes, until edges are set.
- Turn off the oven and leave the cheesecake inside with the door ajar for 1 hour. Cool to room temperature, then refrigerate for at least 4 hours.
- To make the ganache, heat heavy cream until simmering, pour over chopped chocolate, and stir until smooth. Set aside.
- Pour the chocolate ganache over the chilled cheesecake and garnish with chocolate shavings or espresso beans if desired.
Leave a Reply