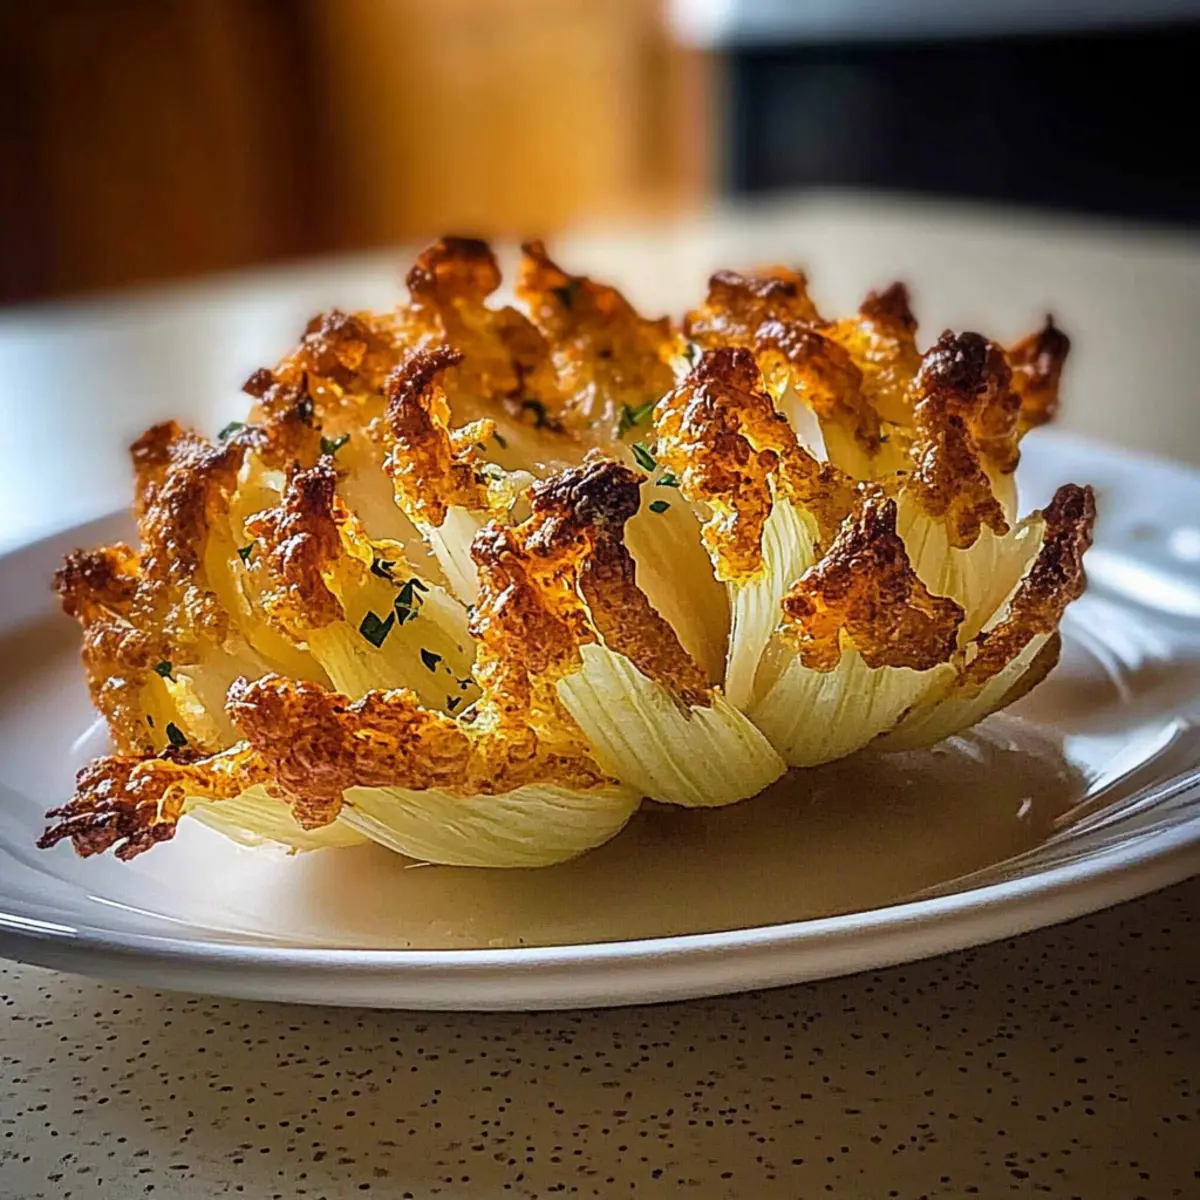
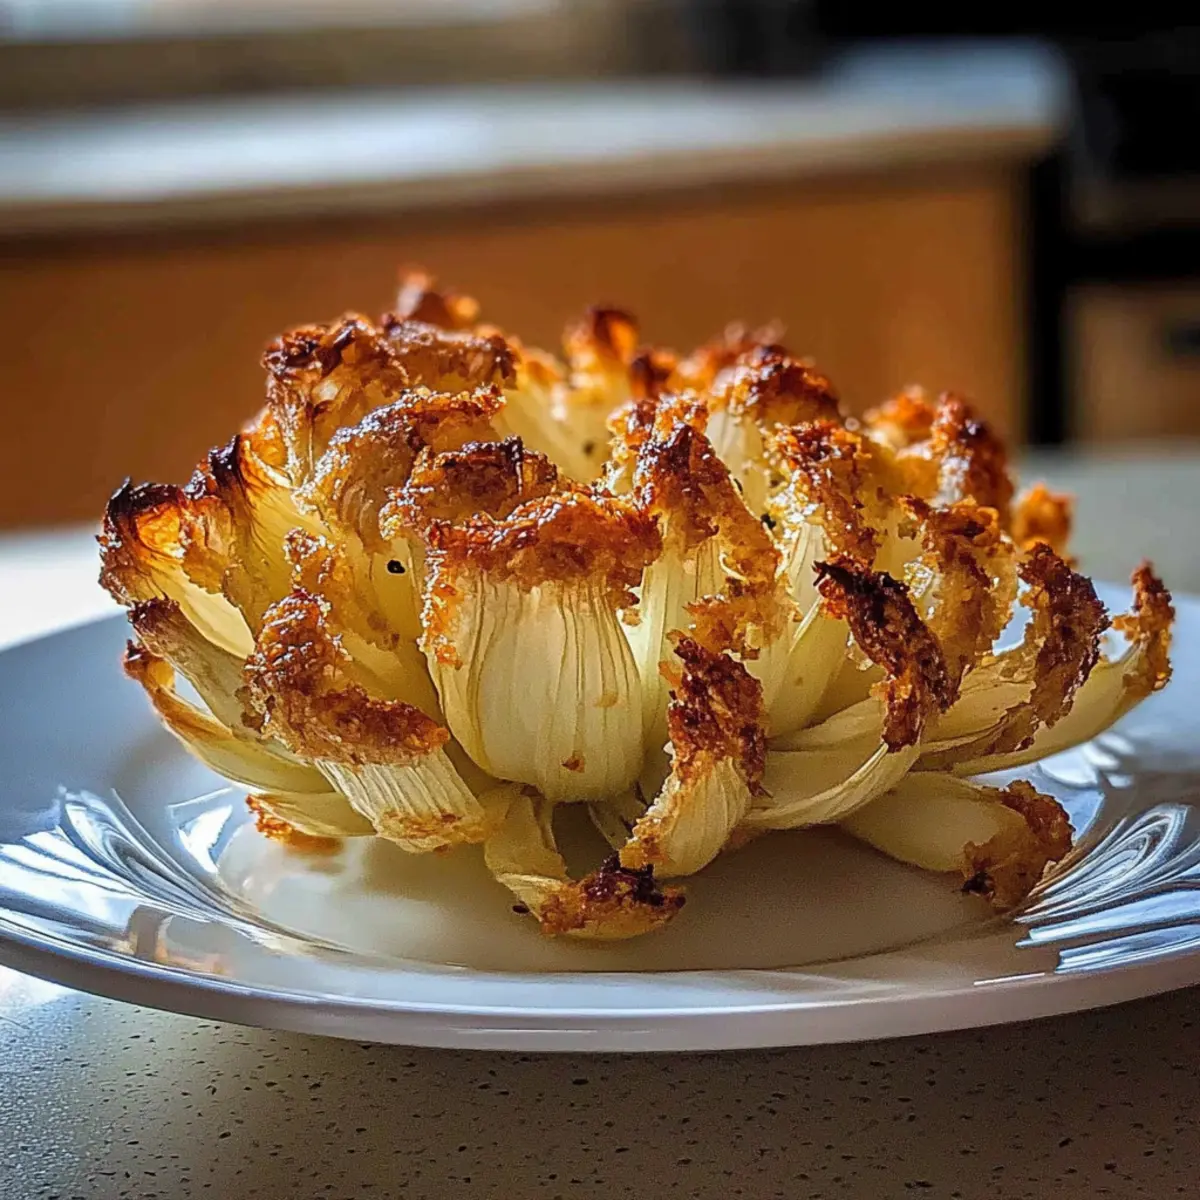
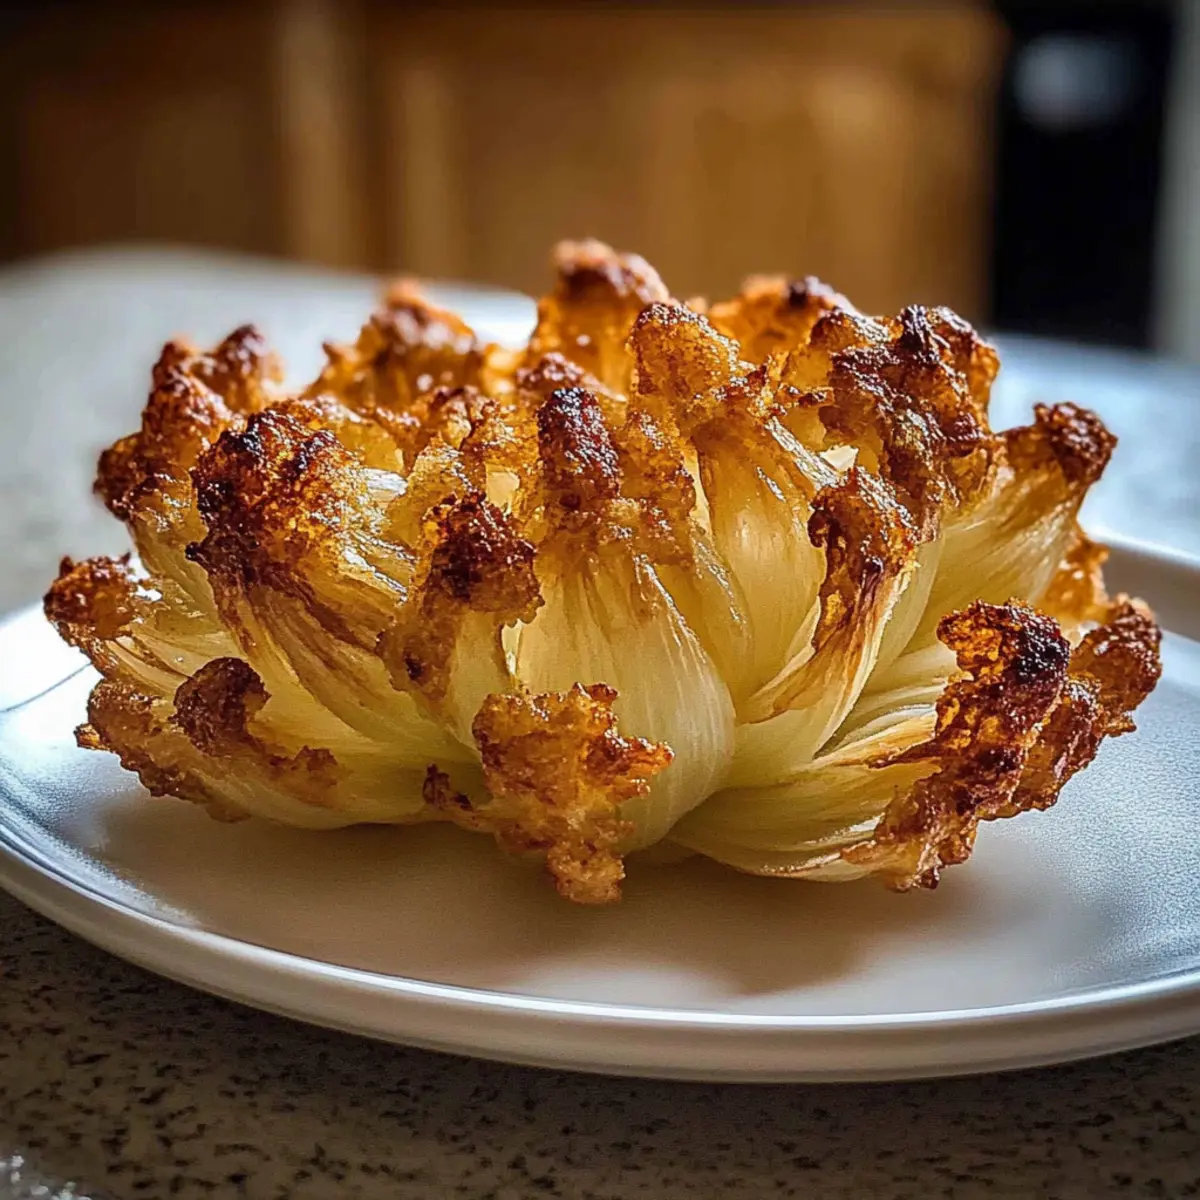
As the aroma of roasting onions fills the kitchen, I can’t help but feel a wave of nostalgia wash over me. This Guilt-Free Oven-Baked Blooming Onion is my healthier homage to a classic that used to dominate appetizer menus, delivering all the crispy, pull-apart joy without the heaviness that often comes from frying. Imagine inviting friends over for game night and presenting this stunning dish: golden, crispy petals waiting to be dipped into a zesty sauce. It’s not just a feast for the eyes but also a guilt-free treat that everyone will love. Perfect for gatherings or cozy family evenings, this recipe brings everyone together, sparking laughter and conversations over shared bites. Are you ready to elevate your appetizer game and impress your guests?

Why make a guilt-free blooming onion?
Guilt-Free: Enjoy the classic taste without the extra calories; this oven-baked version skips the frying.
Simple Steps: The process is easy to follow, making it perfect even for beginner chefs.
Crowd-Pleasing: This visually stunning dish is sure to impress your guests at any gathering, just like my French Onion Pasta does!
Flavorful & Flexible: Customize your blooming onion with different spices to match your tastes—smoked paprika, anyone?
Perfect for Sharing: Ideal for game night or family dinners, it encourages everyone to dig in and enjoy together!
Amazing Blooming Onion Ingredients
• Ready to unleash your culinary creativity with this amazing blooming onion in oven? Here’s what you’ll need!
For the Onion
- Yellow Onion – The foundation of this dish; opt for a firm onion to support all those beautiful petals.
- Olive Oil – Essential for achieving a crispy texture and beautiful browning; don’t skimp on this flavor enhancer.
For the Coating
- All-Purpose Flour – Forms the crunchy coating; swap for a gluten-free blend if needed.
- Paprika – Adds a subtle smokiness and vibrant color to the exterior.
- Garlic Powder – Infuses the dish with savory goodness; a must for flavor depth.
- Cayenne Pepper – Optional, but it gives a delightful kick; adjust to your spice preference.
- Salt and Black Pepper – Essential for bringing all the flavors together; don’t forget these!
For the Wet Dip
- Milk – Helps the coating stick and keeps it moist while baking.
- Egg – Adds richness and aids in forming that beautiful crust.
For the Dipping Sauce
- Mayonnaise – The creamy base that makes the sauce irresistible.
- Ketchup – Adds a touch of sweetness that balances the mayo perfectly.
- Prepared Horseradish – For that zesty zing in your dipping sauce.
- Additional Spices for Sauce (Paprika, Garlic Powder, Cayenne) – Enhance the flavor of your dipping sauce to complement the onion beautifully.
Now that you have all the ingredients ready, you’re one step closer to delighting your guests with this amazing blooming onion in oven!
Step‑by‑Step Instructions for Amazing Blooming Onion In Oven
Step 1: Preheat the Oven
Begin by preheating your oven to 400°F (200°C). This ensures that the heat is just right for creating that crispy exterior. While the oven warms up, line a baking sheet with parchment paper to prevent sticking and make cleanup easier.
Step 2: Prepare the Onion
Take your yellow onion and peel away the outer layer. Trim off the top, leaving the root intact, then place it root-side down. With a sharp knife, make multiple vertical cuts down towards the root, spacing them about half an inch apart. This will create the beautiful petals for your blooming onion.
Step 3: Make the Coating Mixture
In a shallow bowl, combine all-purpose flour, paprika, garlic powder, cayenne pepper, salt, and black pepper. Mix thoroughly until the spices are evenly distributed. In a separate bowl, whisk together milk and an egg until smooth. This wet dip will help the coating adhere perfectly to your onion.
Step 4: Coat the Onion
Dip the prepared onion into the milk-egg mixture, allowing any excess to drip off. Next, dredge the onion thoroughly in the flour mixture, ensuring each petal is well coated. Be gentle as you coat to maintain the structure of the petals while creating that wonderful crunch for the amazing blooming onion in oven.
Step 5: Drizzle with Olive Oil
Place the coated onion on your prepared baking sheet. Drizzle a generous amount of olive oil over the top, ensuring that it seeps into the petals. This will not only enhance the flavor but promote that beautiful golden browning as it bakes.
Step 6: Bake the Onion
Slide the baking sheet into the preheated oven and bake for 30-40 minutes. Keep an eye on the onion as it cooks; it’s ready when the petals are golden brown and crispy. You can gently pull at the edges to check for tenderness—this is your cue that it’s done!
Step 7: Prepare the Dipping Sauce
While the onion is baking, take a moment to whip up a delicious dipping sauce. In a bowl, combine mayonnaise, ketchup, prepared horseradish, and additional spices like paprika, garlic powder, and cayenne. Whisk thoroughly until smooth and well blended, enhancing the flavors of your amazing blooming onion in oven.
Step 8: Serve & Enjoy
Once baked to perfection, remove the blooming onion from the oven and let it cool slightly. Serve it warm with your zesty dipping sauce on the side. Watch as your guests marvel at the stunning presentation and dig into the crispy petals, creating a joyful atmosphere around your delicious appetizer!
Make Ahead Options
These Guilt-Free Oven-Baked Blooming Onions are perfect for meal prep enthusiasts! You can prepare the onion by peeling and cutting it into petals up to 24 hours in advance, storing it in an airtight container in the fridge to prevent browning. Additionally, you can combine the coating ingredients and store them in a separate container for up to 3 days. When you’re ready to bake, simply coat the onion with the prepared mixture, drizzle with olive oil, and bake as directed for a crispy, delightful appetizer that tastes just as delicious as when made fresh. This makes it easier to whip up a fantastic starter for gatherings or family meals without the last-minute rush!
Expert Tips for Amazing Blooming Onion in Oven
- Choose the Right Onion: Opt for a firm yellow onion to get sturdy, beautiful petals that won’t fall apart during baking.
- Cut Carefully: Use a sharp knife for clean cuts, ensuring you don’t cut through the root to keep the petals intact.
- Coat Just Before Baking: To prevent a soggy texture, coat the onion right before it’s time to bake. This helps maintain a crispy finish.
- Airflow Matters: Leave space around the onion on the baking sheet for proper air circulation, which promotes optimal crispiness for your amazing blooming onion in oven.
- Adjust Baking Time: For a crunchier texture, consider increasing baking time slightly or adding more olive oil to encourage browning.
What to Serve with Guilt-Free Oven-Baked Blooming Onion
Elevate your appetizer experience with perfect pairings that enhance the crispy, flavorful beauty of this blooming onion.
-
Creamy Ranch Dip: A classic choice, its smoothness beautifully contrasts with the blooming onion’s crispy texture. Adds an irresistible tang!
-
Zesty Lemon Aioli: Bright and bold, this garlicky dip brings freshness and depth that complements the savory petals wonderfully. Perfect for a lively gathering!
-
Crunchy Vegetable Platter: Pair your blooming onion with an array of fresh veggies for a delightful crunch and refreshing contrast. It balances the rich flavors beautifully.
-
Fresh Garden Salad: A light, crisp salad adds a vibrant, healthy element, providing a refreshing palate cleanser between the indulgent bites of onion.
-
Bubbly Sparkling Water: Serve this effervescent drink for a light and refreshing option that keeps the focus on the blooming onion’s delightful crunch.
-
Classic Beer Pairing: A cold craft beer complements the salty flavors wonderfully, enhancing the overall experience of this fun appetizer.
-
Guacamole: The creaminess of guacamole paired with the crispy onion is a match made in heaven, adding a twist that surprises the taste buds.
-
Spicy Tomato Salsa: Kick up the flavor with a vibrant salsa that offers a kick, enhancing every dip and bite of the blooming onion.
Indulge in these delectable pairings to create a meal that satisfies every craving!
Amazing Blooming Onion Variations
Feel free to get creative with this dish, making it uniquely yours—each idea enhances both flavor and experience!
-
Sweet Onion: Swap yellow onion for sweet Vidalia onions for a milder, sweeter taste that perfectly offsets the savory coating.
-
Gluten-Free: Use a gluten-free flour blend with xanthan gum to make this dish accessible for those with dietary restrictions, allowing everyone to enjoy!
-
Smoky Flavor: Add smoked paprika in the coating for an irresistible depth that brings warmth and character to your blooming onion.
-
Herb Twist: Mix in dried herbs like oregano or thyme into the flour blend for herby notes that complement the onion beautifully.
-
Extra Crispy: For an even crunchier finish, lightly spray with cooking spray before baking, or toss in a tablespoon of cornstarch with the flour.
-
Spicy Kick: Increase the amount of cayenne pepper or try a spicy seasoning blend for those who love a little heat, matching the boldness of traditional frying!
-
Cheesy Coating: Add grated parmesan cheese to the flour mixture to create a rich, cheesy layer that crusts over as it bakes, enhancing every crispy bite.
-
Zesty Dipping Sauce: Instead of the classic sauce, try combining sour cream with fresh herbs and a dash of lemon juice for a refreshing twist that pairs beautifully.
These variations not only keep the essence of the amazing blooming onion in oven intact but also allow for personal touches, catering to every taste at your gathering. If you’re feeling adventurous, why not try serving it with a side of my delightful French Onion Pasta? It’s a fantastic way to enrich your meal and please everyone around the table!
How to Store and Freeze Amazing Blooming Onion
Fridge: Store your blooming onion in an airtight container for up to 2 days. Keeping it sealed will help maintain its freshness and flavor.
Freezer: For longer storage, wrap the baked onion tightly in plastic wrap and then in foil; it can be frozen for up to 1 month. Thaw in the fridge overnight before reheating.
Reheating: To restore the crispiness, reheat in the oven at 350°F (175°C) for 10-15 minutes. This will make your amazing blooming onion in oven just as delightful as when it was freshly baked.
Serving Fresh: Enjoy your blooming onion fresh for the best taste and texture. It’s a show-stopping appetizer that everyone will love!
Amazing Blooming Onion Recipe FAQs
How do I select the best onion for this recipe?
Absolutely! When choosing your yellow onion, look for one that feels firm and heavy for its size. Avoid onions with dark spots or soft areas, as these are signs of spoilage. A quality onion will create the petal structure needed for that beautiful blooming effect, ensuring your oven-baked blooming onion turns out perfectly!
What is the best way to store leftover blooming onion?
Very important! To preserve the taste and texture of your delicious creation, store the blooming onion in an airtight container in the fridge for up to 2 days. This will help maintain its flavor and prevent it from drying out. However, reheating might not bring it back to its crispy glory, so enjoy it fresh whenever possible!
Can I freeze the blooming onion?
Absolutely! If you’ve made a batch ahead of time or have leftovers, you can freeze your blooming onion for up to 1 month. Wrap it tightly in plastic wrap, followed by aluminum foil to prevent freezer burn. When you’re ready to enjoy it again, thaw the onion overnight in the fridge and reheat it in the oven at 350°F (175°C) for about 10-15 minutes to regain that lovely crunch.
What should I do if my blooming onion doesn’t crisp up?
Don’t worry, it can happen to the best of us! If your onion isn’t as crispy as you’d like, double-check the coating was applied just before baking to retain crispiness. If you want to ensure a crunchier texture next time, consider increasing the baking time slightly or adding a bit more olive oil to promote browning. Also, ensure there’s enough space on the baking sheet for adequate airflow.
Is this blooming onion recipe safe for people with allergies?
Make sure to keep your guests in mind! This recipe contains common allergens like eggs and dairy (from the milk and mayonnaise). If you need to accommodate someone with an allergy, consider dairy-free alternatives for the milk and mayonnaise, and opt for a gluten-free flour for coating. Always double-check with your guests about their dietary restrictions before serving!
Can I customize the spices used in the coating?
Absolutely! This is your chance to showcase your culinary flair. Feel free to experiment with spices according to your taste. For example, try using smoked paprika for a deeper flavor or add a little more cayenne pepper for an extra kick of heat. The flexibility of this oven-baked blooming onion recipe lets you create the perfect flavor profile that you and your guests will love!
Amazing Blooming Onion in Oven That Will Wow Your Guests
Ingredients
Equipment
Method
- Preheat your oven to 400°F (200°C) and line a baking sheet with parchment paper.
- Peel the yellow onion, trim the top, and make vertical cuts spaced half an inch apart, keeping the root intact.
- In a bowl, combine all-purpose flour, paprika, garlic powder, cayenne pepper, salt, and black pepper.
- In another bowl, whisk together milk and an egg until smooth.
- Dip the onion into the milk-egg mixture, then dredge in the flour mixture, ensuring all petals are coated.
- Place coated onion on the baking sheet and drizzle with olive oil.
- Bake for 30-40 minutes until golden brown and crispy, checking for tenderness.
- Mix mayonnaise, ketchup, horseradish, and additional spices in a bowl for the dipping sauce.
- Let the onion cool slightly and serve warm with the dipping sauce.
Leave a Reply