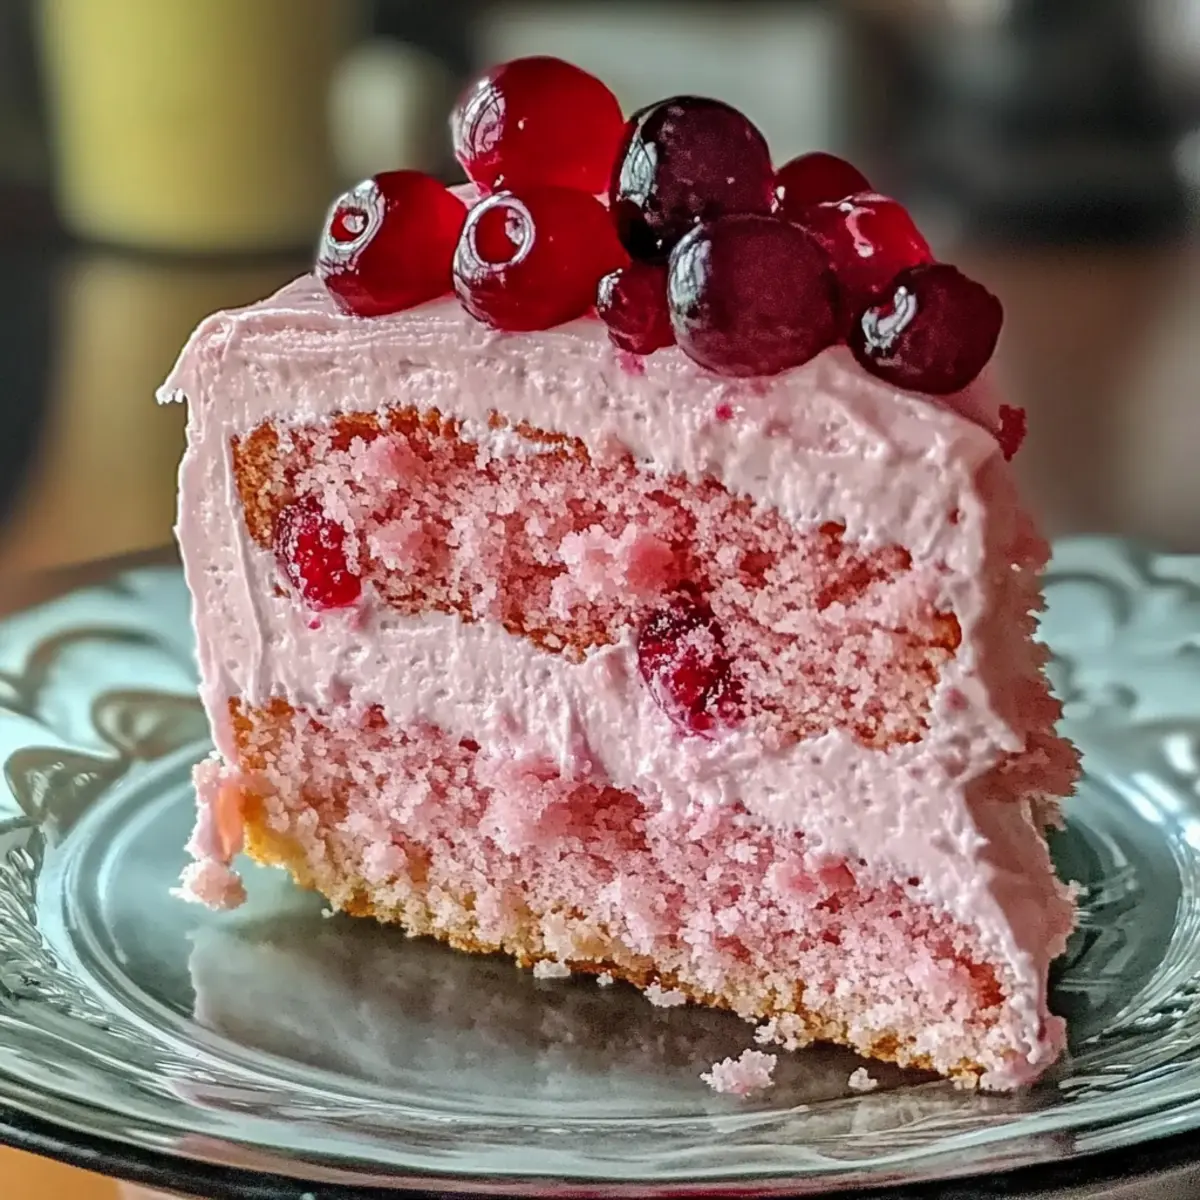
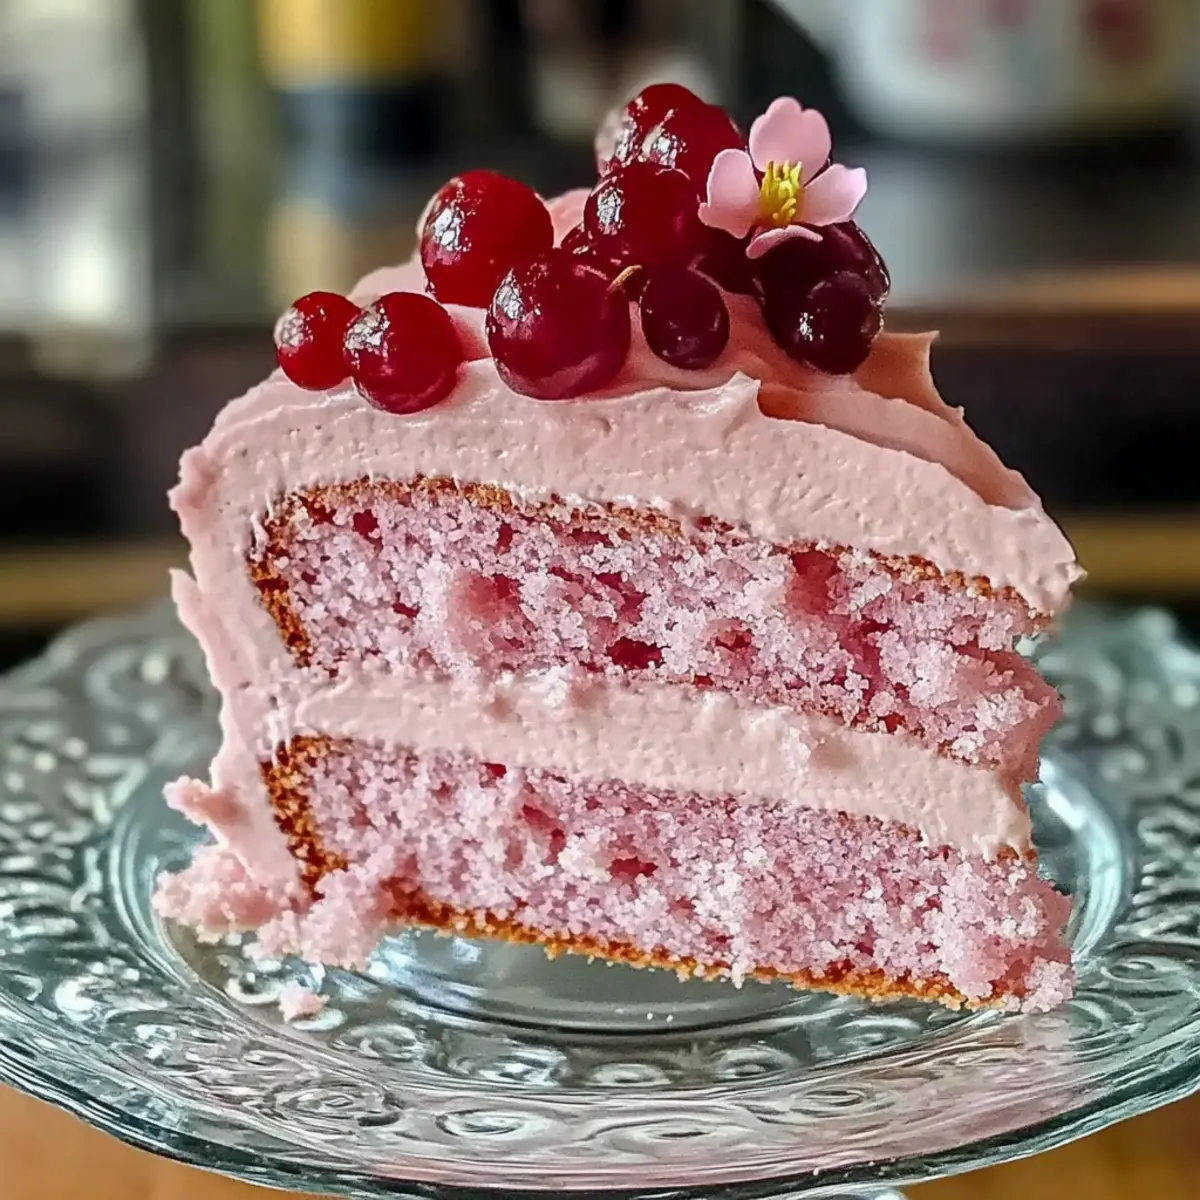
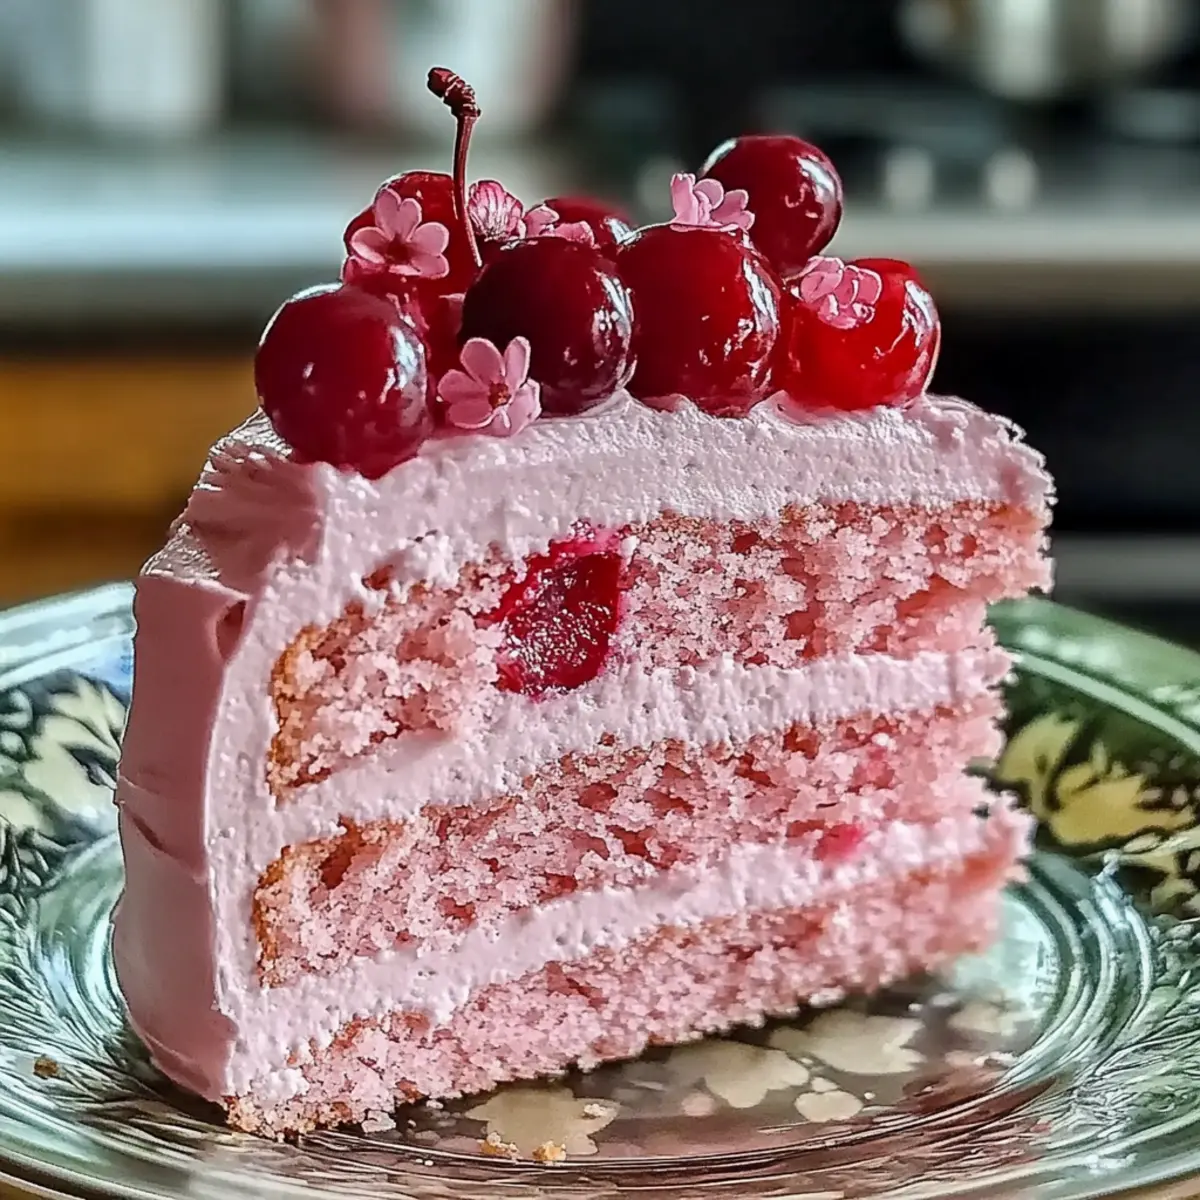
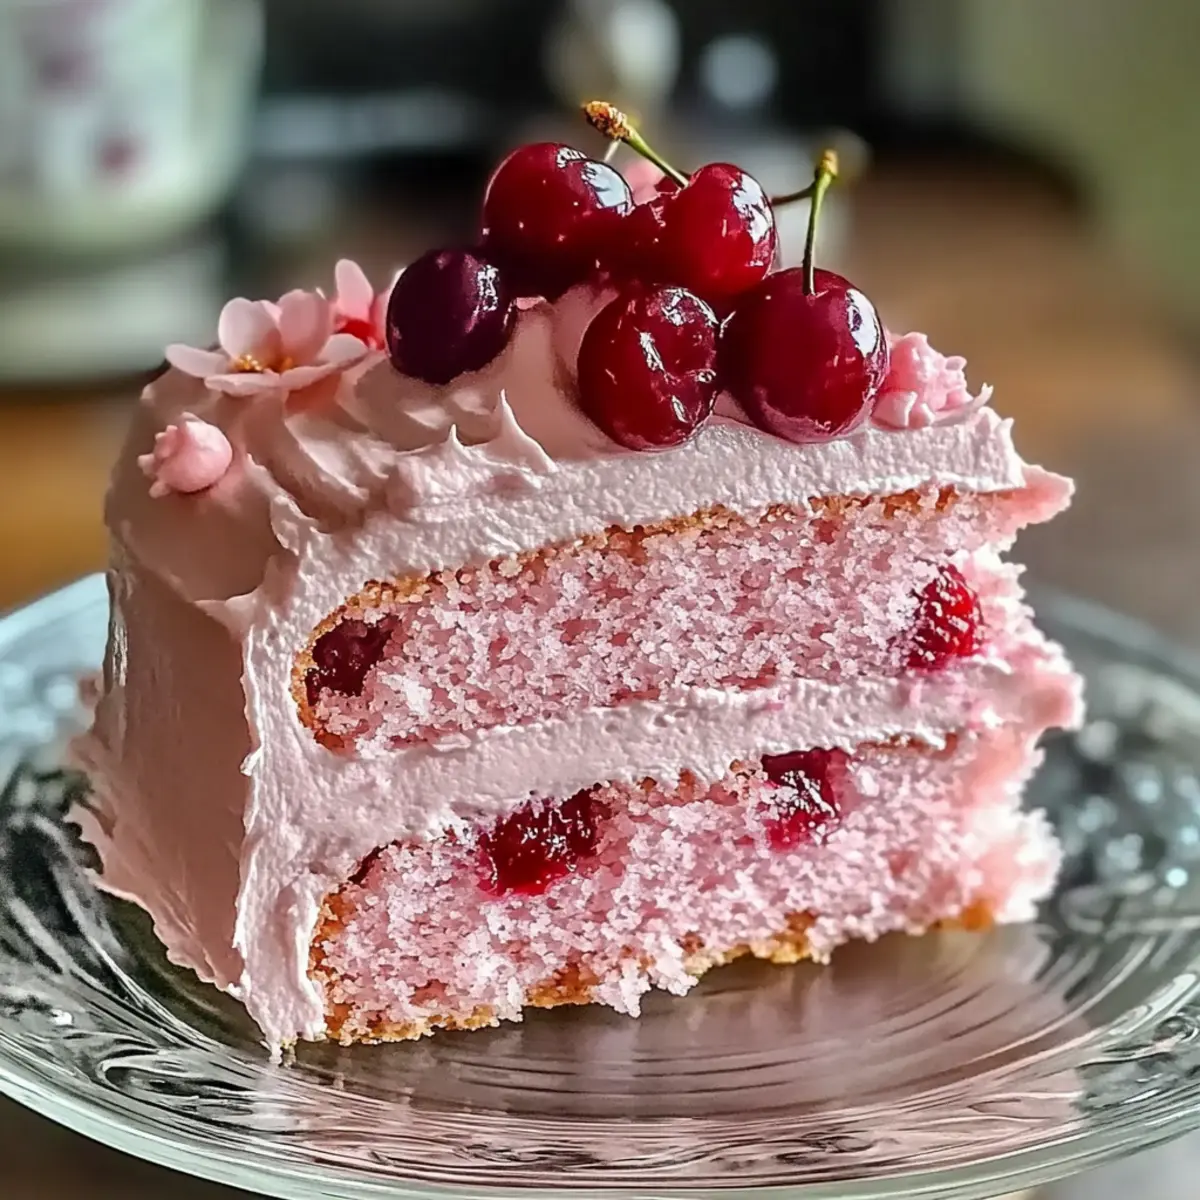
Amid the buzz of springtime blossoms and gentle breezes, I stumbled upon a delightful way to celebrate the season—my Cherry Blossom Dream Cake. This enchanting dessert weaves together the delicate essence of cherry blossoms with juicy cherry accents, crafting a moist cake that brings the beauty of spring right to your table. With its impressive appearance and irresistible flavors, this cake is not only a showstopper for festive gatherings but also a comforting treat for quiet moments of indulgence. Plus, it can easily be made gluten-free, allowing everyone to savor its charm. Are you ready to embrace a slice of spring?
Why is Cherry Blossom Dream Cake a must-try?
Unique Flavor: The cherry blossom essence creates an enchanting floral taste that sets this cake apart from ordinary desserts.
Seasonal Delight: Perfectly celebrating spring, its vibrant colors and light flavors make it a stunning centerpiece for any gathering.
Customizable Options: You can easily make it gluten-free or swap cherries for other fruits to suit your preferences.
Easy to Make: With clear instructions and accessible ingredients, it’s a breeze to whip up and impress your guests.
Crowd-Pleasing Appeal: A slice of this cake sparks joy and delight, leaving everyone craving more, whether at a festive brunch or a cozy afternoon tea. If you’re interested in more delightful cakes, check out my Coconut Cream Cake or Caramel Apple Cake for sweet inspiration!
Cherry Blossom Dream Cake Ingredients
For the Batter
- Flour – Provides structure; use gluten-free all-purpose flour as a substitute for a gluten-free version.
- Sugar – Adds sweetness and moisture; no direct substitutions suggested.
- Butter – Contributes to a tender crumb; can be substituted with vegan butter for a dairy-free option.
- Eggs – Provide richness and stability; for an egg-free version, use flaxseed meal or applesauce as a binding agent.
- Cherry Blossom Extract – Imparts a unique floral flavor; omit if unavailable, but the taste will differ.
- Fresh Cherries – Add fruity flavor and texture; canned cherries can be used if drained and dried thoroughly before adding.
For the Frosting
- Butter – Ensures a creamy texture; softened butter will mix better for a smooth frosting.
- Powdered Sugar – Sweetens and thickens the frosting; adjust the quantity to achieve your desired sweetness.
- Cherry Blossom Extract – Enhances the flavor of the frosting; a little goes a long way in bringing out the cake’s unique cherry blossom essence.
- Milk or Cream – Loosens the frosting for easy spreading; use dairy or plant-based milk to suit your preferences.
Each ingredient plays a pivotal role in achieving the delicious flavor and delightful texture of the Cherry Blossom Dream Cake you’ll love serving this spring!
Step‑by‑Step Instructions for Cherry Blossom Dream Cake
Step 1: Preheat the Oven
Preheat your oven to 350°F (175°C). This temperature is perfect for allowing the Cherry Blossom Dream Cake to bake evenly, creating a beautifully risen and golden crust. While the oven heats up, take a moment to grease and line your cake pans with parchment paper for effortless release later.
Step 2: Mix Dry Ingredients
In a large mixing bowl, whisk together the flour, sugar, and any leavening agents like baking powder or baking soda. Ensure there are no lumps for a smooth texture in your Cherry Blossom Dream Cake. This step sets the foundation for your cake, creating a light and airy texture. Once combined, set the bowl aside while you prepare the wet ingredients.
Step 3: Cream Butter and Sugar
In a separate bowl, use an electric mixer to beat the softened butter until creamy, which should take about 2-3 minutes. Gradually add the sugar, continuing to beat until the mixture is light and fluffy, about 5 minutes. The air incorporated during this process is crucial for the cake’s tender crumb, so make sure it’s well combined before moving on.
Step 4: Add Eggs
Add the eggs to the butter-sugar mixture one at a time, mixing well after each addition until fully incorporated. This should take about 1-2 minutes per egg. Properly incorporating the eggs adds richness and stability to your Cherry Blossom Dream Cake, ensuring it has that perfect moist texture when baked.
Step 5: Add Cherry Blossom Extract
Blend in the cherry blossom extract, mixing until evenly distributed. This fragrant addition enhances the unique floral flavor and scent of your cake. Make sure to scrape down the sides of the bowl to fully integrate all of the ingredients, allowing each bite of the Cherry Blossom Dream Cake to be delightfully aromatic.
Step 6: Combine Mixtures
Slowly add the dry mixture to the wet mixture, alternating with milk or buttermilk, mixing just until combined. This step is essential to avoid overmixing, which can toughen the cake. Aim for a smooth batter that still has a few small lumps for optimal moisture and texture in your Cherry Blossom Dream Cake.
Step 7: Fold in Cherries
Gently fold in the fresh cherries using a spatula, ensuring they are evenly distributed throughout the batter without breaking them apart. This moment is crucial as the fresh fruit adds juiciness and flavor bursts in the cake. Once the cherries are incorporated, you’re almost ready to bake!
Step 8: Bake
Pour the batter evenly into your prepared pans and place them in the preheated oven. Bake for 25-30 minutes, or until a toothpick inserted in the center comes out clean. The delightful aroma of the Cherry Blossom Dream Cake will fill your kitchen, signaling that your cake is nearly ready.
Step 9: Cool
Once baked, remove the cakes from the oven and allow them to cool in the pans for about 10 minutes. Then, carefully transfer the cakes to wire racks to cool completely. This step is important to ensure that the layers stay moist and do not become soggy as they cool.
Step 10: Frost and Garnish
After the cakes are completely cool, whip up your frosting while the layers are resting. Frost the top of one layer, place the second layer on top, and continue to frost the whole cake. For a beautiful presentation, garnish with fresh cherry blossoms or cherries just before serving, bringing your Cherry Blossom Dream Cake to life!
Make Ahead Options
Preparing the Cherry Blossom Dream Cake in advance is a fantastic way to save time and enjoy your spring celebrations with minimal stress! You can bake the cake layers up to 24 hours in advance; simply wrap them tightly in plastic wrap once they’re completely cool to maintain their moisture. If you’re looking to go further, these unfrosted layers can be frozen for 1-2 months—just ensure they’re well-wrapped to prevent freezer burn. On the day of serving, allow the layers to thaw in the refrigerator overnight. When you’re ready, frost and garnish with fresh cherry blossoms just before serving to keep everything looking vibrant and fresh. This way, your Cherry Blossom Dream Cake remains just as delicious, delightful, and ready to impress!
Tips for the Best Cherry Blossom Dream Cake
-
Room Temperature Ingredients: Ensure butter and eggs are at room temperature for better incorporation. This crucial step helps achieve a fluffy texture in your Cherry Blossom Dream Cake.
-
Don’t Overmix: Mix just until combined when combining dry and wet ingredients. Overmixing can lead to a dense cake, preventing that light and airy crumb everyone loves.
-
Test for Doneness: Use a toothpick to check doneness; it should come out clean. Baking times can vary, so start checking a few minutes before the suggested time.
-
Chill Before Frosting: Allow cakes to cool completely before frosting. This prevents the icing from melting and ensures a beautiful finish on your Cherry Blossom Dream Cake.
-
Fresh Decorations: If using cherry blossom flowers, decorate just before serving to maintain their freshness. This finishing touch adds an exquisite look to your cake!
Cherry Blossom Dream Cake Variations
Feel free to get creative and customize your Cherry Blossom Dream Cake with these delightful variations that cater to different tastes and dietary needs.
- Gluten-Free: Use gluten-free all-purpose flour in place of regular flour for a scrumptiously inclusive dessert everyone can enjoy.
- Dairy-Free: Swap regular butter for vegan butter to create a creamy, dairy-free frosting that keeps the cake luscious and moist.
- Berries Twist: Replace fresh cherries with raspberries or strawberries for a refreshing twist that adds vibrant colors and juiciness.
- Jam Layering: Incorporate a layer of cherry jam or raspberry jam between cake layers to enhance the flavor and add a surprise tartness.
- Nutty Texture: Add chopped walnuts or almonds to the batter for a delightful crunch that contrasts beautifully with the moist cake.
- Exotic Spice: Sprinkle in a pinch of cardamom or lavender for a unique spin that elevates the floral notes in your cake.
- Citrus Zest: Infuse some lemon or orange zest into the batter for a zesty twist that complements the floral cherry blossom flavor.
- Decorative Bliss: Top with edible flowers or fresh mint leaves alongside the cherry blossoms to elevate the presentation and flavor profile.
With these variations, there’s a delicious Cherry Blossom Dream Cake for everyone! If you’re looking for more inspired cakes, don’t forget to check out my Homemade Gingerbread Cake or the ever-popular Buttermilk Pancakes Brighten to expand your culinary repertoire!
What to Serve with Cherry Blossom Dream Cake
Imagine delighting your guests with a beautiful meal that perfectly complements the enchanting flavors of this spring-inspired cake.
- Fresh Fruit Salad: A vibrant mix of seasonal fruits adds a refreshing contrast and brightness to the rich cake, enhancing the overall experience.
- Vanilla Ice Cream: The creamy sweetness of classic vanilla ice cream pairs beautifully, melting against the cake’s moist layers for an indulgent treat.
- Earl Grey Tea: This floral tea with hints of bergamot echoes the cake’s cherry blossom essence, creating a serene and fragrant pairing.
- Lemon Zest Whipped Cream: A dollop of this sunny, tangy treat balances the cake’s sweetness, adding a playful zing that brightens each bite.
- Lavender Lemonade: A chilled glass of this floral lemonade offers a unique twist, refreshing the palate with a delicate harmony of flavors.
- Chocolate-Covered Strawberries: These luscious bites introduce an indulgent richness that contrasts with the cake’s lightness, perfect for a festive occasion.
- Coconut Macaroons: The chewy texture and tropical notes complement the cake’s delicate layers, inviting delightful flavors of spring into each mouthful.
Each pairing elevates the Cherry Blossom Dream Cake, transforming your gathering into a feast for the senses!
Storage Tips for Cherry Blossom Dream Cake
-
Room Temperature: Store the frosted Cherry Blossom Dream Cake in an airtight container at room temperature for up to 3 days. This maintains its delicate texture and flavor.
-
Fridge: If you prefer a chilled cake, place the cake in the fridge for up to 5 days. Remember to cover it to prevent it from absorbing other flavors in the fridge.
-
Freezer: The unfrosted layers can be frozen for 1-2 months. Wrap each layer tightly in plastic wrap and then in aluminum foil to prevent freezer burn.
-
Reheating: If serving chilled or frozen layers, allow them to come to room temperature before decorating or serving. For extra warmth, a brief 10-second microwave burst can enhance flavor without drying it out.
Cherry Blossom Dream Cake Recipe FAQs
How do I pick fresh cherries?
Absolutely! When selecting fresh cherries, look for ones that are bright in color with a firm texture. Steer clear of any with dark spots or blemishes, as they may indicate overripeness. Ideally, you want to pick cherries that are plump and feel heavy for their size, as these are often the juiciest and sweetest!
How should I store my Cherry Blossom Dream Cake?
Very well! To keep your frosted Cherry Blossom Dream Cake fresh, store it in an airtight container at room temperature for up to 3 days. If you prefer, you can refrigerate it for up to 5 days; just ensure it’s covered to avoid absorbing any odors from the fridge.
Can I freeze the Cherry Blossom Dream Cake?
Definitely! To freeze the unfrosted layers of your Cherry Blossom Dream Cake, wrap each layer securely in plastic wrap followed by aluminum foil to prevent freezer burn. They can be frozen for 1-2 months. To thaw, simply place the layers in the refrigerator overnight and allow them to come to room temperature before frosting.
What if my cake doesn’t rise properly?
Ah, troubleshooting is part of the journey! If your cake doesn’t rise, it might be due to old or expired leavening agents like baking powder or baking soda. Ensure you use fresh ingredients and combine the dry and wet components just until they are mixed; overmixing can create a dense texture. Remember, the batter should stay somewhat lumpy!
Is this recipe suitable for those with certain allergies?
Of course! This Cherry Blossom Dream Cake can be adjusted for various dietary needs. For a gluten-free version, simply use gluten-free all-purpose flour. To make it dairy-free, swap the butter for vegan butter and use a plant-based milk. If you have egg allergies, consider substituting each egg with ¼ cup of applesauce or 1 tablespoon of flaxseed meal mixed with 2.5 tablespoons of water.
Can I include other fruits in the cake?
The more the merrier! You can easily swap out the fresh cherries for other fruits like raspberries or strawberries to give the cake a different flavor profile. Just remember to adjust the moisture content slightly by draining any excess liquid from canned fruits before mixing them into the batter. Enjoy getting creative!
Cherry Blossom Dream Cake: Celebrate Spring with Floral Bliss
Ingredients
Equipment
Method
- Preheat your oven to 350°F (175°C) and grease and line your cake pans with parchment paper.
- In a large mixing bowl, whisk together the flour, sugar, and any leavening agents until no lumps remain.
- In a separate bowl, cream the softened butter for 2-3 minutes, then gradually add sugar and beat until fluffy.
- Add the eggs one at a time, mixing well after each addition for richness and stability.
- Blend in cherry blossom extract until evenly distributed, scraping down the bowl sides.
- Gradually add the dry mixture to the wet mixture, alternating with milk, mixing just until combined.
- Gently fold in fresh cherries with a spatula, distributing them evenly throughout the batter.
- Pour the batter into prepared pans and bake for 25-30 minutes until a toothpick inserted comes out clean.
- Allow the cakes to cool in the pans for 10 minutes before transferring them to wire racks to cool completely.
- Frost the cooled cakes and garnish with fresh cherry blossoms or cherries before serving.
Leave a Reply