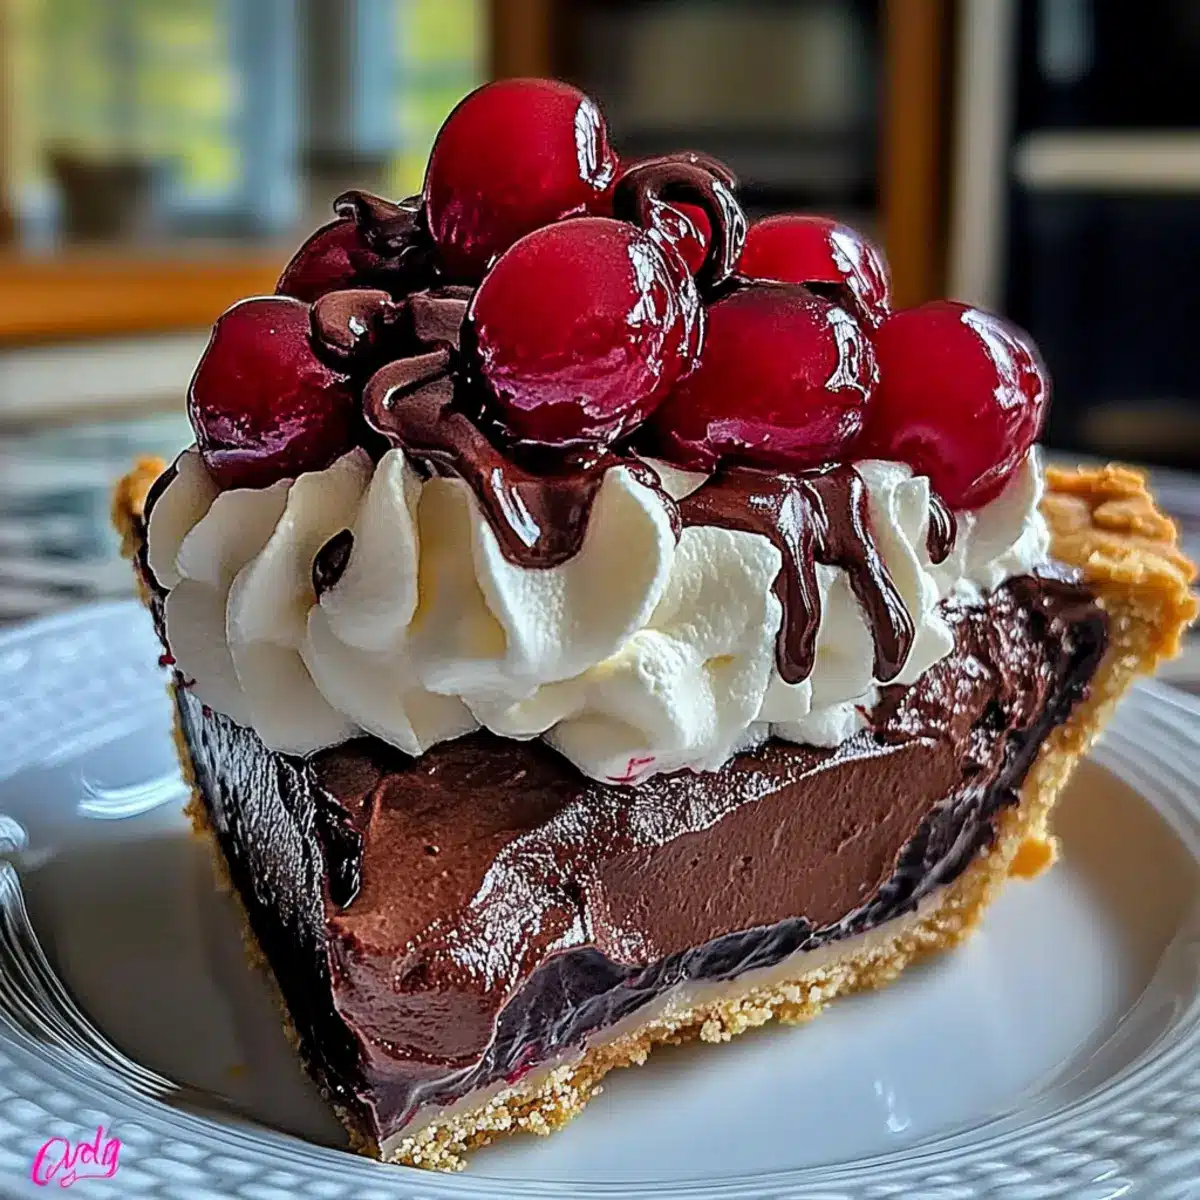
As I stood in my kitchen, the sweet aroma of cherries wafted through the air, instantly transporting me to a nostalgic summer gathering. That’s when the idea struck me: a Chocolate Cherry Cream Pie that’s not only a feast for the senses but also incredibly quick to assemble. This decadent no-bake dessert is perfect for those moments when you crave something rich yet refreshing, making it a crowd-pleaser for holidays or everyday celebrations. The layers of smooth chocolate mousse paired with tart cherry filling create a delightful contrast that will have your guests coming back for seconds. Plus, it’s vegetarian and requires no baking, letting you whip up this indulgent treat without heating up the kitchen. Ready to impress your family and friends with this luscious masterpiece? Let’s dive into the recipe!
Why is this Chocolate Cherry Cream Pie loved?
Decadent Layers: The combination of rich chocolate mousse and tangy cherry filling creates a mouthwatering experience that leaves everyone wanting more.
No-Bake Ease: This simple recipe allows you to prepare a stunning dessert without any baking, making it perfect for quick get-togethers or unexpected guests.
Crowd-Pleasing Delight: Ideal for family gatherings or holiday feasts, this pie’s flavor profile offers something for every palate, attracting both young and older dessert lovers.
Perfectly Textured: Each slice reveals a delightful contrast of creamy chocolate, tart cherries, and fluffy whipped cream, elevating your dessert game effortlessly.
Versatility: Feel free to customize with different crust types or substitute ingredients, allowing for a tailored treat everyone can enjoy. Check out my delicious Mint Chocolate Brownies or White Chocolate Cranberry Fudge for more sweet ideas!
Chocolate Cherry Cream Pie Ingredients
For the Crust
• Pre-baked pie crust – Use a homemade or store-bought crust for reliable structure.
For the Cherry Layer
• Cherry pie filling (1 can) – A fruity base layer; fresh cherries can be substituted for homemade filling.
For the Cream Mixture
• Cream cheese (8 oz, softened) – Adds creaminess and stability; can use dairy-free alternatives for a vegan version.
• Powdered sugar (1/2 cup) – Provides sweetness and a smooth texture when mixed with cream cheese.
For the Chocolate Mousse
• Heavy whipping cream (2 cups) – Creates lightness and volume; use stabilizer for longevity in the dessert.
• Instant chocolate pudding mix (1 package, 3.9 oz) – Provides rich chocolate flavor and creamy texture; a dairy-free version is available.
• Cold milk (3/4 cup) – Activates the chocolate pudding; consider dairy-free milk as a substitute.
For the Topping
• Maraschino cherries (12, for topping) – Adds an aesthetic touch and sweet garnish to finish your pie.
• Mini chocolate chips (2 tablespoons) – For a bit of extra sweetness and visual appeal; perfect for chocolate lovers.
This Chocolate Cherry Cream Pie is not only a visual delight but also a scrumptious way to satisfy your sweet cravings!
Step‑by‑Step Instructions for Chocolate Cherry Cream Pie
Step 1: Prepare the Crust
If you’re using a homemade pie crust, bake it according to the recipe instructions until golden brown, then let it cool completely. If using a store-bought crust, simply remove it from the packaging and set aside. The cool crust serves as the perfect sturdy base for your decadent Chocolate Cherry Cream Pie.
Step 2: Spread the Cherry Filling
Once your crust is cool, open the can of cherry pie filling and evenly spread it over the bottom of the pie crust. Use a spatula to smooth it out, ensuring every bite will have that delightful tart cherry flavor. This layer of cherry filling adds a fruity contrast to the rich chocolate mousse that follows.
Step 3: Mix the Cream Cheese Filling
In a mixing bowl, combine the softened cream cheese and powdered sugar. Using an electric mixer, beat the mixture on medium speed until it becomes smooth and creamy, about 2-3 minutes. This luscious cream cheese layer will act as a base for the chocolate mousse, providing a lovely creaminess to your Chocolate Cherry Cream Pie.
Step 4: Prepare the Chocolate Pudding
In a separate bowl, whisk together the instant chocolate pudding mix and cold milk until fully combined. Continue whisking for about 2 minutes until the mixture thickens to a pudding-like consistency. This step brings rich chocolate flavor to your pie, complementing the cherry filling beautifully.
Step 5: Combine Cream Cheese and Chocolate
Gently fold the thickened chocolate pudding into the cream cheese mixture using a spatula. Mix until just combined, ensuring not to deflate the mixture. This harmonious blend creates the silky chocolate layer that adds depth to your Chocolate Cherry Cream Pie.
Step 6: Whip the Cream
In another clean mixing bowl, pour 1 cup of heavy whipping cream. Whip on high speed until soft peaks form, about 3-4 minutes. Be careful not to overwhip. This light and airy cream will add fluffiness to the chocolate mixture, making it even more indulgent and delightful.
Step 7: Fold in the Whipped Cream
Carefully fold the whipped cream into the chocolate cream mixture, combining gently to maintain airiness. This step adds richness and lightness to the chocolate layer of your Chocolate Cherry Cream Pie. Take your time to ensure the mixture is well combined yet still fluffy.
Step 8: Layer the Chocolate Cream
Spoon the chocolate cream mixture over the layer of cherry pie filling in the crust, spreading it evenly with a spatula. Smooth the top for an appealing finish. This chocolate layer will set beautifully in the fridge, creating a luscious contrast with the cherries beneath.
Step 9: Top with Whipped Cream
In a mixing bowl, whip the remaining cup of heavy cream until soft peaks form again. Spread this whipped cream evenly over the chocolate layer, achieving a light and airy topping for your pie. The fluffy cream will help balance the rich flavors of the Chocolate Cherry Cream Pie.
Step 10: Garnish and Chill
Decorate the top with maraschino cherries and sprinkle mini chocolate chips for an attractive finish. Once garnished, cover the pie with plastic wrap and refrigerate for at least 4 hours, or preferably overnight. Chilling allows the flavors to meld and the layers to set perfectly before serving.
Expert Tips for Chocolate Cherry Cream Pie
• Whip It Right: Ensure the whipping cream reaches soft peaks, as over-whipping can lead to grainy texture. Add powdered sugar to stabilize this layer.
• Chill for Perfection: Give your pie enough time in the fridge to set. A minimum of 4 hours is essential for well-defined layers.
• Choose Your Crust Wisely: While a pre-baked pie crust works well, opting for a graham cracker crust adds a delightful sweetness perfect for the Chocolate Cherry Cream Pie.
• Layer Gently: When folding whipped cream into the chocolate mixture, use a gentle hand to keep that fluffy texture intact.
• Make Ahead Magic: Prepare the pie the day before serving. This allows the flavors to meld beautifully, enhancing the overall taste.
Make Ahead Options
This Chocolate Cherry Cream Pie is an excellent choice for meal prep, allowing you to enjoy a delicious dessert with minimal last-minute efforts! You can prepare and refrigerate the pie up to 24 hours in advance, ensuring the flavors meld beautifully. Start by making the crust and spreading the cherry pie filling in advance. Then, prepare the cream cheese mixture and the chocolate mousse the day before, layering them over the cherries. To maintain quality, cover the pie tightly with plastic wrap before refrigerating, which helps prevent drying out. When ready to serve, simply whip the remaining cream, top the pie, and garnish it with maraschino cherries and chocolate chips for that fresh presentation. Enjoy the convenience and indulgence of this delightful dessert!
How to Store and Freeze Chocolate Cherry Cream Pie
Fridge: Keep your Chocolate Cherry Cream Pie refrigerated, covered with plastic wrap, for up to 4 days. This ensures that the flavors remain fresh while preventing the crust from becoming soggy.
Freezer: It’s not recommended to freeze this pie, as the texture may change upon thawing, leading to a less enjoyable experience.
Reheating: If you prefer to serve it slightly chilled or at room temperature, simply take it out of the fridge 15 to 30 minutes before serving to let it soften up a bit.
Covering: Always keep it covered in the fridge to maintain the pie’s delightful flavors and creamy texture, avoiding any absorption of other fridge odors.
What to Serve with Chocolate Cherry Cream Pie
Indulge in a full meal experience that perfectly complements your delightful no-bake dessert!
- Coffee: The rich, bold flavors of coffee balance the sweetness of the pie, creating a delightful pairing that awakens your senses.
- Vanilla Ice Cream: A scoop of creamy vanilla adds a luscious creaminess to each bite, enhancing the chocolate and cherry flavors beautifully.
- Fresh Fruit Salad: Light and refreshing, a fruit salad made with citrus and berries contrasts nicely against the dense creaminess of the pie.
- Chocolate Fondue: Dip strawberries or banana slices in velvety chocolate for a sweet twist that echoes the pie’s flavors while adding a fun element.
- Sparkling Water: A bubbly, citrus-infused sparkling water cleanses the palate between bites, keeping your taste buds refreshed and engaged.
- Chocolate Chip Cookies: For a double chocolate treat, serve warm cookies alongside the pie, inviting everyone to enjoy a sweet dunking experience!
- Whipped Cream: A dollop of freshly whipped cream on the side elevates the dessert’s indulgence, inviting a luxurious touch with every bite.
- Mint Tea: The fresh notes of mint tea provide a soothing finish after the rich dessert, making it a perfect ending to your meal.
- Cheesecake Bites: Small bites of cheesecake mirror the creamy texture of the pie, offering a delightful textural contrast in a serving platter.
- Chocolate Milkshake: For a dreamy pairing, serve a thick chocolate milkshake that echoes the pie’s flavors, both nostalgic and satisfying.
Chocolate Cherry Cream Pie Variations
Feel free to personalize this delightful dessert to suit your taste and dietary needs!
-
Fresh Cherries: Swap fresh cherries for canned cherry filling for a vibrant, homemade touch. They’ll add a burst of freshness that elevates every bite.
-
Dairy-Free Delight: Use a dairy-free cream cheese and whipped topping for an equally rich flavor without any dairy. This option allows everyone to enjoy the pie without compromising on taste.
-
Crunchy Crust: For a delightful twist, consider blending nuts or granola into your crust. This adds a nice crunch and an unexpected texture that complements the creamy layers beautifully.
-
Chocolate Swirls: Drizzle melted dark chocolate over the top before chilling for an added layer of richness. It creates a stunning visual effect and deepens the chocolate flavor.
-
Flavored Cream: Add a splash of vanilla or almond extract to the whipped cream for a transcendent flavor boost. These flavors work harmoniously with the chocolate and cherries!
-
Berry Medley: Mix in some blueberries or raspberries with the cherries for a tantalizing berry trio. This fruit combination introduces new flavors and gives your pie a unique twist.
-
Caramel Layer: Spread a thin layer of caramel sauce between the cherry filling and chocolate mousse for an indulgent sweet and salty contrast. Your taste buds will thank you for this simple upgrade!
For more delicious ideas, consider trying my Luscious Banana Chocolate Plumcake or your own take on a classic Baked Cream Cheese Chicken!
Chocolate Cherry Cream Pie Recipe FAQs
What kind of cherries should I use for the filling?
You can use canned cherry pie filling for convenience, or opt for fresh cherries. If choosing fresh, look for plump, juicy cherries without dark spots or softness. They can be pitted and cooked down with a bit of sugar and cornstarch to create a homemade filling.
How long can I store the Chocolate Cherry Cream Pie in the fridge?
Store your Chocolate Cherry Cream Pie in the refrigerator, covered with plastic wrap, for up to 4 days. This will keep it fresh and tasty, making it perfect for leftovers!
Can I freeze Chocolate Cherry Cream Pie?
It’s not advisable to freeze this pie as the texture of the cream and cherries may change upon thawing, leading to a less desirable dessert experience. However, if you need to, you can freeze it uncut, wrapped tightly in plastic wrap for up to 1 month, and let it thaw in the fridge.
What if the whipped cream doesn’t whip properly?
Make sure your bowl and beaters are clean and free from grease, as any residue can prevent the cream from whipping up correctly. Also, use heavy whipping cream that’s cold for best results. If it still doesn’t hold soft peaks, try adding a tablespoon of powdered sugar to stabilize it as you whip.
Is this dessert suitable for people with dairy allergies?
Absolutely! You can easily make this pie dairy-free by using dairy-free cream cheese and coconut or almond milk in place of regular milk. Additionally, replace heavy cream with a dairy-free whipped topping to keep it deliciously creamy while catering to dietary needs.
Indulgent Chocolate Cherry Cream Pie for Your Sweet Tooth
Ingredients
Equipment
Method
- Prepare the crust by baking a homemade pie crust according to instructions or using a store-bought crust.
- Spread the cherry pie filling evenly over the bottom of the cooled pie crust.
- Mix the softened cream cheese and powdered sugar in a bowl until smooth and creamy.
- Whisk together the instant chocolate pudding mix and cold milk until thickened.
- Fold the thickened chocolate pudding into the cream cheese mixture until just combined.
- Whip 1 cup of heavy whipping cream until soft peaks form.
- Gently fold the whipped cream into the chocolate cream mixture.
- Layer the chocolate cream mixture over the cherry filling in the crust.
- Whip the remaining cup of heavy cream until soft peaks form and spread over the chocolate layer.
- Garnish with maraschino cherries and sprinkle with mini chocolate chips before chilling.
Leave a Reply