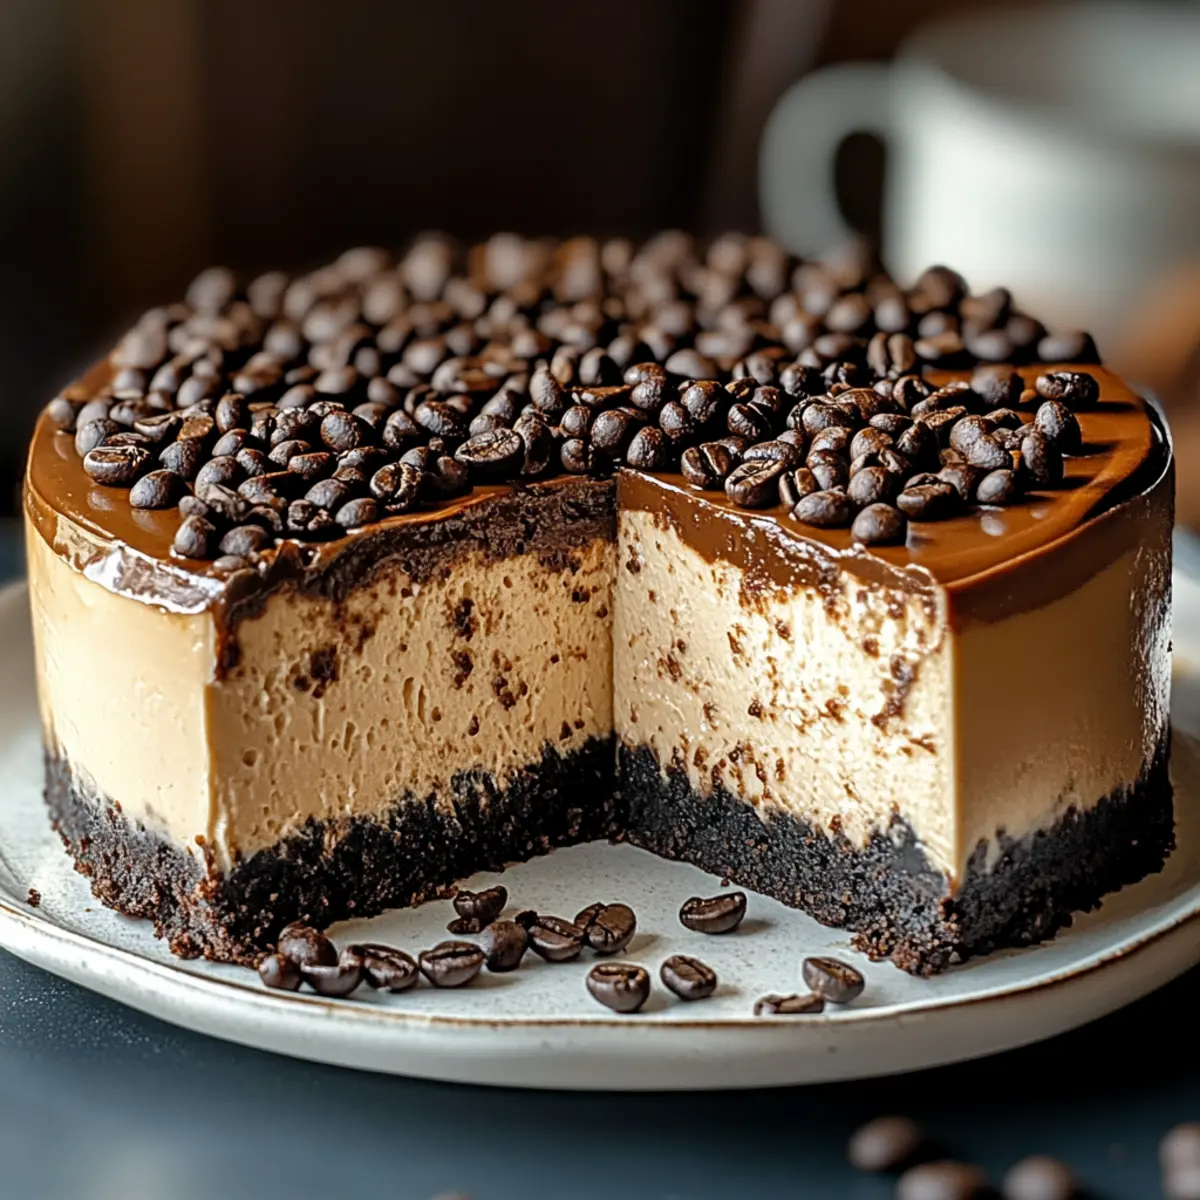
The moment the rich aroma of espresso mingles with a touch of sweetness in a velvety cheesecake, I know I’m in for something special. My Decadent Espresso Cheesecake is a delightful fusion of classic New York-style cheesecake and the bold notes of coffee, creating a dessert that promises both indulgence and satisfaction. What’s more, it’s effortlessly easy to whip up, making it a perfect choice for anyone who wants to impress without spending hours in the kitchen. Whether you’re treating yourself after a long day or hosting friends for a casual gathering, this creamy delight is sure to be a crowd-pleaser. Are you ready to elevate your dessert game with an espresso twist?
Why is this Espresso Cheesecake a must-try?
Incredible Flavor: The bold espresso gives this cheesecake a rich, invigorating taste that coffee lovers will adore.
Easy to Make: Step-by-step instructions ensure you can whip this up without fuss, perfect for any skill level.
Impressive Presentation: Topped with glossy ganache and optional garnishes, it’s stunning enough for gatherings yet cozy for a quiet night.
Versatile Indulgence: Enjoy it plain or explore flavors like a Nutella layer or crushed chocolate cookies for a unique twist.
Crowd-Pleasing Appeal: Whether for a celebration or a simple treat, it’s a dessert that captivates any audience—just like my Strawberry Cheesecake Protein balls! Make this Espresso Cheesecake your next culinary masterpiece, and watch everyone come back for seconds!
Espresso Cheesecake Ingredients
For the Crust
- Graham Cracker Crumbs – Provides structure and flavor for the crust; substitute with gluten-free graham crackers if needed.
- Unsalted Butter – Binds crumbs together and adds richness; remember to melt it for easier mixing.
- Granulated Sugar (Crust) – Sweetens the crust; brown sugar can be used for a deeper flavor.
- Vanilla Extract (Crust) – Enhances the flavor of the crust; vanilla bean paste makes a great alternative.
For the Cheesecake Filling
- Cream Cheese – The creamy base of the filling; ensure it’s softened for smooth blending.
- Granulated Sugar (Filling) – Sweetens the cheesecake and balances flavors; don’t skip this step!
- Vanilla Extract (Filling) – Adds depth to the cheesecake flavor; a dash goes a long way.
- Large Eggs – Helps to set the cheesecake; bring them to room temperature for better mixing.
- Sour Cream – Adds moisture and tanginess, enhancing richness; it’s a game changer.
- Heavy Cream – Contributes to the filling’s smoothness; be generous for a decadent treat.
- Espresso Powder – Infuses the cheesecake with a robust coffee flavor; instant coffee can substitute in a pinch.
- Hot Water – Used to dissolve the espresso powder, enhancing its flavor.
For the Ganache Topping
- Heavy Cream (Ganache) – Creates a luxurious chocolate layer; don’t skip this for that glossy finish.
- Semi-Sweet Chocolate – Forms the ganache and adds richness; feel free to use dark chocolate for a deeper taste.
- Espresso Powder (Ganache) – Enhances the coffee flavor in the topping; it makes all the difference.
- Sugar (Ganache) – Balances the chocolate’s bitterness; adjust to your sweet preference if desired.
Optional Garnishes
- Chocolate Shavings – Beautiful for presentation; they add elegance to your cheesecake.
- Espresso Beans – Use for decoration and an extra coffee kick; fun for coffee enthusiasts!
With these carefully selected Espresso Cheesecake ingredients, you’re on your way to creating a truly irresistible dessert that will leave everyone asking for your secret recipe!
Step‑by‑Step Instructions for Espresso Cheesecake
Step 1: Prepare the Crust
Preheat your oven to 350°F (175°C) and gather a 9-inch springform pan. In a mixing bowl, combine graham cracker crumbs, melted butter, granulated sugar, and vanilla extract until fully blended. Press this mixture into the bottom of the prepared pan, ensuring it’s even. Bake for 10 minutes, or until the crust is lightly golden and fragrant. Allow the crust to cool completely before adding the filling.
Step 2: Make the Cheesecake Filling
Using a stand mixer or hand mixer, beat the softened cream cheese in a large bowl until smooth and creamy. Gradually add granulated sugar and vanilla extract, mixing until well combined. In a separate cup, dissolve espresso powder in hot water, then blend it into the cream cheese mixture. Next, add the eggs one at a time, mixing on low speed to prevent cracking. Finally, incorporate the sour cream and heavy cream until the filling is velvety and smooth.
Step 3: Combine and Bake
Pour the luscious cheesecake filling over the cooled crust. To minimize cracks while baking the Espresso Cheesecake, wrap the springform pan in aluminum foil and place it in a larger baking dish filled halfway with hot water. Bake for 60-70 minutes, checking for doneness when the edges are set but the center remains slightly jiggly. Once ready, turn off the oven, leaving the cheesecake inside to cool for an hour with the door slightly ajar.
Step 4: Chill the Cheesecake
After the hour in the oven, remove the cheesecake and let it cool to room temperature. Once it’s cooled down, cover it with plastic wrap and refrigerate for at least 4 hours, or better, overnight. This chilling process is crucial for setting the cheesecake and enhancing its flavors, ensuring that every bite of your Espresso Cheesecake is perfectly creamy.
Step 5: Prepare Ganache Topping
In a saucepan over low heat, warm the heavy cream until it just begins to simmer. Remove it from heat and pour it over the chopped semi-sweet chocolate in a mixing bowl. Stir until the chocolate is completely melted and the mixture is smooth and glossy. Add the espresso powder and sugar, mixing well to combine. This delicious ganache will add a rich layer to your Espresso Cheesecake.
Step 6: Serve
Once the ganache has cooled slightly, pour it over the chilled cheesecake and spread evenly with a spatula. Return the cheesecake to the refrigerator for at least 30 minutes, allowing the ganache to set. When ready to serve, garnish with chocolate shavings and whole espresso beans for an elegant presentation. Slice and enjoy your decadent Espresso Cheesecake, perfect for any occasion!
Make Ahead Options
These Espresso Cheesecakes are perfect for busy home cooks looking to save time! You can prepare the crust and filling up to 24 hours in advance; simply store the crust in an airtight container and cover the filling tightly with plastic wrap in the refrigerator. To maintain freshness and prevent any browning, ensure that the filling is well-sealed. When you’re ready to finish, pour the filling over the chilled crust and bake as directed. For the ganache, you can also make it ahead and refrigerate it; just rewarm slightly to achieve that smooth texture before pouring it over your cheesecake. This preparation allows you to enjoy a stunning dessert while reducing stress on the day of serving!
What to Serve with Decadent Espresso Cheesecake?
Indulging in a slice of this rich Espresso Cheesecake opens the door to delightful pairing possibilities that elevate your dessert experience.
-
Fresh Berries: Bright, juicy berries like raspberries or strawberries provide a refreshing contrast to the creamy cheesecake, adding a burst of natural sweetness.
-
Whipped Cream: A dollop of light, fluffy whipped cream offers a delicate touch that perfectly balances the dense richness of the cheesecake while enhancing its aesthetic appeal.
-
Coffee or Espresso: For a true coffee lover’s experience, serve your cheesecake alongside a cup of freshly brewed espresso or a smooth cappuccino to amplify the espresso flavor.
-
Chocolate-Covered Espresso Beans: Adding these as a garnish not only enhances visual appeal but also delivers a satisfying crunch and a punch of coffee flavor that complements the cheesecake.
-
Vanilla Ice Cream: The creamy texture of vanilla ice cream with its sweet undertones provides a delightful contrast to the coffee and chocolate notes of the cheesecake—perfect for a comforting finish.
-
Hazelnut Pralines: Crunchy hazelnut pralines add delicious texture and a nutty note that harmonizes beautifully with the espresso-infused cheesecake.
-
Chocolate Sauce Drizzle: Drizzle some rich chocolate sauce over each slice for those who crave an extra dose of decadence, intensifying the dessert’s indulgence.
-
Aged Port Wine: Offering a sweet and rich counterpart, a glass of port adds an elegant touch to this dessert, making it ideal for special occasions or gatherings.
-
Toasted Coconut Flakes: Sprinkling toasted coconut on top adds not just texture, but a tropical flair that complements the creamy coffee flavors beautifully.
These appealing accompaniments enhance the luxurious experience of your Espresso Cheesecake, creating the perfect dessert spread for any occasion.
Espresso Cheesecake Variations
Feel free to get creative and customize your Espresso Cheesecake to suit your taste and dietary needs!
- Instant Coffee: Swap espresso powder for instant coffee for a different coffee flavor that still delivers a delightful coffee kick.
- Nutella Layer: Add a layer of Nutella underneath the ganache for a delicious hazelnut twist. This rich combination makes for an indulgent surprise!
- Crushed Chocolate Cookies: Incorporate crushed chocolate cookies into the crust for an added chocolate flavor that will please any chocoholic.
- Dairy-Free: Use dairy-free cream cheese and coconut cream for the ganache to create a luscious dairy-free dessert. Your dairy-sensitive friends will thank you!
- Flavor Extracts: Experiment with different extracts like almond or hazelnut to enhance the flavors and add a personal touch. A few drops can elevate your cheesecake!
- Spicy Kick: Add a pinch of cayenne pepper or cinnamon to the filling for a surprising spicy twist that complements the espresso perfectly. It’s a bold move, but oh-so-worthy!
- Fruity Touch: Fold in some raspberry or cherry pureé into the cheesecake batter for a fruity burst that beautifully contrasts the rich espresso flavor. Delicious!
- Serving Choices: Consider topping with fresh whipped cream or a scoop of vanilla ice cream for added creaminess. This is the perfect balance for your indulgent treat.
With these variations, every bite of your Espresso Cheesecake can be a new experience! Enjoy customizing it to satisfy your cravings, and if you’re looking for more sweet inspirations, check out my delectable Bake Biscoff Cheesecake or try the delightful Strawberry Cream Cheesecake for a change of pace!
How to Store and Freeze Espresso Cheesecake
Fridge: Store your Espresso Cheesecake in the refrigerator, covered with plastic wrap or in an airtight container, for up to 5 days to maintain its creamy texture and flavor.
Freezer: If you want to make it ahead, freeze your cheesecake without the ganache for up to 1 month. Wrap it tightly in plastic wrap and then in aluminum foil, ensuring it’s well-protected.
Thawing: To enjoy your frozen Espresso Cheesecake, transfer it to the fridge to thaw overnight. If topped with ganache, add the ganache after thawing for the best presentation.
Serving After Storage: After refrigerating, let the cheesecake sit at room temperature for 15-20 minutes before slicing. This will enhance its creamy texture and make it easier to cut.
Expert Tips for Espresso Cheesecake
- Room Temperature Ingredients: Ensure your cream cheese and eggs are at room temperature to achieve a smooth filling without lumps.
- Gentle Mixing: Avoid overmixing the filling once adding eggs; this prevents cracks in your cheesecake while maintaining its creamy texture.
- Water Bath Importance: Always use a water bath when baking your Espresso Cheesecake; it helps regulate temperature for even baking and minimizes the chance of cracking.
- Proper Cooling: Allow the cheesecake to cool in the oven with the door ajar after baking. This gradual cooling helps prevent cracks and improve texture.
- Chill Time: Don’t rush the chilling process! Refrigerating your cheesecake overnight allows flavors to meld and results in a firm, sliceable dessert.
Espresso Cheesecake Recipe FAQs
How do I select the best espresso powder?
When choosing espresso powder, opt for a high-quality brand that has a rich, robust flavor. The powder should be fine and dark; avoid any with clumps or an off-putting smell. Freshness is key, so check the expiration date. I often recommend using freshly ground coffee if you have a grinder, as this will significantly enhance the flavor of your cheesecake.
How do I store leftover Espresso Cheesecake?
To keep your Espresso Cheesecake fresh, cover it tightly with plastic wrap or place it in an airtight container. It can be stored in the refrigerator for up to 5 days without losing its creamy texture. For the best taste, enjoy it within the first few days. If not consumed within those days, I suggest giving it a quick check for any signs of spoilage before indulging.
Can I freeze my Espresso Cheesecake?
Absolutely! To freeze your Espresso Cheesecake, it’s best to do so without the ganache topping. Wrap it tightly in plastic wrap and then in aluminum foil to prevent freezer burn. It can be stored in the freezer for up to 1 month. When you’re ready to enjoy it, simply transfer it to the refrigerator to thaw overnight. After thawing, you can add the ganache for that perfect finish.
What should I do if my cheesecake cracks while baking?
Oh no, cracks can sometimes happen! To avoid this, always make sure to bake your cheesecake in a water bath—this allows for gentle, even baking. If it does crack, don’t fret! You can cover it with the ganache topping which not only enhances the flavor but also masks any imperfections. Just be gentle with your mixing to minimize air bubbles that lead to cracks during baking.
Is it safe for my pets to consume any part of the Espresso Cheesecake?
Generally, it’s best to keep this decadent dessert away from pets. The chocolate ganache contains theobromine, which is toxic to dogs and cats. Additionally, the creamy ingredients may upset their stomachs. If you’re looking for a pet-friendly treat, consider making a batch of plain yogurt drops or frozen fruit treats instead!
How important is chilling time in my cheesecake-making process?
Chilling time is crucial for your Espresso Cheesecake! After baking, allow it to cool to room temperature, then let it chill in the refrigerator for at least 4 hours, or overnight if possible. This time allows the flavors to develop and the filling to set properly. A well-chilled cheesecake slices beautifully and has a delightful, creamy texture that’s truly satisfying!
Irresistible Espresso Cheesecake for Coffee Lovers at Home
Ingredients
Equipment
Method
- Preheat your oven to 350°F (175°C) and gather a 9-inch springform pan. In a mixing bowl, combine graham cracker crumbs, melted butter, granulated sugar, and vanilla extract until blended. Press mixture into the prepared pan, ensuring it's even. Bake for 10 minutes until golden. Allow to cool completely.
- Using a mixer, beat softened cream cheese until smooth. Gradually add granulated sugar and vanilla, mixing until well combined. Dissolve espresso powder in hot water, then blend into cream cheese mixture. Add eggs one at a time, mixing on low. Finally, incorporate sour cream and heavy cream until smooth.
- Pour cheesecake filling over cooled crust. Wrap the springform pan in aluminum foil and place in a larger baking dish with hot water. Bake for 60-70 minutes until edges are set but center remains slightly jiggly. Turn off the oven, leaving the cheesecake inside to cool for an hour.
- After an hour, let the cheesecake cool to room temperature. Cover with plastic wrap and refrigerate for at least 4 hours or overnight.
- In a saucepan over low heat, warm heavy cream until it simmers. Pour it over chopped chocolate in a bowl. Stir until melted and smooth. Add espresso powder and sugar.
- Pour ganache over chilled cheesecake and spread evenly. Refrigerate for at least 30 minutes to set. Garnish with chocolate shavings and espresso beans before serving.
Leave a Reply