As I was preparing for Thanksgiving last year, I stumbled upon a delightful idea that turned my holiday dessert table into a vibrant celebration: Harvest Thanksgiving Cupcakes! These stunning treats encapsulate the spirit of fall, featuring a moist base and topped with swirls of colorful buttercream frosting. Not only are they incredibly easy to make, allowing even the busiest home chefs to join in on the fun, but they also make for a show-stopping centerpiece at any autumn gathering. Imagine serving these beauties—each adorned with rich reds, sunny oranges, and golden yellows—at your next holiday feast. Don’t you think everyone will be eager for a taste of these festive delights?
Why Will You Adore These Cupcakes?
Simplicity at Its Finest: With only a box mix involved, even beginner bakers can whip these up in no time!
Vibrant Celebration: The stunning swirls of buttercream in seasonal colors will amaze your guests and spice up your dessert table.
Perfectly Festive: These cupcakes are tailored for Thanksgiving, making them a must-have for gatherings or to bring along to autumn bake sales.
Crowd-Pleasing Treat: Moist and flavorful, they’re sure to satisfy sweet cravings while impressing everyone with their beautiful presentation—just like our Thanksgiving Caramelcopia Cupcakes.
Versatility: Feel free to switch up the cake mix or frosting colors for different occasions, inspired by our delicious Thanksgiving Mac and Cheese recipe for an extra treat!
Bake Ahead: Prepare a day in advance, allowing flavors to deepen and ensuring a hassle-free experience when it’s time to serve—perfect for busy hosts!
Harvest Thanksgiving Cupcake Ingredients
-
For the Cupcakes
• Chocolate Cake Mix – This provides the essence of your cupcakes with a rich flavor; you can substitute with vanilla cake mix for a different taste.
• Eggs – Essential for binding the ingredients and giving moisture; check your cake mix box for the exact amount needed.
• Water or Milk – Adds moisture to your batter; milk will give a richer flavor.
• Vegetable Oil – Keeps your cupcakes moist and tender; you can use melted butter instead for added flavor. -
For the Buttercream Frosting
• The Best Buttercream Frosting – Creates a creamy, delightful topping that brings joy to every bite; this recipe yields enough for 12 cupcakes, so double if making more.
• Powdered Sugar – Sweetens and thickens the frosting; ensure sifting makes it fluffy.
• Milk or Cream – Adjust the consistency of your frosting; a splash will help it spread easily.
• Vanilla Extract – Adds a lovely flavor to your frosting; feel free to use almond extract for a unique twist. -
For the Decoration
• Wilton Color Right Food Coloring – Tints the frosting into beautiful fall shades; a little goes a long way for vibrant colors.
• Wilton 1M Frosting Tip – Perfect for piping those gorgeous swirls; using different tips can create varied designs.
These Harvest Thanksgiving Cupcakes are so simple to prepare yet so captivating—they’re guaranteed to be the highlight of your autumn festivities!
Step‑by‑Step Instructions for Harvest Thanksgiving Cupcakes
Step 1: Prepare the Cupcake Batter
Preheat your oven to 350°F (175°C). In a large mixing bowl, combine the chocolate cake mix, eggs, water or milk, and vegetable oil according to the package directions. Mix until smooth and well blended, about 2-3 minutes. Pour the batter evenly into cupcake liners placed in a muffin tin, filling each about two-thirds full. Bake for 18-20 minutes, or until a toothpick inserted comes out clean.
Step 2: Cool the Cupcakes
Once baked, remove the muffin tin from the oven and let it cool on the wire rack for about 5 minutes. Carefully transfer the cupcakes from the tin to the rack to cool completely. Allow them to cool at room temperature for at least 30 minutes, ensuring the perfect texture for topping with your creamy buttercream.
Step 3: Make the Buttercream Frosting
While the cupcakes are cooling, whip up your Buttercream Frosting. In a large mixing bowl, beat softened butter until creamy, then gradually add in sifted powdered sugar and a splash of milk or cream. Continue mixing until you achieve a fluffy consistency, about 2-4 minutes. Set aside, ensuring it’s ready for loading into your piping bags.
Step 4: Color the Frosting
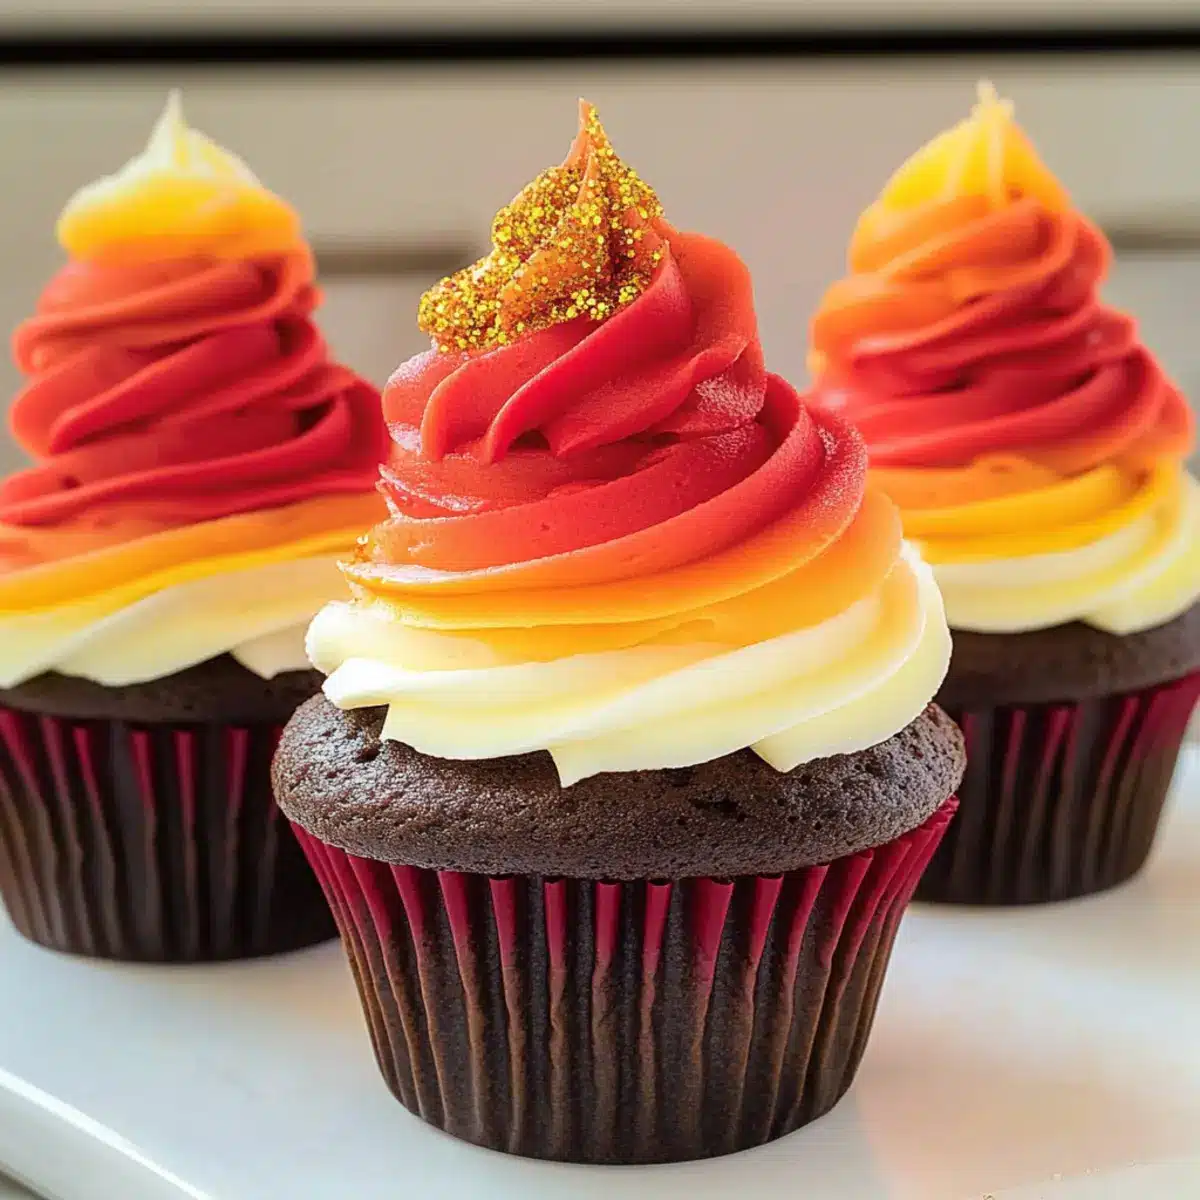
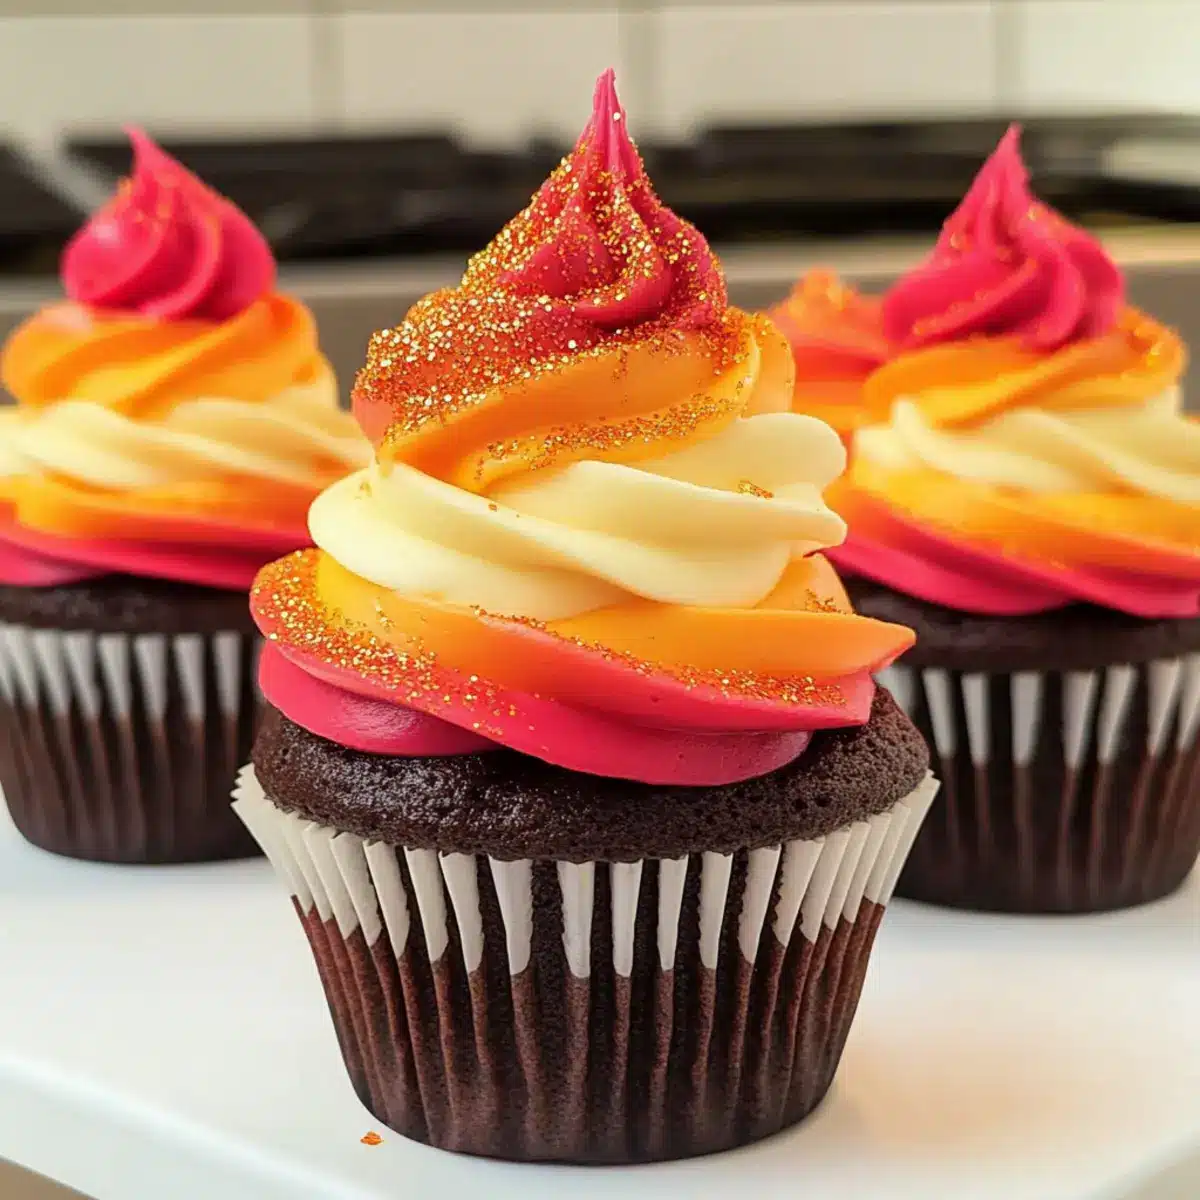
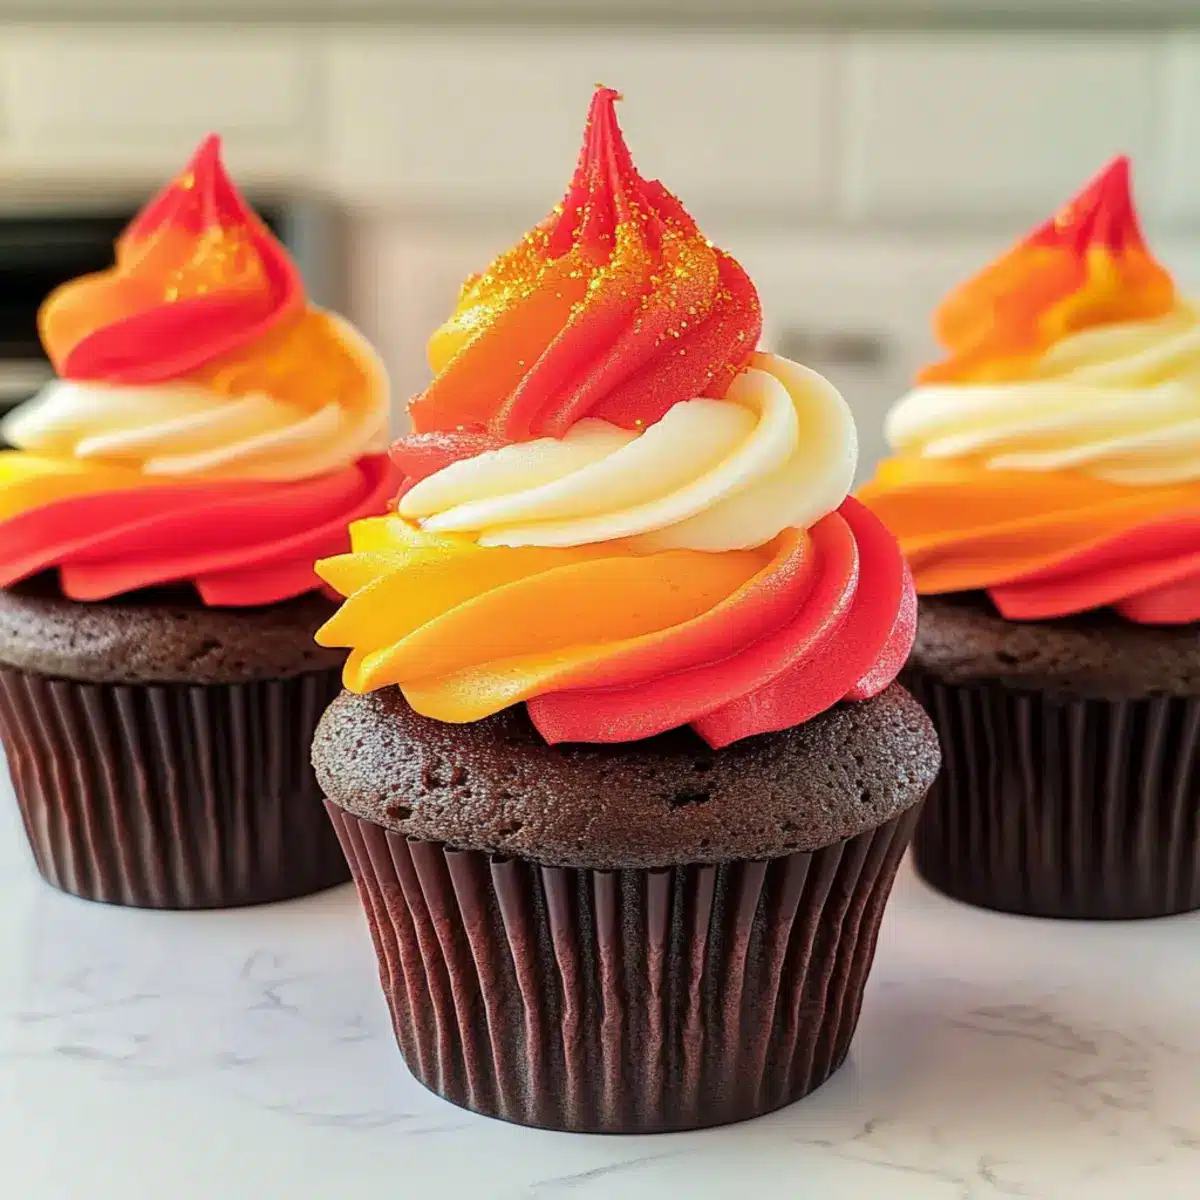
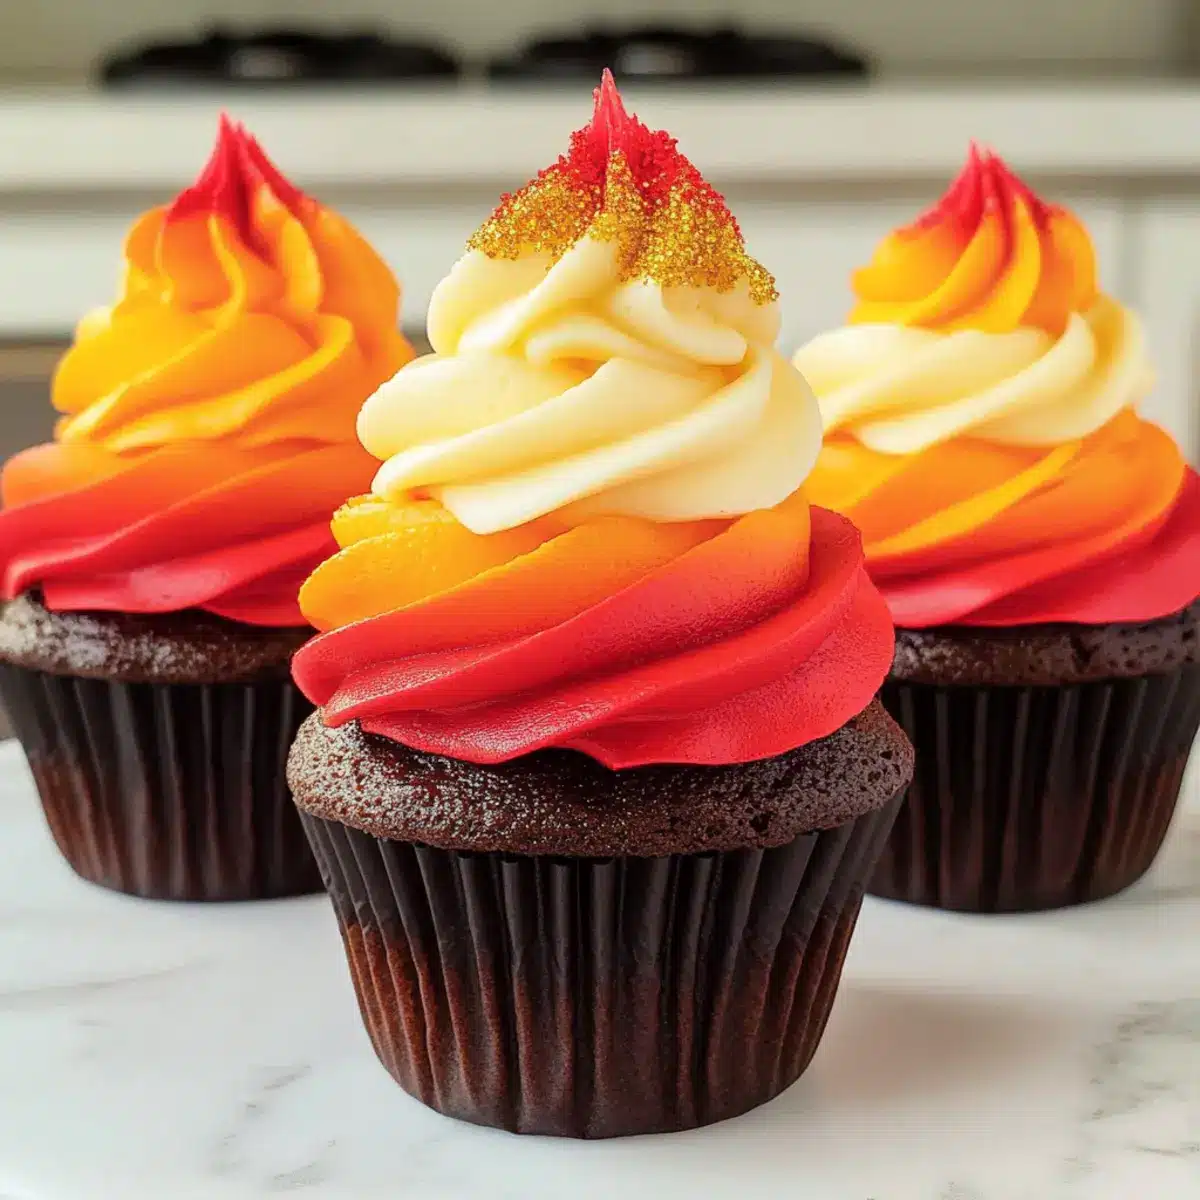
Divide the Buttercream Frosting into four bowls. Using Wilton Color Right Food Coloring, tint each bowl as follows: for red, mix 10 drops of Red and 4 drops of Crimson; for orange, use 6 drops of Orange and 2 drops of Red; for gold, combine 6 drops of Yellow and 1 drop of Orange; and leave one bowl white. Stir each bowl until uniform in color.
Step 5: Load the Piping Bags
Prepare your decorating setup by loading separate piping bags with the tinted frostings. Fit each bag with a Wilton 1M Frosting Tip. Gently twist the bags to secure the frosting inside, making them ready for piping. This organization will help create beautiful layers for your Harvest Thanksgiving Cupcakes.
Step 6: Frost the Cupcakes
Start frosting the cooled cupcakes by piping a swirl of red frosting in the center. Next, without lifting the tip, add a swirl of orange around the red. Continue with a swirl of gold and finish with a swirl of white, creating a festive layered look. Repeat for each cupcake, enjoying the vibrant display of colors as you work.
Step 7: Allow to Set
Once all the Harvest Thanksgiving Cupcakes are frosted, let them sit at room temperature for about 2 hours. This resting time allows the flavors and textures to meld beautifully, ensuring a delightful treat when it’s time to serve. Enjoy the anticipation as you prepare them for your holiday gathering!
Make Ahead Options
These Harvest Thanksgiving Cupcakes are perfect for meal prep enthusiasts! You can prepare the cupcake batter and bake them up to 24 hours in advance, allowing the flavors to deepen. Simply cool the cupcakes completely before wrapping them tightly in plastic wrap and refrigerating. The Best Buttercream Frosting can also be made a day ahead; store it in an airtight container in the fridge to keep it fresh. When it’s time to serve, take the cupcakes out of the refrigerator and let them sit at room temperature for about 30 minutes for optimal taste. Finish by frosting each cupcake just before your guests arrive, ensuring they stay just as delicious as if made the same day!
How to Store and Freeze Harvest Thanksgiving Cupcakes
Room Temperature: Store cupcakes in an airtight container at room temperature for up to 2 days to maintain freshness and flavor.
Fridge: For longer storage, keep the Harvest Thanksgiving Cupcakes in the refrigerator for up to 1 week. Bring them to room temperature before serving for the best experience.
Freezer: Freeze undecorated cupcakes wrapped tightly in plastic wrap and aluminum foil for up to 3 months. Thaw overnight in the refrigerator before frosting.
Reheating: If desired, you can gently warm the cupcakes in the microwave for about 10-15 seconds to refresh their texture before serving.
Expert Tips for Harvest Thanksgiving Cupcakes
- Pre-Bake Planning: Make your cupcakes a day ahead. This allows flavors to develop and ensures a smoother baking day.
- Room Temperature Ingredients: Use room temperature eggs and milk for the batter. This creates a smoother mixture and a better rise in your Harvest Thanksgiving Cupcakes.
- Cooling Space Matters: Leave plenty of space between cupcakes while cooling to prevent moisture accumulation and ensure they cool evenly without becoming soggy.
- Color Consistency: Start with a small amount of food coloring when tinting frosting. You can always add more, but it’s hard to lighten a color that’s too dark!
- Piping Tip Variety: Experiment with different frosting tips for unique designs. The Wilton 1M tip is great, but shape your cupcake style to match your creativity!
Harvest Thanksgiving Cupcakes: Variations & Substitutions
Feel free to get creative with these Harvest Thanksgiving Cupcakes, adding your personal touch to each batch.
-
Gluten-Free: Substitute chocolate cake mix with a gluten-free option. This way, everyone can enjoy these treats without worry!
-
Dairy-Free: Use almond or oat milk instead of regular milk and dairy-free butter for the frosting. It’s a great way to include those with dietary restrictions.
-
Spiced Delight: Incorporate a teaspoon of pumpkin spice into your cupcake batter for an extra burst of autumn flavor. It adds warmth and aroma to each bite!
-
Nutty Crunch: Fold in some chopped pecans or walnuts into the batter for texture. The delightful crunch complements the moist cupcakes beautifully, offering a satisfying contrast.
-
Fruity Frosting: Add pureed strawberries or raspberries to your buttercream frosting for a fruity twist. This not only enhances the flavor but also adds a unique surprise for your palate.
-
Chocolate Delight: Mix chocolate chips into the batter if you’re using vanilla cake mix instead. It’s like a hidden treasure inside your cupcakes!
-
Zesty Upgrade: A splash of orange or lemon zest in the frosting brings a refreshing zing to balance the sweetness. It gives the frosting a delightful brightness that captures the essence of fall.
-
Heat It Up: For a hint of spice, add a pinch of cayenne pepper to your batter. It’s a surprising yet delightful kick that can elevate the flavor experience.
These variations ensure your Harvest Thanksgiving Cupcakes are tailored to suit your needs. They can be a delightful companion to your favorite dishes, just like our creamy Thanksgiving Mac and Cheese!
What to Serve with Harvest Thanksgiving Cupcakes?
Elevate your autumn celebration by pairing these vibrant treats with delicious sides and beverages that complement their festive flavors.
-
Creamy Mashed Potatoes: Their velvety texture and buttery richness provide a satisfying contrast to the sugary cupcakes, enhancing every bite. Think of the comfort they bring; the general warmth of mashed potatoes can set a cozy mood during your gathering.
-
Roasted Brussels Sprouts: The earthy flavor and crispiness of roasted Brussels sprouts add a delightful crunch that balances out the sweetness of the cupcakes, creating a well-rounded meal. Plus, their bold green color adds to the fall aesthetic!
-
Apple Cider: A glass of spiced apple cider resonates with the theme of autumn, offering a warm, comforting drink that matches the flavors of your cupcakes beautifully. It’s the essence of fall in a cup.
-
Butternut Squash Soup: This creamy soup’s hint of sweetness aligns perfectly with the buttercream, making it a perfect starter that warms the soul. Savor each spoonful as you journey into the season’s flavors.
-
Pumpkin Bread: Extend the pumpkin flair with this moist, spiced bread that echoes the flavors of your cupcakes while offering a different texture. It’s wonderfully inviting and sure to please!
-
Cranberry Sauce: A tart cranberry sauce can cut through the sweetness of the cupcakes, providing a refreshing burst of flavor. Its bright hue also brings cheerful color to your dessert table!
-
Maple Pecan Pie: Cap off your meal with this indulgent classic. The rich, nutty flavors and sticky sweetness are an irresistible duo that will delight anyone who loves dessert. It truly captures the spirit of Thanksgiving!
Harvest Thanksgiving Cupcakes Recipe FAQs
How do I select the best chocolate cake mix for my cupcakes?
Absolutely! Look for a chocolate cake mix labeled as “moist” or “rich” to ensure your Harvest Thanksgiving Cupcakes come out fluffy and delicious. Check the expiration date for freshness, and if possible, choose a brand that uses high-quality cocoa for deeper flavor. You can also take a peek at reviews online to gauge which mixes others love!
What’s the best way to store my cupcakes after baking?
Very good question! Store your freshly baked Harvest Thanksgiving Cupcakes in an airtight container at room temperature for up to 2 days. This keeps them moist and flavorful. If you need to store them longer, refrigerate them for up to a week. Just remember to bring them back to room temperature before serving for the best flavor.
Can I freeze my Harvest Thanksgiving Cupcakes?
Absolutely! To freeze your cupcakes, let them cool completely, then wrap each one tightly in plastic wrap followed by aluminum foil. This way, they can maintain their quality for up to 3 months. When you’re ready to serve, simply thaw them overnight in the refrigerator, then frost as desired.
What should I do if my buttercream frosting is too runny?
Not to worry! If you find your buttercream frosting too thin, simply add a bit more sifted powdered sugar, a tablespoon at a time, while mixing until you reach your desired consistency. Keep mixing for about 2-4 minutes until your frosting thickens up nicely. If it’s too thick, you can add a splash of milk or cream to loosen it up—just make sure to mix well!
Are there any dietary considerations I should keep in mind for my guests?
Definitely! When making Harvest Thanksgiving Cupcakes, always check for common allergens in your ingredients, such as eggs, dairy, or gluten. For guests who may have dietary restrictions, consider using an egg replacement or dairy-free milk, and opt for gluten-free cake mix if needed. This way, everyone can join in on the festive treat!
How do I achieve the best results when coloring my frosting?
To get those vibrant, fall-inspired hues in your frosting, start with just a few drops of food coloring and mix thoroughly. It’s much easier to deepen the color than to lighten it later! I often recommend using a toothpick to add small amounts at a time for better control. Enjoy experimenting with different combinations to create your perfect shades!
Harvest Thanksgiving Cupcakes to Ignite Your Fall Celebrations
Ingredients
Equipment
Method
- Preheat your oven to 350°F (175°C). In a large mixing bowl, combine the chocolate cake mix, eggs, water or milk, and vegetable oil according to the package directions. Mix until smooth and well blended, about 2-3 minutes.
- Pour the batter evenly into cupcake liners placed in a muffin tin, filling each about two-thirds full. Bake for 18-20 minutes, or until a toothpick inserted comes out clean.
- Once baked, remove the muffin tin from the oven and let it cool on a wire rack for about 5 minutes. Carefully transfer the cupcakes from the tin to the rack to cool completely.
- While the cupcakes are cooling, whip up your Buttercream Frosting. In a large mixing bowl, beat softened butter until creamy, then gradually add in sifted powdered sugar and a splash of milk or cream. Continue mixing until you achieve a fluffy consistency, about 2-4 minutes.
- Divide the Buttercream Frosting into four bowls. Using Wilton Color Right Food Coloring, tint each bowl in desired fall colors: combine red with 10 drops of Red and 4 drops of Crimson, orange with 6 drops of Orange and 2 drops of Red, and gold with 6 drops of Yellow and 1 drop of Orange; leave one bowl white.
- Prepare your decorating setup by loading separate piping bags with the tinted frostings. Fit each bag with a Wilton 1M Frosting Tip and twist to secure the frosting inside.
- Frost the cooled cupcakes by piping a swirl of red frosting in the center. Add a swirl of orange around the red, followed by gold, and finish with a swirl of white.
- Let the frosted cupcakes sit at room temperature for about 2 hours before serving.
Leave a Reply