The moment I turned the oven on, the sweet earthy aroma of chocolate began to fill my kitchen, wrapping me in warmth and nostalgia. These Irresistibly Decadent Chocolate Tiramisu Cupcakes bring together the best of both worlds—rich tiramisu flavors blended into fluffy cupcake form. What I love is that they’re not only quick to whip up in under 30 minutes but also easily customizable to be gluten-free, ensuring everyone can enjoy them without missing out. Whether you’re celebrating a special occasion or simply need a delectable pick-me-up, these cupcakes promise to elevate any day. Ready to discover just how delightful indulgence can be in a little cupcake? Let’s dive in!

Why Are These Cupcakes So Irresistible?
Decadent Delight: Each bite offers a luxurious blend of chocolate and espresso flavors that will leave you craving more.
Quick to Prepare: Whip these up in under 30 minutes, making them a perfect option for unexpected guests or last-minute celebrations.
Customizable Options: Easily adapt this recipe to be gluten-free or use dairy-free substitutes like almond milk and flax eggs, catering to various diets.
Crowd-Pleasing Treat: With their rich flavors and gorgeous presentation, these cupcakes are sure to impress at any gathering, similar to my Mint Chocolate Brownies.
Perfect Pairing: Serve with a warm cup of espresso or a scoop of vanilla ice cream to truly enhance the dessert experience!
Irresistibly Decadent Chocolate Tiramisu Cupcakes Ingredients
For the Cupcake Batter
- All-Purpose Flour – Provides structure; substitute with gluten-free all-purpose blend for gluten-free versions.
- Cocoa Powder – Adds rich chocolate flavor; dark cocoa can enhance the intensity.
- Baking Powder – Acts as a leavening agent for fluffy cupcakes; ensure freshness for the best results.
- Granulated Sugar – Sweetens the cupcakes; coconut sugar can be an alternative for a deeper flavor.
- Eggs – Binds the ingredients and adds moisture; use flax eggs for a plant-based option.
- Milk – Brings moisture to the batter; almond milk serves as a dairy-free substitute.
- Vegetable Oil – Keeps cupcakes moist; melted butter can work as an alternative.
- Espresso – Infuses coffee flavor; instant coffee is a convenient substitute for ease.
For the Creamy Filling
- Mascarpone Cheese – Creates a rich, creamy filling; ricotta can be used for a lighter option.
- Cocoa Powder (for Dusting) – Adds a bittersweet finish that balances the sweetness; perfect for that classic tiramisu touch.
These Irresistibly Decadent Chocolate Tiramisu Cupcakes are ready to become a family favorite!
Step‑by‑Step Instructions for Irresistibly Decadent Chocolate Tiramisu Cupcakes You’ll Love
Step 1: Preheat the Oven and Prepare the Muffin Tin
Start by preheating your oven to 350°F (175°C). While the oven warms up, line a muffin tin with cupcake liners to make for easy removal and a neat presentation. This simple step ensures that your Irresistibly Decadent Chocolate Tiramisu Cupcakes come out perfectly moist and easy to serve.
Step 2: Combine the Dry Ingredients
In a large mixing bowl, whisk together 1 cup of all-purpose flour, 1/2 cup of cocoa powder, 1 teaspoon of baking powder, and 1 cup of granulated sugar. Mix until well combined and the dry ingredients are evenly distributed, which will help create a light, fluffy texture in your cupcakes. Set this bowl aside and prepare for the wet ingredients.
Step 3: Mix the Wet Ingredients
In another bowl, whisk together 2 large eggs, 1/2 cup of milk, and 1/4 cup of vegetable oil until smooth and well blended. This mixture should look creamy and slightly frothy, indicating that it’s ready to combine with the dry ingredients. The moisture from these ingredients will help ensure your cupcakes stay tender and delectable.
Step 4: Combine Wet and Dry Mixtures
Gently pour the wet mixture into the bowl of dry ingredients, stirring with a spatula until just combined. Be careful not to overmix; a few lumps are perfectly fine to maintain the airiness of your batter. Your cupcake batter should be rich and silky, promising rich flavors in your Irresistibly Decadent Chocolate Tiramisu Cupcakes.
Step 5: Fill the Cupcake Liners and Bake
Using a scoop or spoon, fill each cupcake liner about two-thirds full with batter. This allows space for rising while baking. Place the muffin tin in the preheated oven and bake for 18-20 minutes. Check for doneness by inserting a toothpick into the center of a cupcake—if it comes out clean, they’re ready!
Step 6: Prepare the Creamy Filling
While your cupcakes are baking, whip together 1 cup of mascarpone cheese and 1 shot of espresso in a separate bowl until light and fluffy. This luscious filling adds the classic tiramisu flavor you crave. If you prefer a lighter option, ricotta works beautifully as a substitute for the creamy filling.
Step 7: Assemble the Cupcakes
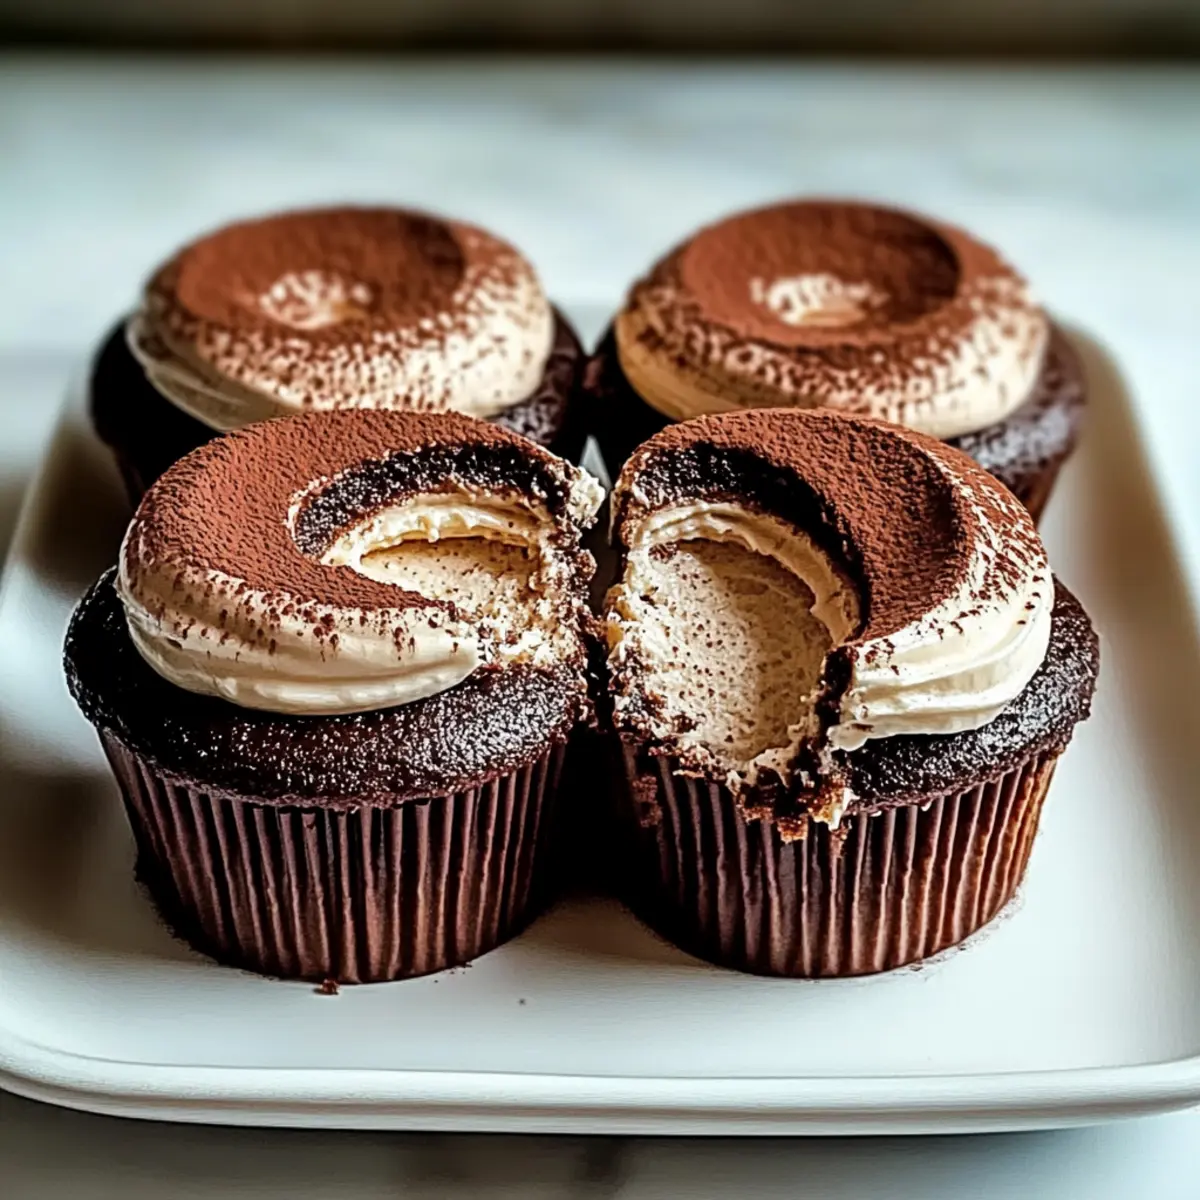
Once the cupcakes are cool, carefully cut off the tops with a serrated knife to create a small dome and scoop out the centers. Fill each cooled cupcake with the espresso mascarpone, using a piping bag for precision, or simply spoon the filling into the holes. This step ensures that every bite is a delightful surprise of flavors.
Step 8: Dust with Cocoa Powder and Serve
To finish, dust the tops of each cupcake with cocoa powder for a touch of elegance and added richness. This step not only enhances the appearance but also complements the sweetness of the filling. Present your Irresistibly Decadent Chocolate Tiramisu Cupcakes on a lovely platter, ready to impress your family and friends!

Expert Tips for Irresistibly Decadent Chocolate Tiramisu Cupcakes
-
Accurate Measurements: Ensure precise ingredient measurements; this prevents dry or overly wet cupcakes that can ruin your indulgent experience.
-
Mix with Care: Avoid overmixing the batter; a few lumps are okay. This helps maintain the light, fluffy texture that makes your cupcakes irresistible.
-
Cooling Time: Allow cupcakes to cool completely before adding the creamy filling to prevent it from melting and losing its delightful texture.
-
Storage Guidance: Keep cupcakes in an airtight container in the fridge for up to three days to maintain their moistness and flavor.
-
Flavor Exploration: Don’t hesitate to experiment with flavored liqueurs in the filling; this can elevate the taste of your cupcakes for a unique twist everyone will love.
Variations & Substitutions for Chocolate Tiramisu Cupcakes
Feel free to add your unique twist to these cupcakes, catering to various tastes and dietary needs!
-
Gluten-Free: Substitute the all-purpose flour with a gluten-free all-purpose blend to enjoy the same delightful taste without the gluten.
Create a seamless transition without missing out on flavor or texture, making these cupcakes accessible to all! -
Dairy-Free: Use almond milk instead of regular milk and swap mascarpone with a dairy-free cream cheese for a delectable dairy-free option.
Incorporating these substitutes ensures everyone at the table can savor the deliciousness. -
Low Sugar: Replace granulated sugar with coconut sugar or a sugar substitute for a healthier version without sacrificing sweetness.
This tweak will still yield delightful flavors while catering to health-conscious friends or family. -
Vegan: Opt for flax eggs as a binding agent and include plant-based milk and cream cheese to give these cupcakes a vegan makeover.
You’ll be amazed at how satisfying and rich these cupcakes can be, keeping all the indulgence intact! -
Chocolate Boost: Enhance the chocolate flavor by using dark cocoa powder instead of regular cocoa for a deeper, more intense experience.
This simple swap adds an extra level of richness that all chocolate lovers will adore! -
Frosting Instead of Filling: Swap the creamy filling for a rich chocolate ganache on top for a different yet scrumptious take on these cupcakes.
Imagine diving into blissfully smooth and velvety sweet chocolate, bringing decadence to a whole new level. -
Flavorful Liqueurs: Infuse the filling with flavored liqueurs like amaretto or coffee liqueur for a unique, adult-friendly twist.
This addition will elevate your cupcakes, making them perfect for special occasions or when you just want to impress!
Explore all these variations while enjoying your Tiramisu Christmas Cookies, or feel free to pair these cupcakes with my sumptuous Luscious Banana Chocolate for an unforgettable dessert spread!
What to Serve with Indulgent Gluten-Free Chocolate Tiramisu Cupcakes
Elevate your dessert experience with delightful pairings that complement the rich flavors of these charming cupcakes.
-
Rich Vanilla Ice Cream: The creamy sweetness contrasts beautifully with the deep coffee and chocolate of the cupcakes, creating a harmonious balance. Scoop some on the side for a delectable and refreshing treat.
-
Fresh Berries: Strawberries or raspberries add a burst of freshness, cutting through the richness of the chocolate and enhancing the overall flavor profile. Their vibrant color also creates an appealing presentation.
-
Warm Espresso Shot: A classic pairing, the robust flavor of espresso will amplify the coffee essence within the cupcakes, making every bite more satisfying. Enjoy it alongside for a truly indulgent coffee experience.
-
Chocolate Ganache Drizzle: For those craving an extra layer of decadence, a drizzle of chocolate ganache over the top of the cupcakes adds elegance while deepening the chocolate experience. This indulgence is perfect for special occasions.
-
Whipped Cream: A dollop of light, airy whipped cream can offset the richness of the mascarpone filling, introducing a delightful texture contrast. Consider adding a hint of vanilla for an extra touch of flavor.
-
Nutty Biscotti: Serve alongside crunchy biscotti for a delightful texture variety. The nutty undertones mingle perfectly with the coffee flavors in the cupcakes, making for a wonderful pairing.
-
Decadent Chocolate Sauce: For the ultimate chocolate lover, a side of warm chocolate sauce allows you to dip or drizzle, amplifying the rich flavors of your cupcakes.
Each of these accompaniments amplifies the irresistible deliciousness of your Indulgent Gluten-Free Chocolate Tiramisu Cupcakes, ensuring a memorable dessert experience!
Make Ahead Options
These Irresistibly Decadent Chocolate Tiramisu Cupcakes are a fantastic treat for busy home cooks looking to save time! You can bake the cupcakes up to 24 hours in advance, allowing them to cool completely before storing them in an airtight container at room temperature. Moreover, the mascarpone filling can be prepared and refrigerated for up to 3 days, ensuring the flavors meld beautifully. Just remember to bring the filling back to room temperature before filling the cupcakes to maintain that creamy texture. When you’re ready to serve, simply fill the cooled cupcakes with the espresso mascarpone and dust with cocoa powder for an indulgent dessert that’s just as delicious as when freshly made!
How to Store and Freeze Irresistibly Decadent Chocolate Tiramisu Cupcakes
Fridge: Store the cupcakes in an airtight container for up to 3 days to keep them moist and flavorful.
Freezer: If you want to enjoy them later, freeze the cupcakes (without filling) for up to 3 months. Wrap each one individually in plastic wrap and then place them in a freezer-safe bag.
Filling Storage: The espresso mascarpone filling can be prepared in advance and stored in the fridge for up to 3 days. Bring it to room temperature before using to fill the cupcakes.
Reheating: If desired, warm the filled cupcakes in the microwave for about 10-15 seconds for a delightful, decadently soft treat whenever the craving strikes!

Irresistibly Decadent Chocolate Tiramisu Cupcakes Recipe FAQs
What type of flour can I use for gluten-free cupcakes?
Absolutely! To make your cupcakes gluten-free, I recommend substituting all-purpose flour with a gluten-free all-purpose blend. Make sure to pick one that contains xanthan gum, as it helps mimic the structure of regular flour.
How should I store the cupcakes to keep them fresh?
Store your Irresistibly Decadent Chocolate Tiramisu Cupcakes in an airtight container in the fridge for up to three days. This will keep them moist and flavorful. Remember to let them cool completely before sealing them up!
Can I freeze these cupcakes? If so, how?
Yes! You can freeze the cupcakes without filling for up to three months. Individually wrap each cupcake in plastic wrap, then place them in a freezer-safe bag. To enjoy, let them thaw at room temperature or warm them in the microwave for about 10-15 seconds.
What’s the best way to prevent the cupcakes from becoming too dry?
Ensure you’re measuring your ingredients accurately. Overmixing the batter can also create a dry texture, so mix just until combined! Additionally, allow the cupcakes to cool before adding the filling to keep them moist and tender.
Are there any common allergens to be aware of in this recipe?
Yes, the recipe contains eggs, dairy (mascarpone and milk), and gluten (unless using a gluten-free flour substitute). If you have allergies, you can use flax eggs instead of traditional eggs, almond milk as a dairy-free alternative, and make the filling with ricotta for a lighter option. Always double-check ingredient labels if cooking for someone with allergies.
How far in advance can I prepare the filling?
You can prepare the espresso mascarpone filling up to three days in advance. Store it in the fridge in an airtight container. Just remember to bring it back to room temperature before filling your cupcakes for the best flavor and texture!
Irresistibly Decadent Chocolate Tiramisu Cupcakes You’ll Love
Ingredients
Equipment
Method
- Preheat your oven to 350°F (175°C) and line a muffin tin with cupcake liners.
- In a large mixing bowl, whisk together all-purpose flour, cocoa powder, baking powder, and granulated sugar.
- In another bowl, whisk together eggs, milk, and vegetable oil until smooth.
- Pour the wet mixture into the bowl of dry ingredients, stirring until just combined.
- Fill each cupcake liner about two-thirds full with batter and bake for 18-20 minutes.
- Whip together mascarpone cheese and espresso until light and fluffy.
- Once the cupcakes are cool, cut off the tops and scoop out the centers.
- Fill each cupcake with the espresso mascarpone and dust with cocoa powder before serving.
Leave a Reply