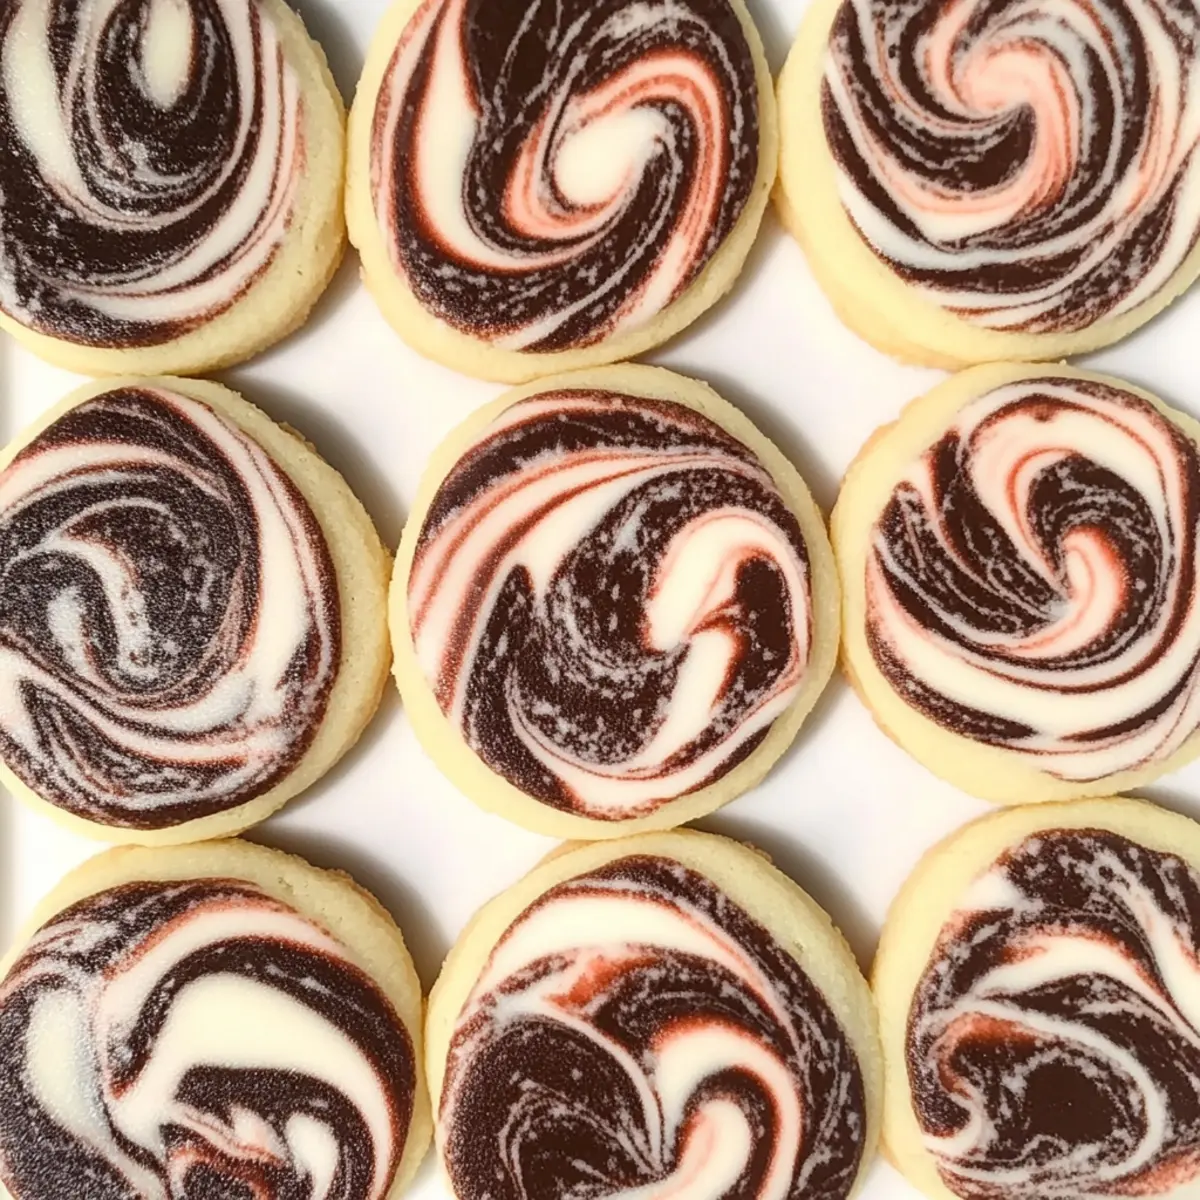
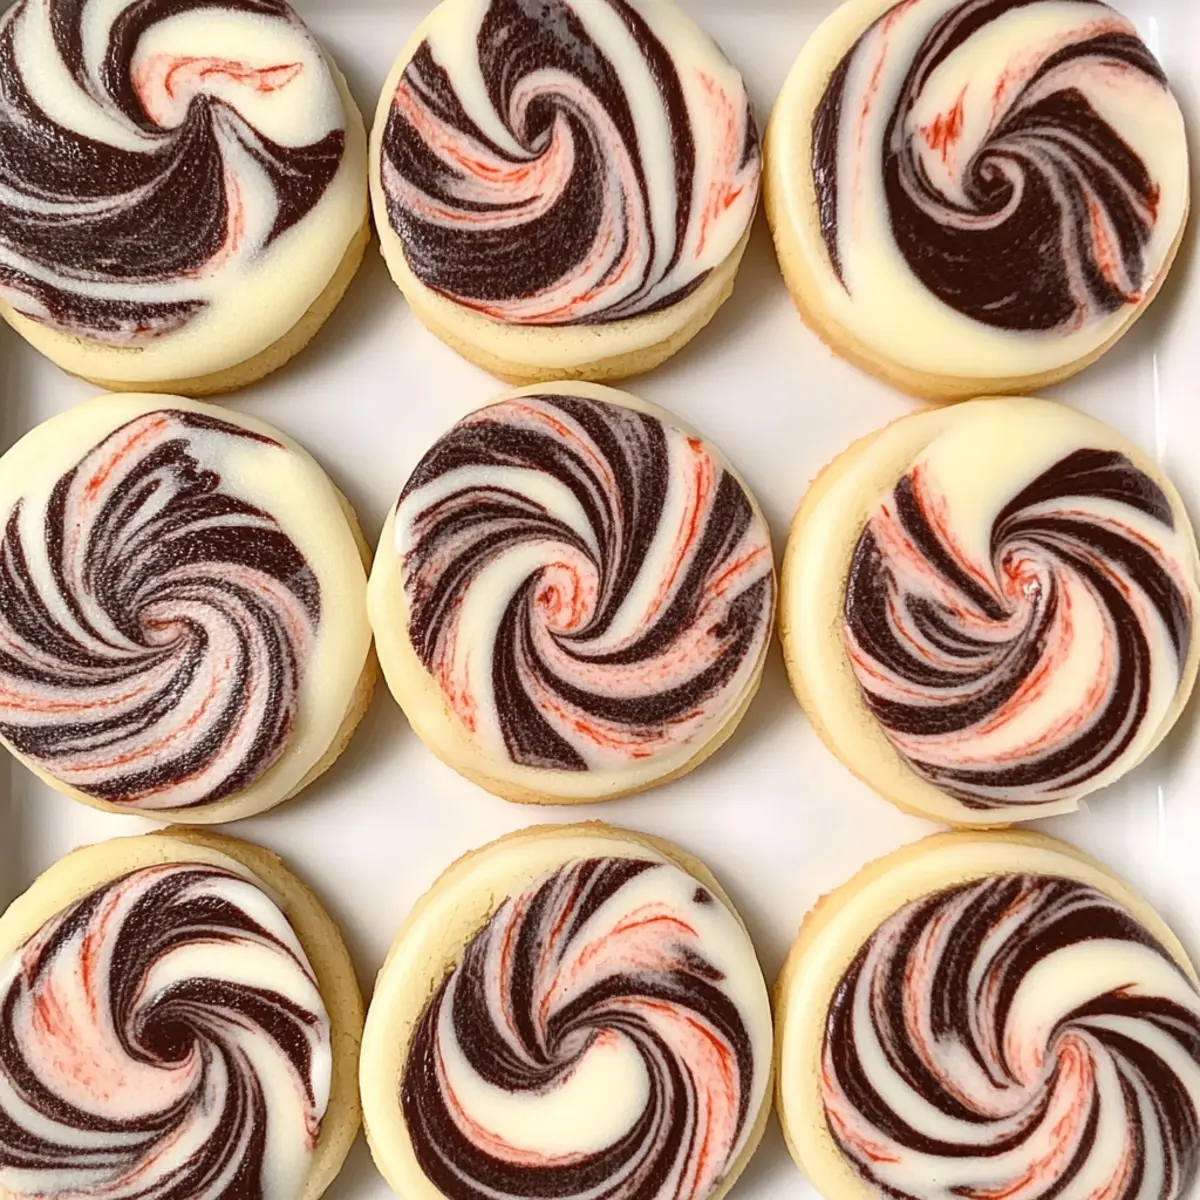
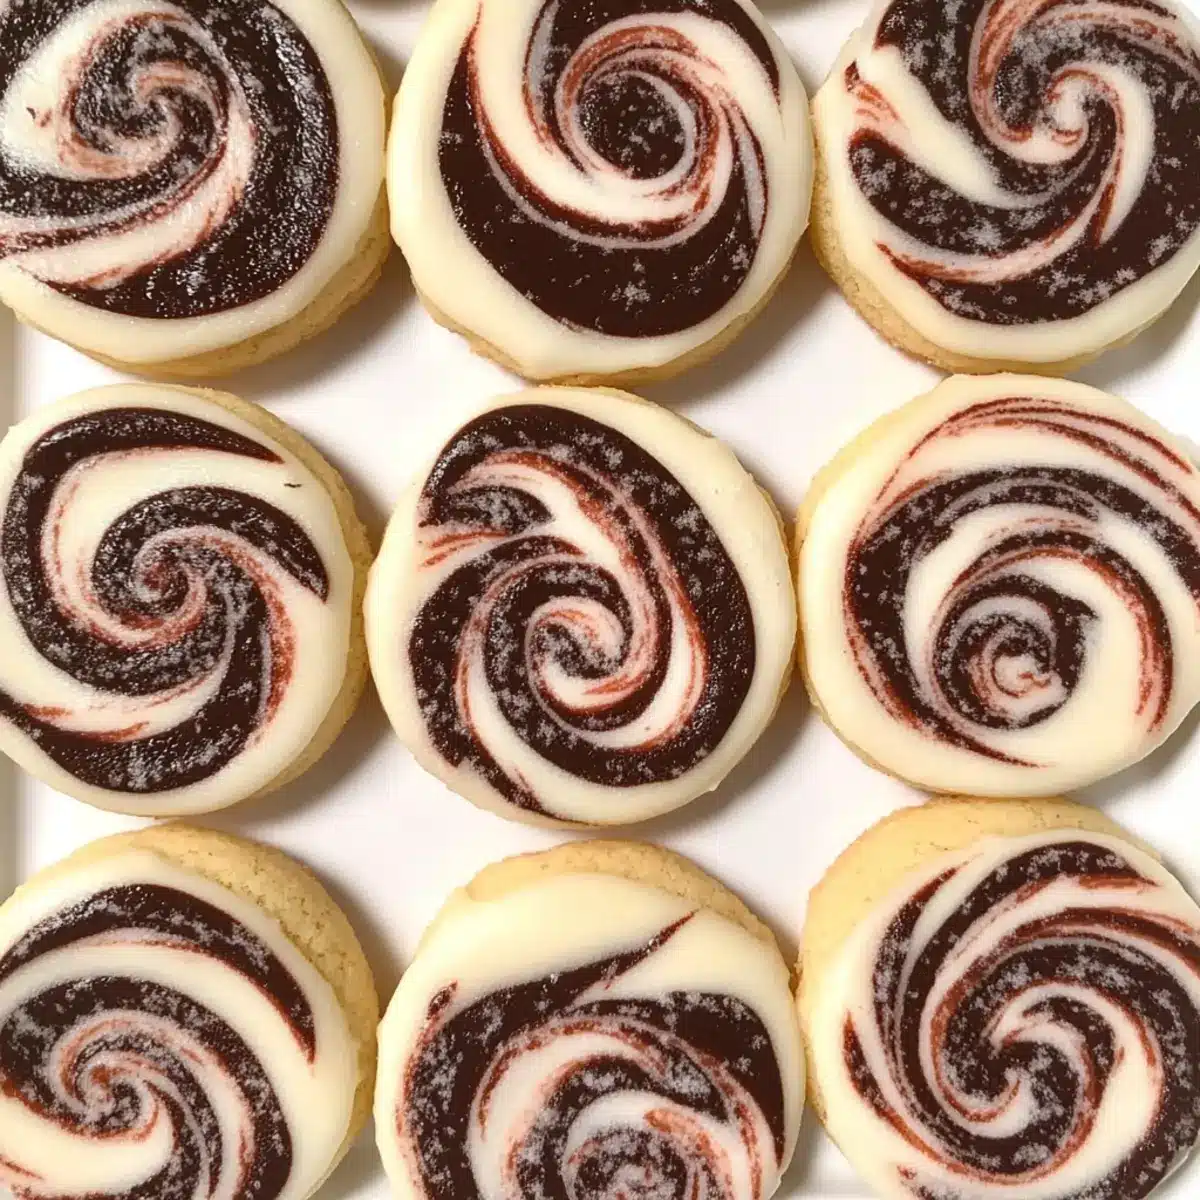
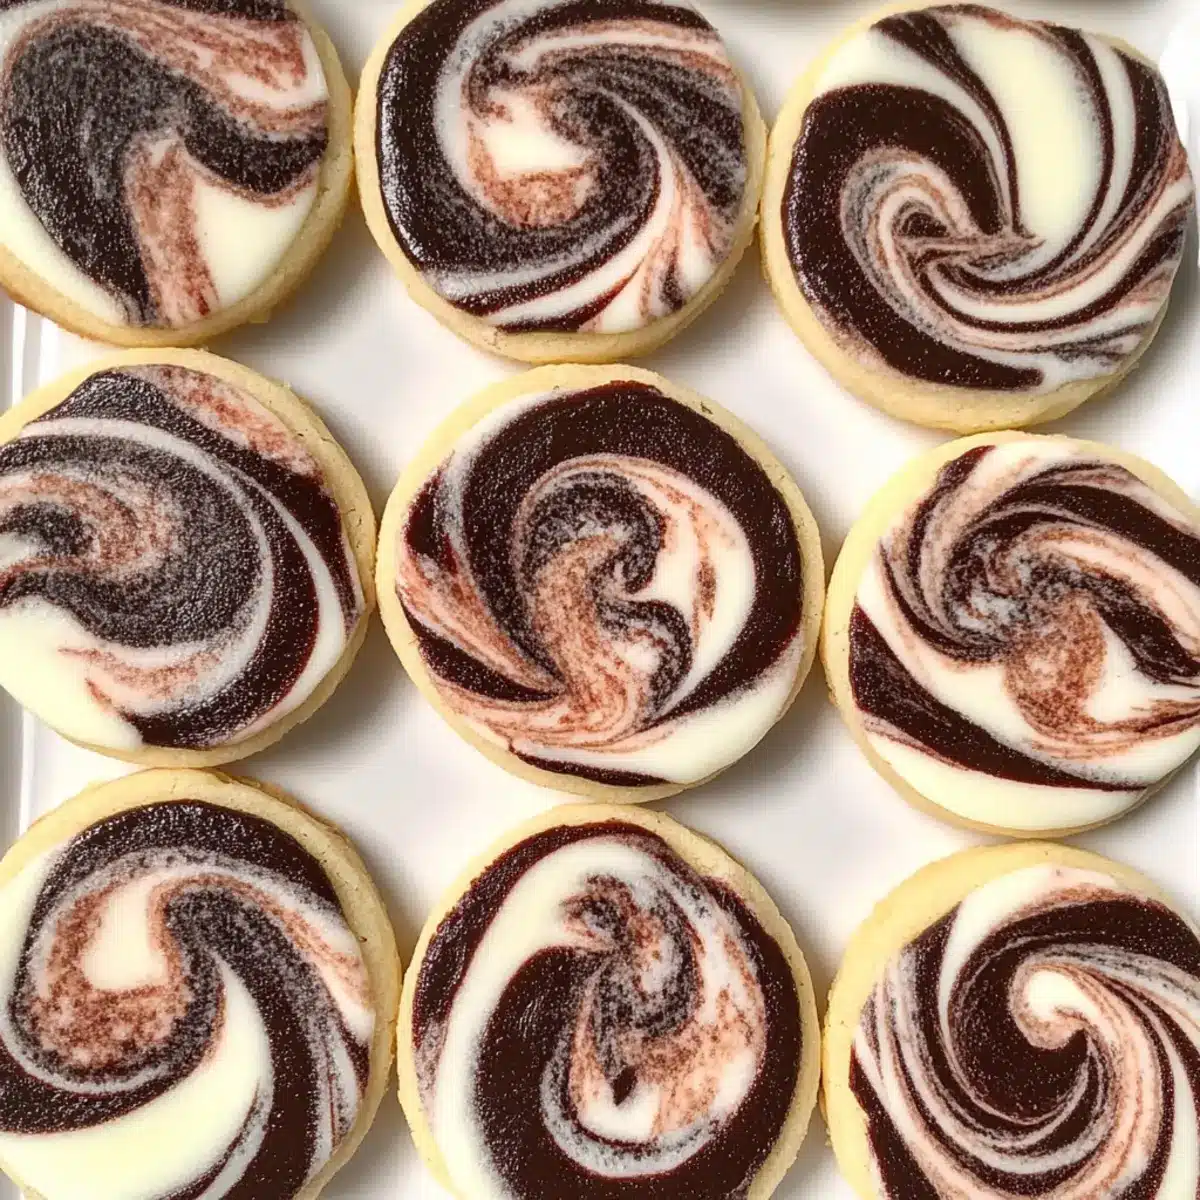
As the holidays approach, the aroma of baked goods wafts through the air, stirring memories of joy and laughter. Enter my Chocolate Peppermint Marble Cookies: A Holiday Delight, designed to brighten any festive gathering. These delectable cookies aren’t just a feast for the eyes with their whimsical swirl, but they also deliver a melt-in-your-mouth experience drenched in rich chocolate and invigorating peppermint. Best of all, they are incredibly easy to whip up and can be prepped ahead of time, making them a perfect addition to your cookie platter. You can even stash them in the freezer for spontaneous cravings or unexpected guests! Ready to sprinkle some holiday magic into your kitchen? Let’s dive into the recipe!
Why Are These Cookies a Holiday Hit?
**Irresistible *Visual Appeal:* The stunning marbled design of these cookies will surely catch the eye of holiday guests, making them an instant centerpiece.
**Easy *Preparation:* With simple ingredients and straightforward instructions, even beginner bakers can shine! These cookies come together quickly, saving you precious time during the busy holiday season.
**Flavor *Combination:* The delightful pairing of rich chocolate and refreshing peppermint creates a festive flavor explosion that everyone will love.
**Make-Ahead *Convenience:* Prep and chill the dough in advance, allowing you to bake fresh cookies anytime. They can also be frozen for those last-minute gatherings!
Crowd-Pleasing Treat:** Perfectly pair these cookies with a warm cup of hot chocolate or Christmas Mini Cookies, making them an ideal addition to any celebration.
Chocolate Peppermint Marble Cookies Ingredients
For the Dough
• Salted Butter – Adds richness and moisture; unsalted butter can be used with a pinch of salt.
• Powdered Sugar – Provides sweetness and a soft texture; granulated sugar is a substitute but may change the texture.
• Vanilla Extract – Enhances the overall flavor; opt for high-quality extract for the best experience.
• All-Purpose Flour – Gives structure to the cookies; can use gluten-free flour, but expect a texture change.
• Peppermint Extract – Delivers that festive minty flavor; consider halving the quantity for a milder taste.
• Cocoa Powder – Introduces rich chocolate flavor; Dutch-processed cocoa offers a deeper taste.
Optional Add-ins
• Mint Chocolate Chips – For an extra burst of sweetness; ideal for a more indulgent cookie experience.
• Chopped Nuts – Walnuts or pecans add a delightful crunch, balancing the softness of the cookie.
Dive into this exciting journey of flavors and textures with these Chocolate Peppermint Marble Cookies that melt in your mouth!
Step‑by‑Step Instructions for Marble Cookies that Melt in Your Mouth: A Holiday Delight
Step 1: Prepare Doughs
In a stand mixer, combine 18 tablespoons of softened salted butter and ¾ cup of powdered sugar. Beat together until the mixture is fluffy and light, about 2-3 minutes. Gradually blend in 2¼ cups of all-purpose flour until just combined. Divide the dough into two parts, mixing ¾ teaspoon of peppermint extract into one half and 2 tablespoons of cocoa powder into the other, creating the chocolate and peppermint flavors.
Step 2: Chill Doughs
Shape each dough into a disk, wrap tightly in plastic wrap, and refrigerate for at least 30 minutes. This chilling step is crucial as it allows the doughs to firm up, making them easier to roll out later and ensuring that the Marble Cookies that Melt in Your Mouth hold their shape during baking.
Step 3: Roll Out
After chilling, place each dough between two sheets of parchment paper. Roll out both the chocolate and vanilla doughs to about 9×12 inches, ensuring the chocolate dough is slightly thinner and easier to break apart. This rolling helps create the perfect swirls and brings together the delightful flavors for your holiday treat.
Step 4: Create Marble Effect
Tear the rolled chocolate dough into smaller pieces and scatter them evenly over the vanilla dough. Gently fold the vanilla dough together with the chocolate pieces, creating a beautiful marbled effect without fully blending them, as this will enhance the appearance and flavor of the Marble Cookies that Melt in Your Mouth. Wrap the marbled dough and return it to the fridge for another 30 minutes.
Step 5: Bake
Preheat your oven to 350°F (175°C). Once the dough is chilled, slice it into ¼-inch rounds using a sharp knife or cookie cutter. Place the rounds on a parchment-lined baking sheet, leaving space between each cookie. Bake for 16-20 minutes until the edges are lightly golden, keeping a close eye to avoid over-baking, which could strip the cookies of their melt-in-your-mouth quality.
Step 6: Cool
Allow the freshly baked Marble Cookies to cool on the baking sheet for 5 minutes. This step helps them firm up slightly. After this, carefully transfer them to a wire rack to cool completely, allowing the cookies to maintain their soft texture and ensuring they are at their best for serving during your holiday festivities.
Expert Tips for Marble Cookies
-
Softened Butter: Always start with softened butter to achieve that perfect creamy texture. Cold butter can lead to dense cookies.
-
Gentle Marbling: Handle the dough gently while creating the marble effect to avoid toughness in your Marble Cookies. You want soft and tender bites!
-
Chill, Chill, Chill: Don’t skip the chilling steps. Chilling the dough not only makes it easier to roll but also helps the cookies maintain their shape while baking.
-
Quality Counts: Use high-quality cocoa powder and extracts. They make a significant difference in the flavor of your cookies, enhancing that rich chocolate and refreshing peppermint taste.
-
Oven Watch: Keep a close eye on your cookies in the oven. Since every oven is different, check for doneness around the 16-minute mark to avoid over-baking.
-
Creative Variations: Feel free to experiment! Add nuts or swap in different extracts to create your perfect Marble Cookies that melt in your mouth!
Make Ahead Options
These Chocolate Peppermint Marble Cookies are perfect for busy home cooks looking to save time during the holidays! You can prepare the dough up to 24 hours in advance and refrigerate it wrapped tightly in plastic wrap. Alternatively, roll and shape the cookies, then freeze them for up to three months—this way, you can bake fresh cookies anytime. Just slice the chilled or frozen dough into rounds and bake directly from the fridge or freezer, adding a minute or two to the baking time as needed. To maintain that melt-in-your-mouth quality, be sure to allow the cookies to cool completely on a wire rack before serving. Enjoy warm, freshly baked treats with minimal effort during your festive celebrations!
How to Store and Freeze Marble Cookies
Room Temperature: Store your Marble Cookies in an airtight container at room temperature for up to 1 week to keep them soft and fresh.
Fridge: If you prefer a longer shelf life, these cookies can be refrigerated for up to 10 days in an airtight container, ensuring they stay delicious and moist.
Freezer: For longer storage, wrap each cookie individually in plastic wrap, then place them in a freezer-safe bag or container. They can be frozen for up to 3 months, perfect for unexpected cravings!
Reheating: When ready to enjoy, let cookies sit at room temperature for a few minutes or warm them for a few seconds in the microwave to restore that melt-in-your-mouth experience.
Marble Cookies Variations & Substitutions
Feel free to embrace your creativity and make these Marble Cookies uniquely yours with these delightful twists!
-
Flavor Swap: Replace peppermint extract with vanilla or almond for a completely different flavor profile that still shines bright.
-
Cocoa Choices: Experiment with dark cocoa or Dutch-processed cocoa for a richer chocolate experience that deepens the taste of your cookies. A little variation can make a world of difference!
-
Nutty Delight: Add chopped walnuts or pecans to the dough for a lovely crunchy texture that beautifully complements the softness of the cookie. This extra crunch adds layers of flavor that make each bite even more enjoyable.
-
Citrus Zing: Try infusing the dough with a bit of citrus zest, such as orange or lemon, for a refreshing twist that brightens the overall flavor of the cookies.
-
Dairy-Free Option: Substitute the butter with coconut oil or your favorite dairy-free butter alternative. This not only caters to vegan diets but also embeds a subtle coconut flavor that’s simply lovely.
-
Minty Bliss: Stir in mint chocolate chips for those who can’t get enough chocolate! This addition brings an extra burst of sweetness and a fun chocolatey texture.
-
Festive Sprinkles: Top your cookies with holiday-themed sprinkles before baking for a cheerful touch that enhances the festive spirit. It’s a small addition that packs a big visual impact.
-
Spiced Up: For a hint of warmth, incorporate a dash of cinnamon or nutmeg into the dough. These spices elevate the flavor, making your cookies even more comforting during the colder months.
These variations not only personalize your Marble Cookies but also invite a world of taste and texture that can delight your family and friends. Enjoy the magic of baking!
What to Serve with Chocolate Peppermint Marble Cookies
Indulging in these delightful cookies creates a magical festive experience, so why not enhance it with some perfect pairings?
-
Creamy Hot Chocolate: A rich, velvety hot chocolate brings out the cookie’s cocoa flavors while adding warmth to your festive gatherings.
-
Freshly Brewed Coffee: The boldness of coffee beautifully contrasts with the sweet peppermint, creating a cozy serenade on chilly days.
-
Minty Green Tea: The herbal notes and subtle mintiness of green tea offer a refreshing balance to the cookies’ rich chocolate and peppermint.
-
Vanilla Ice Cream: Pairing a scoop of creamy vanilla ice cream creates a luscious melt-in-your-mouth experience that will impress your guests.
-
Chewy Ginger Snaps: The spiciness of ginger snaps provides a delightful contrast to the minty sweetness, perfect for a holiday cookie platter.
-
Fruity Cranberry Bread: Serve slices of tart cranberry bread alongside for a burst of fruity flavor that complements the cookies beautifully.
-
Chocolate Peppermint Milkshake: Blend some milk with chocolate and peppermint for a fun drink that matches the cookie’s festive spirit.
-
Holiday Fruit Salad: A mix of fresh, seasonal fruits adds a refreshing, vibrant touch, balancing the richness of your cookie spread.
-
Nutty Biscotti: This crunchy treat enhances your cookie enjoyment, providing a delightful crunch and contrasting textures in every bite.
-
Rich Eggnog: For a classic holiday drink, eggnog pairs perfectly with the flavors of festive cookies—a nostalgic treat for all ages!
Chocolate Peppermint Marble Cookies Recipe FAQs
What is the best way to select ripe ingredients for this recipe?
Absolutely! When selecting your ingredients, especially for butter, choose a fresh block that feels slightly soft to the touch. For peppermint extract, pick a high-quality brand for the best flavor. When it comes to cocoa powder, Dutch-processed is a great choice for a richer taste; look for a deep, dark color in your cocoa packaging.
How should I store my Marble Cookies after baking?
These cookies are best stored in an airtight container at room temperature for up to 1 week. If you’d like to keep them fresher for longer, refrigerate them in an airtight container for up to 10 days. Just be sure to layer them with parchment paper to prevent sticking!
Can I freeze these Marble Cookies?
Yes, you can freeze your Marble Cookies! It’s quite simple: wrap each cooled cookie tightly in plastic wrap, then place them in a freezer-safe bag or container. They can be frozen for up to 3 months. When you’re ready to enjoy them, simply let them thaw at room temperature for about 20-30 minutes or warm them up briefly in the microwave for that fresh-baked experience.
What should I do if my dough is too sticky when rolling it out?
Very! If you find that your dough is sticking a bit while rolling out, don’t worry. Just sprinkle a little flour on your work surface and the parchment paper, or return the dough to the fridge for an additional 10-15 minutes to firm it up. This will make it much easier to roll and help maintain those gorgeous swirls.
Are these cookies safe for pets or individuals with allergies?
These Marble Cookies contain common allergens, such as butter and flour, which are not suitable for dogs or individuals with gluten sensitivities. If you’re baking for someone with allergies, consider using gluten-free flour and substitute butter with a vegan option like coconut oil. Always check the specific dietary needs of your guests to ensure everyone can enjoy these delightful treats!
Marble Cookies that Melt in Your Mouth: The Ultimate Holiday Treat
Ingredients
Equipment
Method
- In a stand mixer, combine 18 tablespoons of softened salted butter and ¾ cup of powdered sugar. Beat together until fluffy, about 2-3 minutes. Gradually blend in 2¼ cups of all-purpose flour until just combined. Divide the dough into two parts, mixing ¾ teaspoon of peppermint extract into one half and 2 tablespoons of cocoa powder into the other.
- Shape each dough into a disk, wrap tightly in plastic wrap, and refrigerate for at least 30 minutes.
- Roll out both the chocolate and vanilla doughs between sheets of parchment paper to about 9x12 inches.
- Tear the rolled chocolate dough into pieces and scatter over the vanilla dough. Gently fold to create a marbled effect. Return to the fridge for another 30 minutes.
- Preheat oven to 350°F (175°C). Slice chilled dough into ¼-inch rounds and place on a baking sheet, leaving space between each cookie. Bake for 16-20 minutes until edges are lightly golden.
- Allow cookies to cool on the baking sheet for 5 minutes, then transfer to a wire rack to cool completely.
Leave a Reply