As I stood in my kitchen one bustling evening, the aroma of savory spices wafted through the air, igniting warmth and excitement. That’s the magic of my Oven-Baked Cheesy Tacos (Crispy & Loaded) you’ll love! These delightful bundles are the perfect blend of comfort and convenience, making them an ideal quick weeknight meal for those of us who crave home-cooked goodness without spending hours in the kitchen. In just 35 minutes, you can whip up a batch of crispy taco shells stuffed with seasoned beef and oozing cheese, ready to impress family and friends alike. Plus, they’re endlessly customizable—feel free to swap in your favorite proteins or toppings to suit your mood or dietary needs. Ready to dive into this deliciousness together? Let’s explore these tacos that promise a satisfying crunch with every flavorful bite!
Why Will You Enjoy These Tacos?
**Deliciously *Crispy*: Each taco shell is perfectly baked for that ideal crunch, ensuring you won’t miss the mess of frying.
*Customizable* Goodness: Swap proteins or toppings to satisfy your family’s cravings and dietary needs—everyone will love their personalized creation!
**Quick *Preparation*: In just 35 minutes, you can have a flavorful dinner on the table, making it a fantastic weeknight option.
**Comfort Food: These cheesy tacos deliver that warm, hearty feeling of home cooking, perfect for cozy family dinners or casual gatherings.
Crowd- Pleaser: Serve them at your next fiesta, and watch as guests rave about these satisfying bites. For more tasty tacos and meal ideas, check out my Cheesy Chicken Wrapsilla or a comforting Chicken Noodle Soup to complete your menu!
Oven-Baked Cheesy Tacos Ingredients
Get ready to whip up these Oven-Baked Cheesy Tacos (Crispy & Loaded) with this easy ingredient list!
For the Taco Filling
• Ground Beef – Provides a savory base; feel free to substitute with ground turkey or chicken for a lighter option.
• Taco Seasoning – Infuses authentic Mexican flavor; you can use either store-bought or homemade for added convenience.
• Tomato Sauce – Keeps the filling moist and tangy; salsa is a great alternative if you want a spicier kick.
• Onion (diced) – Adds natural sweetness and depth; omit if you prefer a milder flavor.
• Garlic (minced) – Elevates flavor with its aromatic touch; garlic powder works in a pinch too.
For the Tacos
• Taco Shells – Choose crispy taco shells for that perfect crunch; corn or flour options work according to your preference.
• Shredded Cheese – Melts beautifully over the filling for a creamy finish; swap for vegan cheese to keep it dairy-free.
For the Toppings
• Lettuce – Adds a refreshing crunch; feel free to choose romaine or iceberg for extra texture.
• Tomatoes – Brightens the dish and adds juiciness; diced tomatoes or cherry tomatoes can both work fabulously.
• Red Onion – Contributes a zesty bite; use green onions for a milder taste.
• Cilantro – Infuses a burst of freshness; if you’re not a cilantro fan, try parsley instead.
These ingredients will come together to create a mouthwatering meal that’s sure to please!
Step‑by‑Step Instructions for Oven-Baked Cheesy Tacos (Crispy & Loaded) You’ll Love
Step 1: Preheat the Oven
Begin by preheating your oven to 375°F (190°C). This ensures a perfectly baked, crispy finish for your Oven-Baked Cheesy Tacos. While the oven warms, gather your ingredients and set up a greased baking dish to hold your assembled tacos—this will streamline your cooking process.
Step 2: Sauté the Aromatics
In a large skillet, heat a tablespoon of olive oil over medium heat. Add the diced onion and minced garlic, sautéing for 2 to 3 minutes until fragrant and the onion turns translucent. This step adds a delightful aroma and forms the foundational flavor of your taco filling.
Step 3: Cook the Ground Beef
Next, add the ground beef to the skillet and break it apart with a spatula. Cook until it’s browned and no longer pink, about 5 to 7 minutes. Once cooked, stir in the taco seasoning and tomato sauce. Let the mixture simmer for another 5 minutes, allowing the flavors to meld together beautifully.
Step 4: Assemble the Tacos
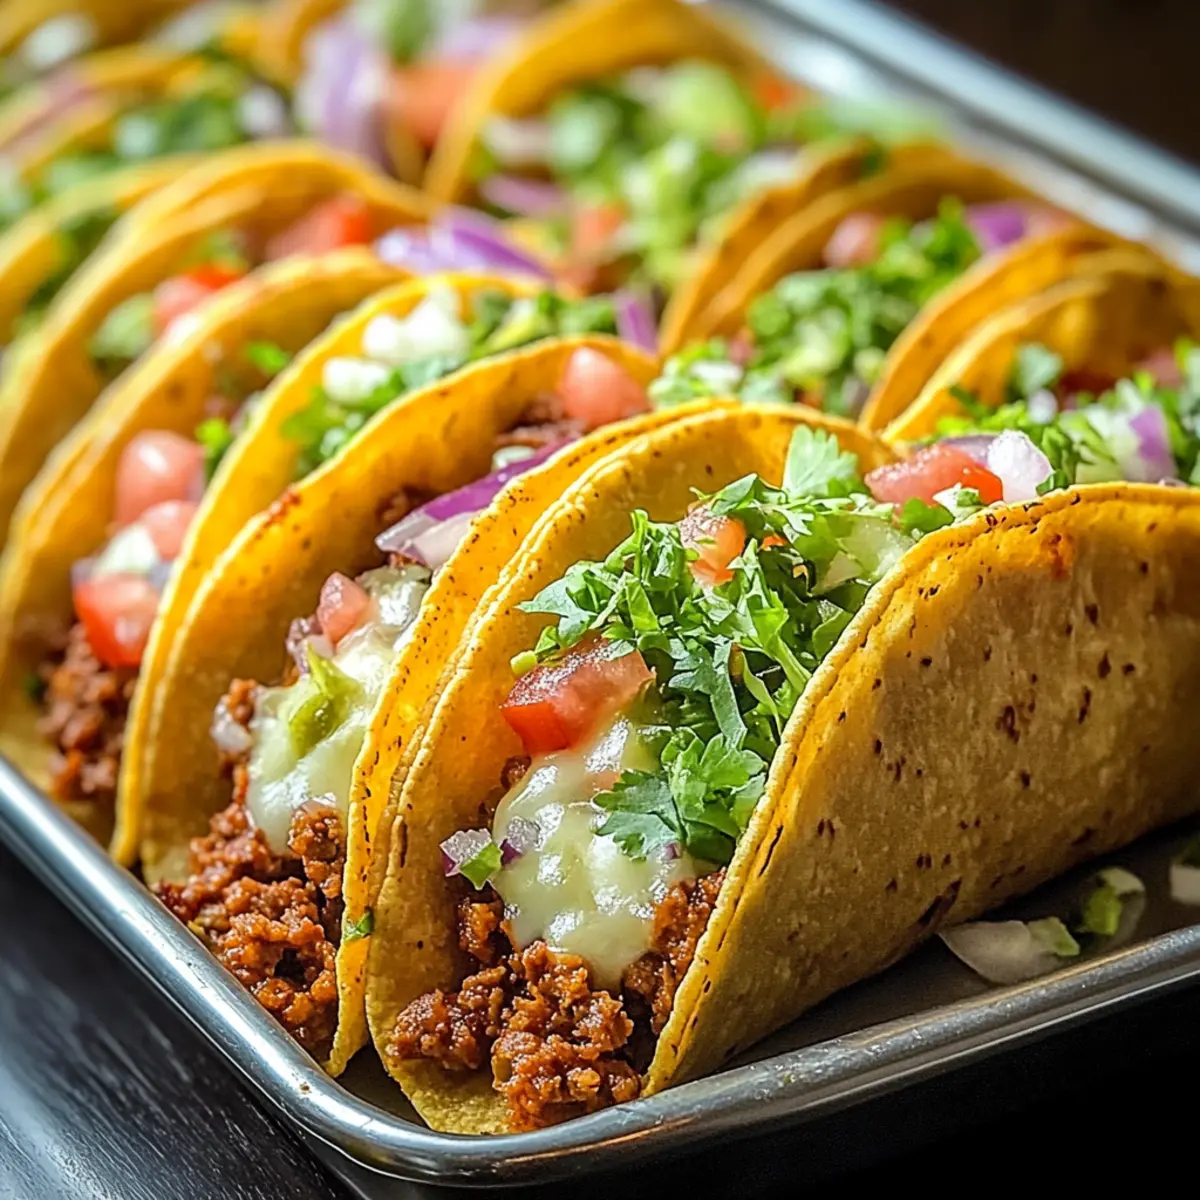
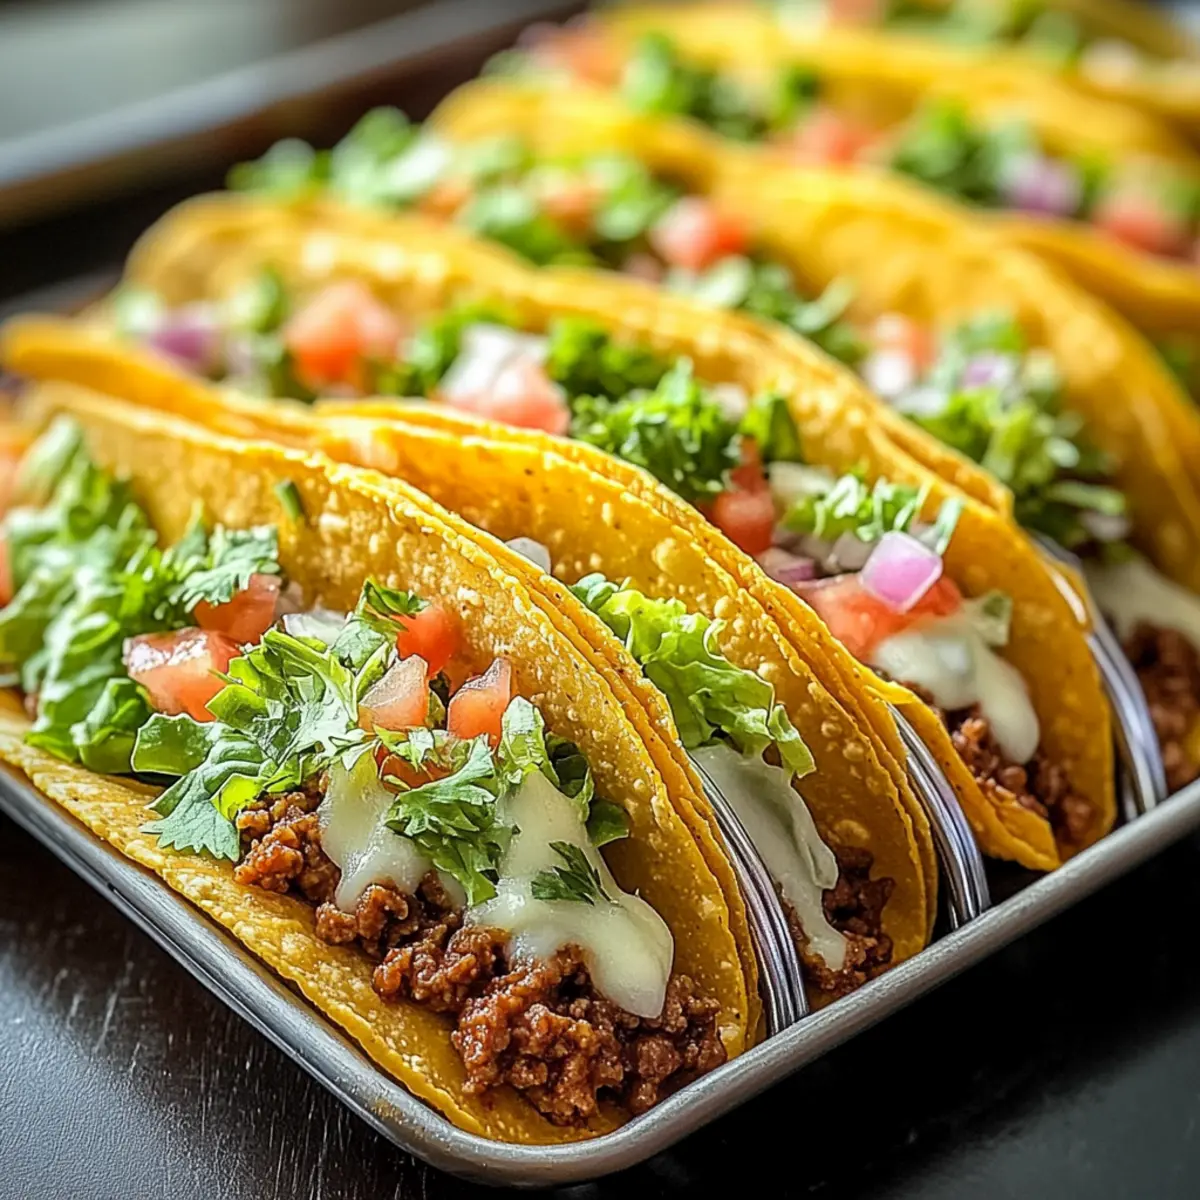
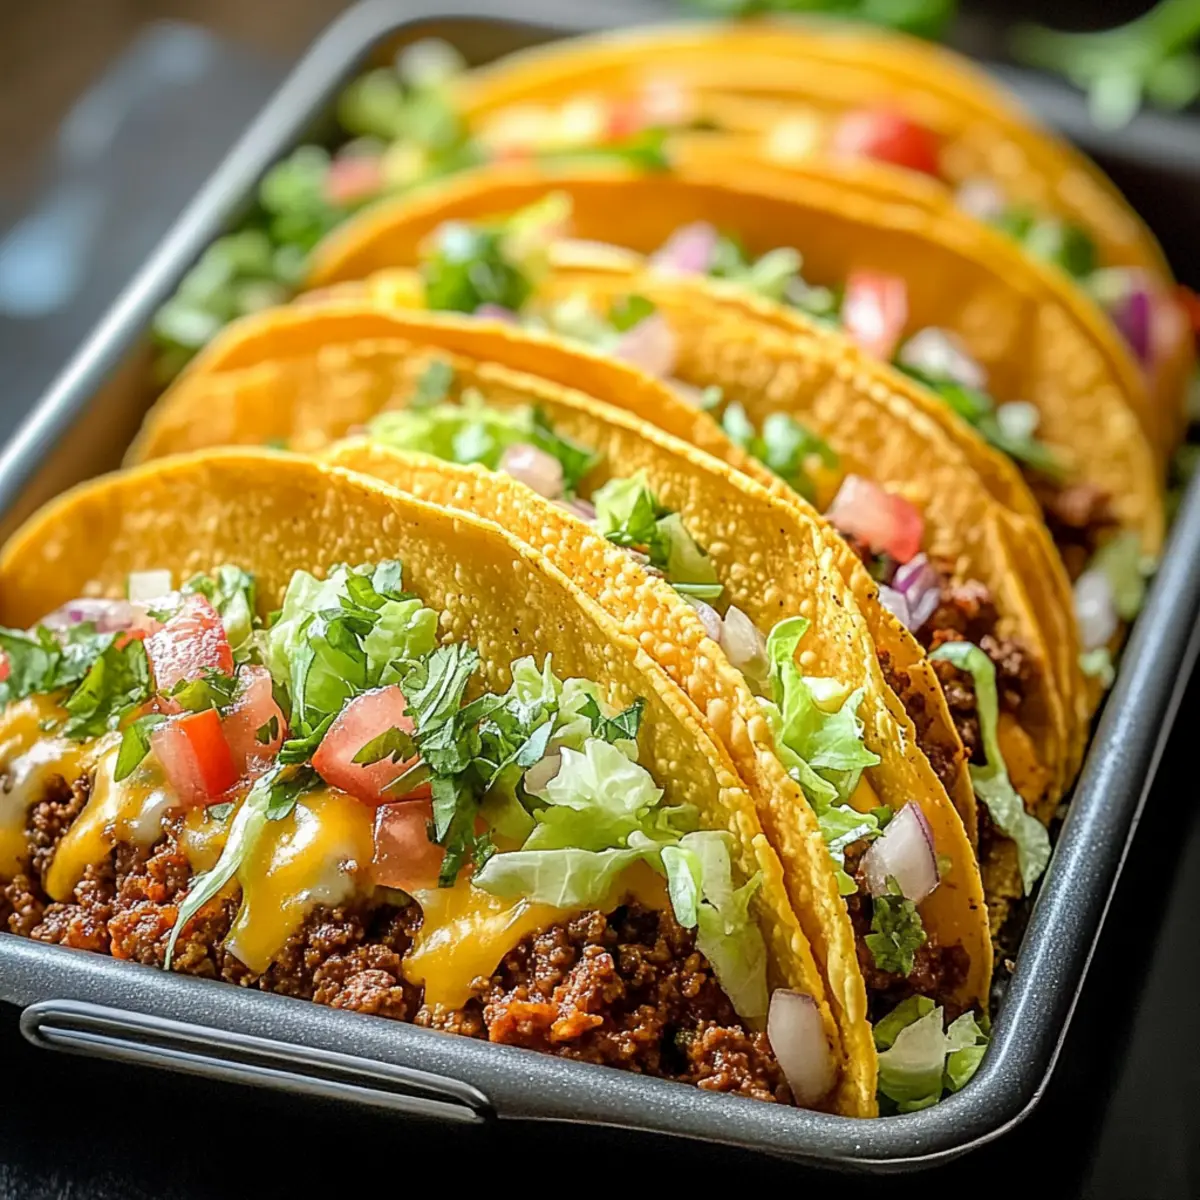
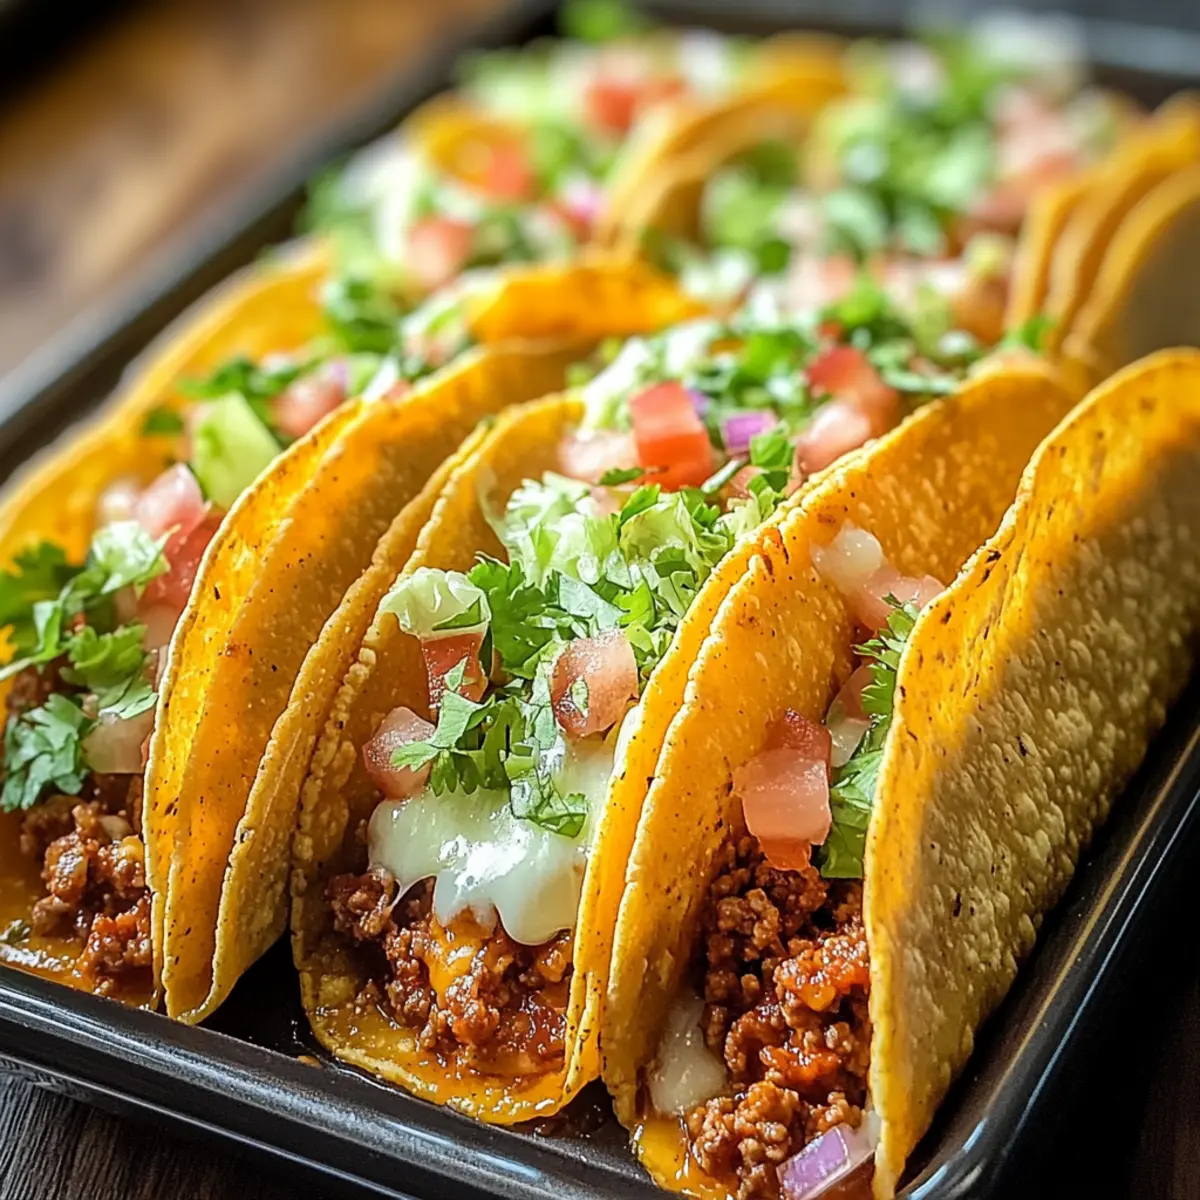
Once your beef mixture is ready, it’s time to assemble your Oven-Baked Cheesy Tacos. Warm the taco shells slightly for easier handling, then fill each shell generously with the beef mixture. Top each taco with a handful of shredded cheese, which will melt perfectly as they bake.
Step 5: Bake to Perfection
Carefully arrange the filled taco shells in the greased baking dish, ensuring they are snug but not overcrowded. Place the dish in the preheated oven and bake for 10 to 15 minutes, or until the cheese is bubbly and the taco shells are crispy. Keep an eye on them for that golden-brown finish!
Step 6: Add Fresh Toppings
Once baked, remove the tacos from the oven and let them cool for a minute. Now it’s time to bring your Oven-Baked Cheesy Tacos to life! Add your favorite fresh toppings like shredded lettuce, diced tomatoes, red onion, and cilantro for a burst of color and flavor before serving.
Oven-Baked Cheesy Tacos Variations & Substitutions
Feel free to get creative with these Oven-Baked Cheesy Tacos by customizing flavors and ingredients to suit your palate!
-
Protein Swap: Substitute ground beef with shredded chicken, turkey, or even a plant-based meat for a different twist.
-
Vegan Option: Use lentils or black beans in place of meat, making it perfect for a hearty vegetarian delight.
-
Cheese Variation: Experiment with different cheese options—try pepper jack for a spicy kick or vegan cheese for a dairy-free alternative.
-
Flavor Boost: Add a spoonful of salsa to the beef mixture for an extra layer of flavor and a bit of heat!
-
Crunchy Additions: Mix in corn or black olives to your filling for added texture and a pop of color.
-
Fresh Toppings: Customize your toppings—avocado slices or jalapeños can bring a refreshing or spicy touch to every bite.
-
Gluten-Free: Use gluten-free taco shells to make this dish suitable for gluten-sensitive diners.
-
Baked to Perfection: For an extra crispy finish, broil the tacos for a minute or two after baking. Just keep an eye on them!
For more inspiration, try pairing these tacos with my delightful Cheesy Chicken Wrapsilla or enjoy a soothing bowl of homemade Chicken Noodle Soup for a comforting meal duo!
What to Serve with Oven-Baked Cheesy Tacos (Crispy & Loaded)
A delightful meal awaits when you pair these flavorful tacos with scrumptious sides that enhance their savory vibes.
- Creamy Guacamole: This smooth and buttery dip adds a rich contrast to the crunchy tacos, making each bite even more satisfying.
- Zesty Sour Cream: A cool dollop provides a lovely creaminess that balances the spices and heat from the tacos.
- Mexican Street Corn Salad: This vibrant salad bursts with sweet corn, lime, and cilantro, creating a perfect refreshing companion to your meal.
- Spicy Black Beans: Their hearty texture and kick of spice complement the tacos beautifully, lending additional layers of flavor to your feast.
- Crispy Tortilla Chips: Serve with flavorful salsa or a spicy cheese dip for a fun, crunchy side that adds an enjoyable texture to your dinner spread.
- Pineapple Agua Fresca: This sweet, fruity drink not only quenches thirst but also provides a refreshing contrast to the savory tacos, making it a must-have beverage.
- Fresh Fruit Salsa: A light, fruity salsa with diced mango or strawberries adds a sweet zing that pairs perfectly with the tacos’ spice.
- Roasted Veggies: Seasoned veggies bring a satisfying depth and add vibrant color to your plate, creating a wholesome, balanced meal experience.
How to Store and Freeze Oven-Baked Cheesy Tacos
Fridge: Store leftovers in an airtight container for up to 3-4 days. Reheat in the oven for the best texture, ensuring the cheese melts perfectly.
Freezer: Assemble tacos without baking and wrap tightly in foil. Freeze for up to 2 months. Bake from frozen at 375°F (190°C) for 20-25 minutes, adding extra time if necessary.
Reheating: For previously baked cheesy tacos, reheat in the oven at 350°F (175°C) for about 10 minutes until heated through and crispy.
Assemble Later: You can prepare the filling in advance and store it in the fridge, making meal prep easy and quick for your Oven-Baked Cheesy Tacos!
Expert Tips for Oven-Baked Cheesy Tacos
Preheat Smartly: Ensure your oven is fully preheated to 375°F (190°C) to achieve a perfect crunch on your taco shells without sogginess.
Advance Preparation: You can prepare the filling ahead of time! Just refrigerate it until you’re ready to assemble your Oven-Baked Cheesy Tacos, saving you time on busy weeknights.
Custom Protein Swap: If you’re looking for variety, feel free to replace the ground beef with black beans or lentils for a delicious vegetarian twist that maintains the hearty flavor.
Layer for Flavor: Don’t skimp on toppings! Adding fresh ingredients like lettuce, tomatoes, and cilantro not only enhances flavor but also adds visual appeal to your dish.
Watch the Bake Time: Keep an eye on your tacos while they bake—baking times may vary a bit based on your oven, so aim for that golden-brown finish without overcooking.
Make Ahead Options
These Oven-Baked Cheesy Tacos (Crispy & Loaded) are perfect for busy weeknights and can save you valuable time! You can prepare the taco filling (ground beef, onion, garlic, taco seasoning, and tomato sauce) up to 3 days in advance. Simply let it cool after cooking, then store it in an airtight container in the fridge. When you’re ready to enjoy, preheat your oven, fill the taco shells with the prepared filling and cheese, and bake as directed. For added convenience, you can also assemble the filled tacos and refrigerate them for up to 24 hours before baking—this keeps the shells crispy and the flavors intact. Enjoy restaurant-quality tacos with minimal last-minute effort!
Oven-Baked Cheesy Tacos (Crispy & Loaded) Recipe FAQs
How do I choose the best ground beef for my tacos?
Absolutely! When selecting ground beef, look for something with an 80/20 lean-to-fat ratio. This ratio provides the perfect balance of flavor and juiciness without being too greasy. Alternatively, you can opt for ground turkey or chicken as a leaner, healthier option. Just be sure to add a bit more seasoning since they can lack flavor on their own.
How should I store leftover Oven-Baked Cheesy Tacos?
Leftovers can be stored in an airtight container in the refrigerator for 3-4 days. Make sure the tacos cool down completely before storing to prevent moisture build-up, which can lead to soggy shells. When you’re ready to enjoy them again, I recommend reheating in the oven for that perfect crispy texture!
Can I freeze the assembled tacos?
Yes, you can! Simply assemble the Oven-Baked Cheesy Tacos without baking them first. Wrap the filled taco shells tightly in aluminum foil and freeze them for up to 2 months. When you’re ready to cook, preheat your oven to 375°F (190°C) and bake from frozen for about 20-25 minutes, making sure the cheese melts and the shells turn golden brown.
What should I do if my taco shells become soggy during baking?
To avoid soggy taco shells, ensure your taco shells are crispy before filling them. Preheat your oven correctly and consider warming the taco shells in the oven for about 5 minutes before assembling. If you find yourself with soggy shells despite this, you can crisp them back up by placing the assembled tacos in a hot oven (around 400°F) for a few minutes to regain that delightful crunch.
Are there any dietary considerations I should keep in mind?
Very! If you’re concerned about gluten, you can choose corn taco shells or make your own using gluten-free flour. Additionally, for those with dairy allergies or who are vegan, opt for plant-based cheese alternatives. I often recommend checking ingredient labels and choosing toppings that align with your guests’ dietary needs.
How can I customize these Oven-Baked Cheesy Tacos?
Feel free to mix it up! Swap out the ground beef for shredded chicken, turkey, or even a plant-based meat alternative like beyond meat. You can experiment with different toppings such as jalapeños for heat, black olives for brininess, or avocado for creaminess. There are endless combinations to fit every taste and craving!
Oven-Baked Cheesy Tacos (Crispy & Loaded) You’ll Love Tonight
Ingredients
Equipment
Method
- Preheat your oven to 375°F (190°C) and prepare a greased baking dish.
- Heat olive oil in a skillet, sauté diced onion and minced garlic for 2-3 minutes.
- Add ground beef, cook until browned, then mix in taco seasoning and tomato sauce; simmer for 5 minutes.
- Warm taco shells, fill with beef mixture, and top with shredded cheese.
- Arrange tacos in the baking dish and bake for 10-15 minutes until cheese is bubbly and shells are crispy.
- Remove from oven, add toppings like lettuce, tomatoes, red onion, and cilantro before serving.
Leave a Reply