As I stood in the kitchen, the vibrant red hue of my latest creation sparkled in the morning sunlight, hinting at the fun day ahead. This Red Velvet Waffles Recipe is where comfort meets celebration, turning any breakfast into a festive occasion. With the dreamy combination of velvety chocolate flavors and a creamy glaze that dances on your taste buds, these waffles are perfect for everything from cozy weekend brunches to romantic Valentine’s Day surprises. Plus, using Bisquick means you can whip them up with ease, making them accessible for all skill levels. Not only are they a showstopper on the table, but they also bring that joyous, homemade touch that elevates any gathering. Are you ready to impress your family and friends with this delightful twist on a classic? Let’s dive in!

Why are Red Velvet Waffles a must-try?
Visual Appeal: The stunning red color makes these waffles a feast for the eyes, perfect for special occasions.
Decadent Flavor: Rich chocolate with a pearly cream cheese glaze creates an irresistible taste sensation that’ll delight your palate.
Quick & Easy: Thanks to Bisquick, this recipe eliminates the hassle, making it perfect for both novice cooks and busy breakfast hosts.
Versatile Options: Serve them stacked with berries for a breakfast showpiece, or pair them with savory sides like bacon for a balanced meal.
Crowd-Pleasing: Elevate any brunch gathering with this beloved classic that’s sure to have everyone asking for seconds!
From a delightful weekend treat to a festive addition to your holiday celebrations, these Red Velvet Waffles are guaranteed to impress.
Red Velvet Waffles Ingredients
- The essentials for your delicious morning treat.
For the Waffle Batter
• Bisquick Mix – A quick and easy base; substitutable with a homemade pancake/waffle mix.
• Brown Sugar – Adds a touch of sweetness and rich flavor; feel free to use white sugar if needed.
• Cocoa Powder – Essential for that classic red velvet chocolate flavor; don’t skip this!
• Buttermilk – Creates a tender waffle texture; replace with a mixture of regular milk and vinegar if necessary.
• Whole Milk – Moisture booster; can be swapped for non-dairy alternatives if preferred.
• Red Gel Food Coloring – Provides the iconic red hue; liquid food coloring works but may use more.
• Egg – Adds structure and richness; no notable substitutes, so use fresh if possible.
• Melted Butter – Enhances richness; for a lighter version, you can use vegetable oil instead.
• Vanilla Extract – A delightful flavor enhancer; optional, but highly recommended for added depth.
For the Cream Cheese Glaze
• Powdered Sugar – The primary sweetener for the glaze, ensuring a smooth texture.
• Cream Cheese – Gives the glaze its tangy richness; you can opt for a lower-fat version if desired.
• Milk (for glaze) – Adjusts the glaze consistency; non-dairy milk works well too.
This Red Velvet Waffles Recipe will add a festive flair to your breakfast table that everyone will love!
Step‑by‑Step Instructions for Irresistible Red Velvet Waffles with Cream Cheese Glaze
Step 1: Glaze Preparation
Start by making the cream cheese glaze. In a medium bowl, beat together 4 ounces of softened cream cheese and 2 tablespoons of melted butter with an electric mixer until the mixture is completely smooth and creamy. Gradually add 1 cup of powdered sugar and mix until combined. Finally, stir in 1-2 tablespoons of milk and 1 teaspoon of vanilla extract, adjusting until the glaze is pourable but not too runny.
Step 2: Dry Ingredients Mixing
In a large mixing bowl, whisk together 2 cups of Bisquick mix, ¼ cup of brown sugar, and 2 tablespoons of cocoa powder. This dry mixture forms the base of your delicious Red Velvet Waffles. Ensure no lumps remain for an even texture, and set this bowl aside while you prepare the wet ingredients.
Step 3: Wet Ingredients Combination
In a separate bowl, combine 1 cup of buttermilk, ½ cup of whole milk, 1 tablespoon of red gel food coloring, 1 large egg, ¼ cup of melted butter, and 1 teaspoon of vanilla extract. Whisk these ingredients together until you achieve a smooth and cohesive mixture. This vibrant batter will be the secret to your delightful red waffles.
Step 4: Combining Mixtures
Carefully pour the wet ingredients into the bowl containing the dry ingredients. Using a spatula, gently fold the mixtures together until just incorporated. Be cautious not to overmix; a few lumps are perfectly fine. The goal here is to maintain a fluffy texture in your Red Velvet Waffles.
Step 5: Waffle Cooking
Preheat your waffle iron according to the manufacturer’s instructions. Once hot, pour approximately ¾ cup of the batter onto the center of the iron. Close the lid and cook for 4-5 minutes, or until the waffles are crispy and golden brown. You’ll know they’re done when they easily release from the iron.
Step 6: Serving Your Waffles
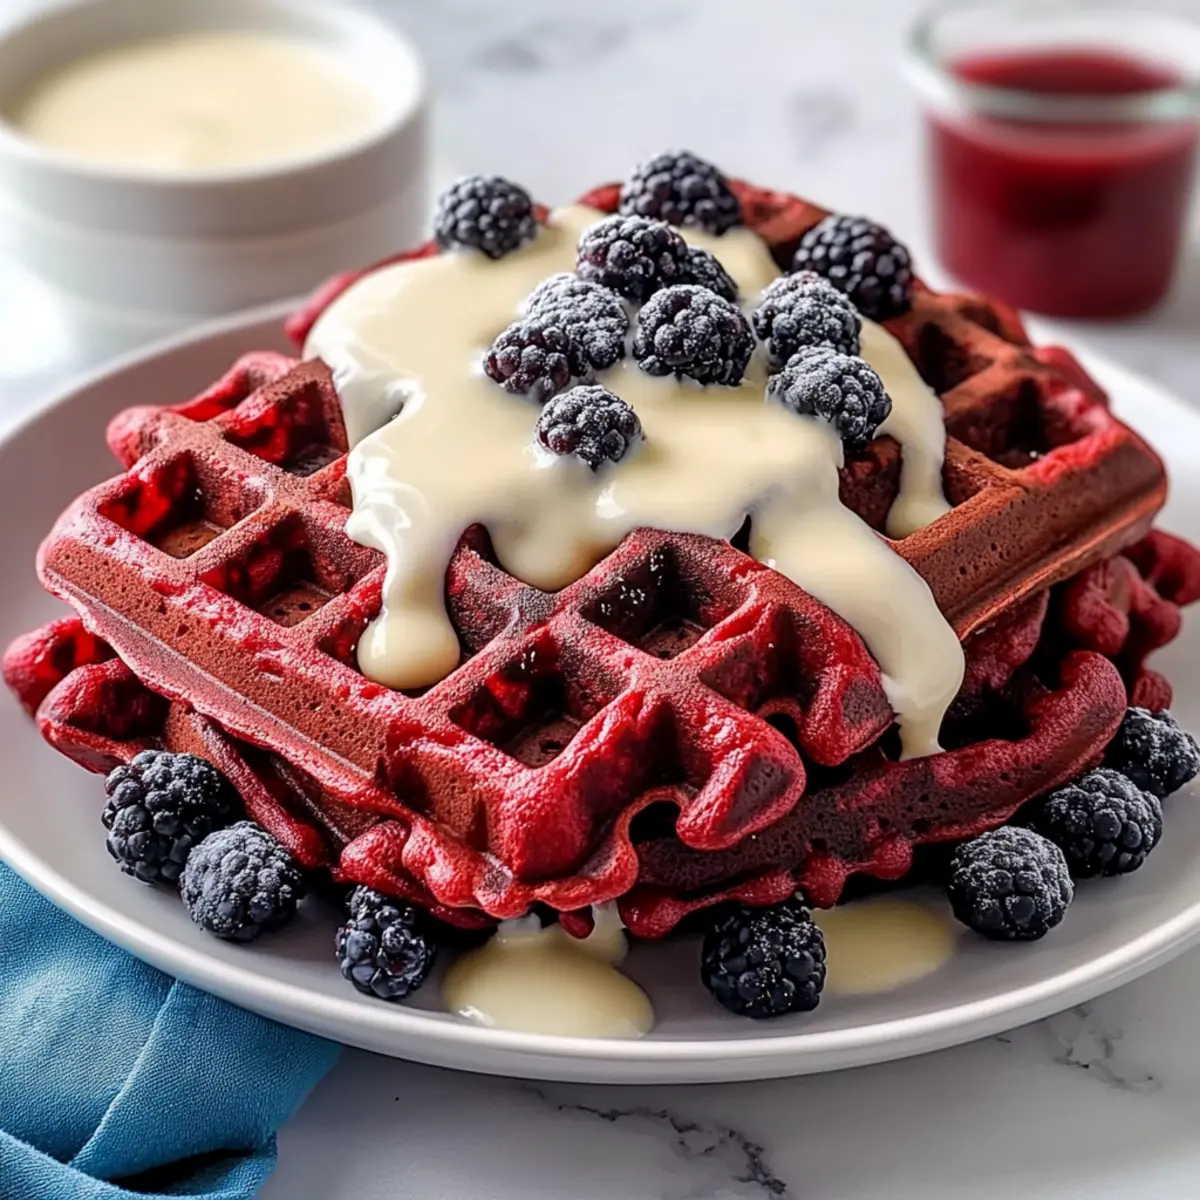
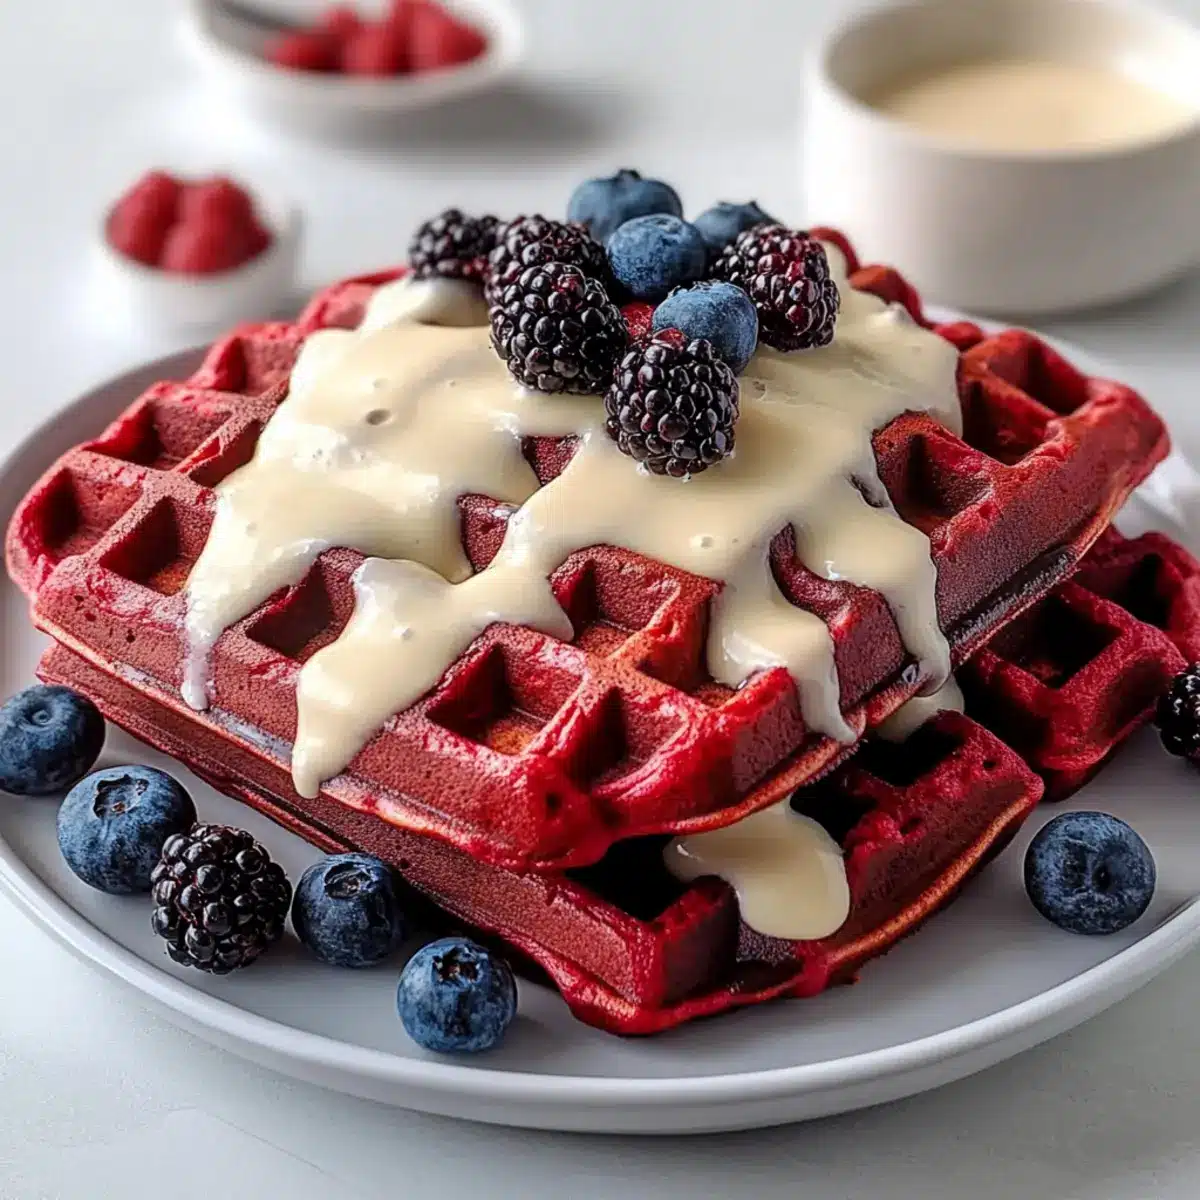
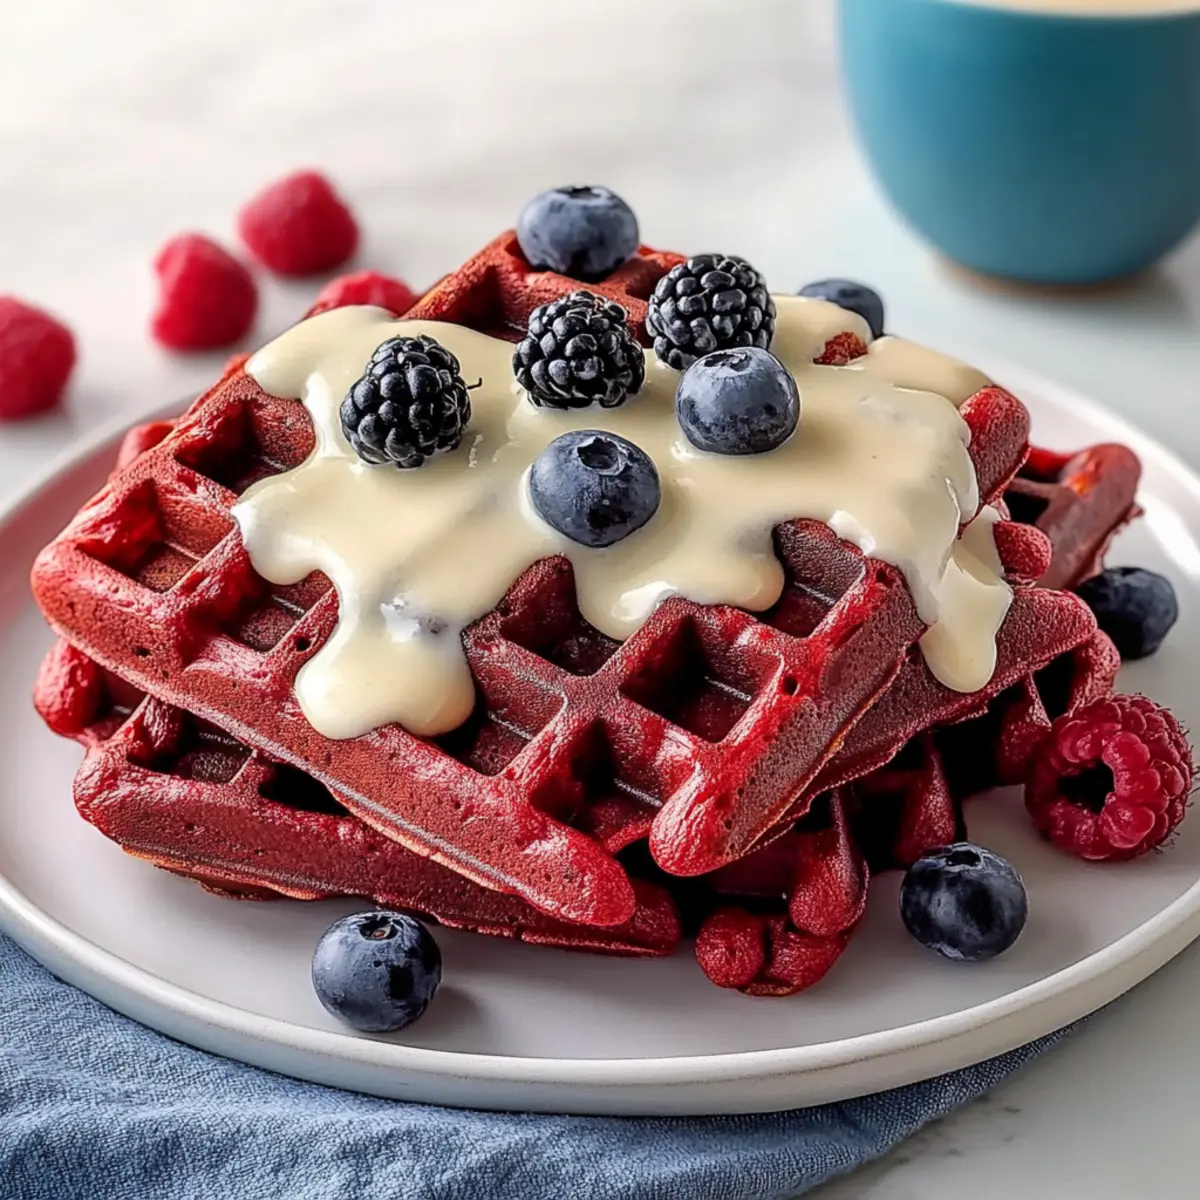
Carefully transfer the freshly made Red Velvet Waffles to a plate. Drizzle a generous amount of your cream cheese glaze over the top while they’re still warm. For a festive touch, consider adding fresh berries or a dusting of powdered sugar before serving. Enjoy your delicious creation right away!
What to Serve with Irresistible Red Velvet Waffles
Indulging in these gorgeous waffles opens up a world of delightful complements that can elevate your breakfast or brunch experience.
-
Crispy Bacon: The smoky flavor of bacon contrasts beautifully with the sweetness of the waffles, adding a savory touch that balances the meal.
-
Scrambled Eggs: Fluffy eggs provide a rich, creamy counterpart that creates a satisfying combination of flavors and textures on your plate.
-
Fresh Berries: A medley of strawberries, blueberries, or raspberries adds freshness and a burst of color, enhancing the dish visually and flavorfully.
-
Whipped Cream: Light and airy, this addition brings an extra layer of sweetness, making every bite feel like a treat—perfect for special occasions.
-
Maple Syrup: Drizzling a touch of pure maple syrup over the glaze adds a wonderful depth and warmth that seamlessly melds with the flavors of the waffles.
-
Mimosas: For a festive touch, serve these waffles with a refreshing mimosa; the bright citrus notes provide a lovely contrast to the rich waffle experience.
Elevate your brunch with these thoughtful pairings that not only complement but also enhance the indulgent experience of your Red Velvet Waffles!
How to Store and Freeze Red Velvet Waffles
Fridge: Store cooled Red Velvet Waffles in an airtight container for up to 2 days. They’ll stay fresh and delicious for your next breakfast!
Freezer: For longer storage, wrap waffles individually in plastic wrap and place them in a freezer-safe bag. They can be frozen for up to 2 months.
Reheating: To enjoy leftovers, reheat in a toaster or toaster oven for that crispy outside. Drizzle with the cream cheese glaze just before serving for the best taste experience.
Make-Ahead: These waffles can be prepared ahead of time, making them perfect for holiday or weekend brunch preparations.
Helpful Tricks for Red Velvet Waffles Recipe
-
Preheat Properly: Ensure your waffle iron is hot before adding batter; this helps achieve crispy edges and avoids sogginess.
-
Gentle Mixing: Don’t overmix your batter! A few lumps are acceptable; overmixing can lead to tougher waffles rather than fluffy ones.
-
Glaze Consistency: For a thicker cream cheese glaze, start with less milk; you can always add more if needed for the desired pouring consistency.
-
Portioning Batter: Use a measuring cup for consistent waffle sizes; about ¾ cup of batter per waffle works best for even cooking.
-
Serve Fresh: Enjoy your waffles right away for the best flavor; they can become chewy when stored for too long.
-
Storage Tips: If making ahead, store cooled waffles in an airtight container and reheat in a toaster for optimal texture before drizzling with glaze.
Red Velvet Waffles Recipe Variations
Feel free to add your personal spin to this delightful recipe and create something uniquely yours!
- Gluten-Free: Substitute Bisquick with a gluten-free baking mix for a gluten-friendly delight.
- Non-Dairy: Use a plant-based milk and vegan cream cheese to make this recipe entirely dairy-free.
- Chocolate Chips: Fold in mini chocolate chips to the batter for an extra decadent chocolatey texture.
- Berry Bliss: Top the finished waffles with fresh strawberries or raspberries for a burst of fruity freshness.
- Savory Stack: Add crumbled bacon or sausage bits into the batter for a savory flavor twist that’s delightful.
- Heart-Shaped Waffles: Use a heart-shaped waffle maker to create romantic waffles for special occasions.
- Cinnamon Sugar Dusting: Sprinkle a little cinnamon and sugar over the top for an aromatic flavor lift.
- Raspberry Sauce: Drizzle with homemade raspberry sauce instead of glaze for a tangy twist on sweetness.
These ideas allow you to play around and make your Red Velvet Waffles Recipe an unforgettable experience. If you love easy alternatives, check out my suggested recipes like this comforting Chicken Noodle Casserole or this festive Fruitcake Moist Festive. Enjoy experimenting!
Make Ahead Options
These delectable Red Velvet Waffles are perfect for meal prep enthusiasts looking to save time during busy mornings! You can prepare the batter up to 24 hours in advance by mixing all the dry ingredients and wet ingredients separately, keeping them in airtight containers in the fridge. The cream cheese glaze can also be made ahead and stored, ensuring it’s ready when you are. When you’re ready to enjoy your waffles, simply combine the wet and dry mixtures, cook them, and drizzle with the freshly-made glaze. This way, they’ll taste just as delicious as if they were made fresh that morning, making your breakfast a breeze to assemble!
Red Velvet Waffles Recipe FAQs
How do I choose ripe ingredients for this recipe?
Absolutely! When selecting your ingredients, especially the buttermilk and butter, ensure they are fresh. Check that the buttermilk is within its expiration date and has no lumps or off smell. For the eggs, look for those that are clean and stored in the fridge for optimal freshness.
How should I store leftovers from my Red Velvet Waffles?
Very! To store your cooled waffles, place them in an airtight container in the fridge for up to 2 days. If you’d like to keep them longer, freezing is a fantastic option—wrap each waffle individually in plastic wrap and place them in a freezer-safe bag, where they’ll stay fresh for up to 2 months.
Can I freeze Red Velvet Waffles? If so, how?
Absolutely! Here’s how to freeze your delicious creations: Once your waffles cool completely, wrap each one tightly in plastic wrap. Place the wrapped waffles into a freezer-safe bag, removing as much air as possible to prevent freezer burn. They can be stored in the freezer for up to 2 months. When you’re ready to eat, simply reheat them in a toaster or toaster oven for that fresh, crispy texture!
What should I do if my waffle batter is too runny?
If this happens, don’t worry! You can gradually add a bit more Bisquick mix—start with a tablespoon at a time—until the batter reaches a thicker consistency that holds its shape when you pour it onto the waffle iron. Just be cautious not to overmix again, as we want to maintain that delightful fluffiness!
Are there any dietary considerations for pets or allergies?
Definitely! This recipe contains common allergens such as eggs, dairy, and gluten (from Bisquick). It’s always best to keep these waffles away from pets, especially the cream cheese glaze, which can be harmful to them. If you’re preparing for someone with dietary restrictions, consider substituting the eggs with a flaxseed mix or egg replacement for a vegan option, and use plant-based buttermilk alternatives. Always check labels for allergens!
What if I want a thicker cream cheese glaze?
If you’re aiming for a thicker glaze, simply start by using less milk—begin with 1 tablespoon and stir it in gradually until you reach your desired consistency. This way, you’ll maintain a rich and spreadable glaze that never drips too freely from your waffles!
Decadent Red Velvet Waffles Recipe with Cream Cheese Bliss
Ingredients
Equipment
Method
- Beat together 4 ounces of softened cream cheese and 2 tablespoons of melted butter until smooth. Gradually add 1 cup of powdered sugar and mix. Stir in 1-2 tablespoons of milk and 1 teaspoon of vanilla extract until pourable.
- Whisk together 2 cups of Bisquick mix, 1/4 cup of brown sugar, and 2 tablespoons of cocoa powder until no lumps remain.
- Combine 1 cup of buttermilk, 1/2 cup of whole milk, 1 tablespoon of red gel food coloring, 1 large egg, 1/4 cup of melted butter, and 1 teaspoon of vanilla extract until smooth.
- Pour wet ingredients into the dry ingredients and gently fold until just incorporated. A few lumps are fine.
- Preheat waffle iron. Pour approximately 3/4 cup of batter onto the center and cook for 4-5 minutes until golden brown.
- Transfer waffles to a plate and drizzle with cream cheese glaze. Add fresh berries or powdered sugar if desired.
Leave a Reply