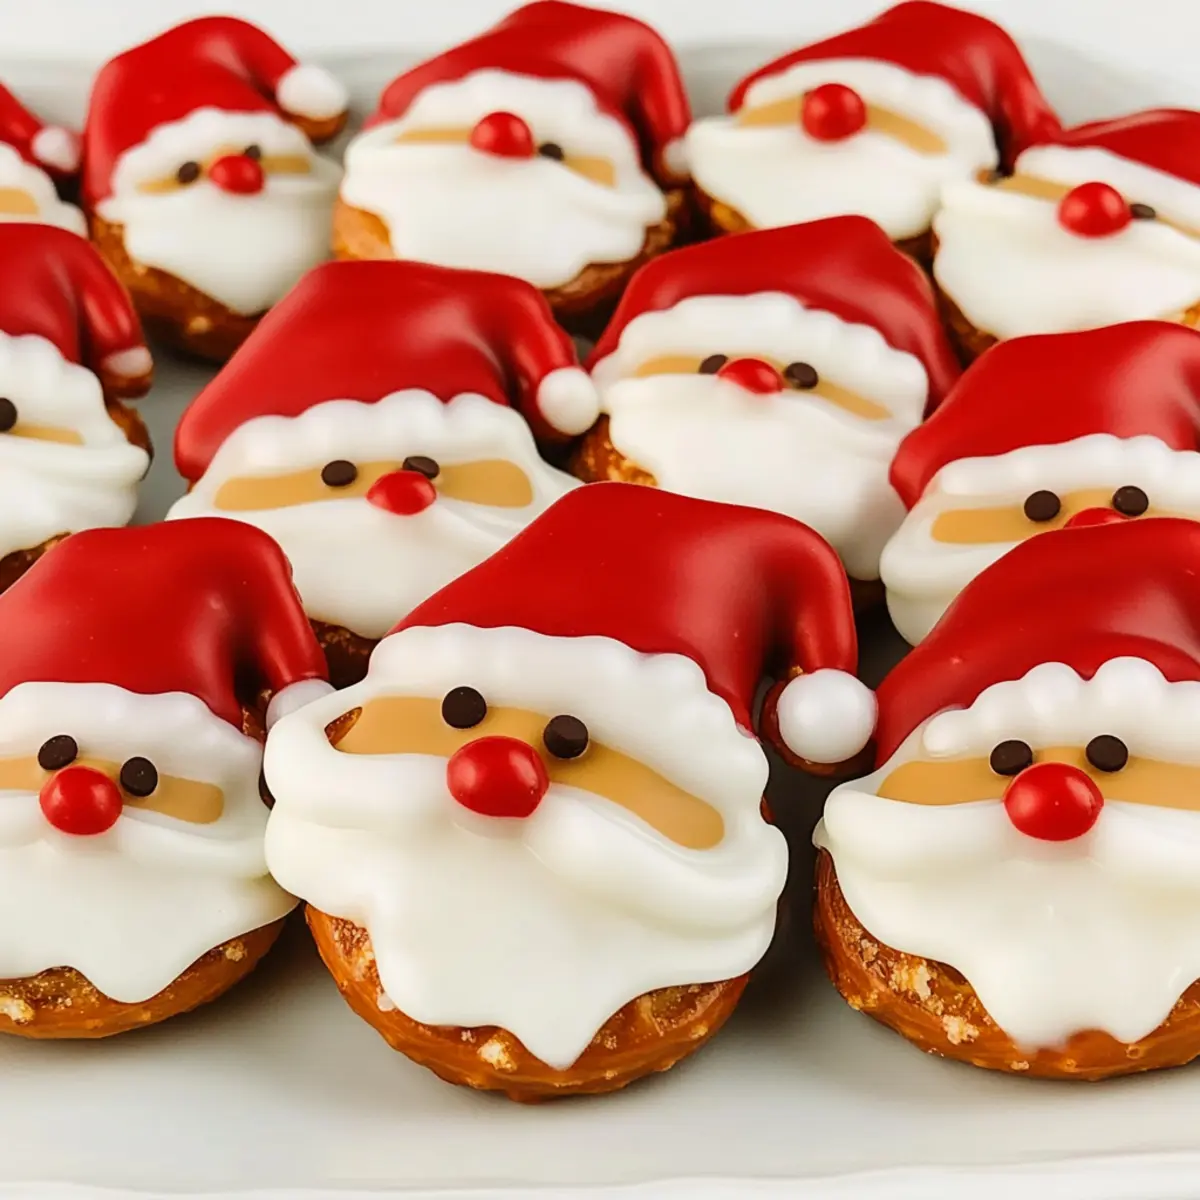
The aroma of melted candy fills my kitchen—a uniquely joyful scent that instantly transports me to festive holiday gatherings past. Today, I’m thrilled to share my latest creation: Santa Claus Pretzel Bites. These charming little treats perfectly blend sweet and salty flavors, making them not only a delight for the taste buds but also a visual feast for the eyes. What I love most? They are quick and easy to assemble, transforming your kitchen into a cheerful workshop where you can craft delightful DIY food gifts for family and friends. Picture these adorable bites on your holiday dessert table, captivating everyone with their whimsical charm. Ready to spread some holiday cheer? Let’s dive into the magic of creating these tasty Santa pretzels together!
Why Are Santa Claus Pretzel Bites Perfect?
Festive Charm: These adorable Santa Claus Pretzel Bites not only taste fantastic, but their cute design adds a whimsical touch to your holiday celebrations.
Quick and Easy: You’ll love how simple they are to make—perfect for both seasoned bakers and kitchen novices alike!
Sweet & Salty Delight: The combo of crunchy pretzels and sweet candy melts will have everyone reaching for more.
Customizable Fun: Feel free to experiment by adding your favorite candies or changing the melty colors to match your holiday theme.
Ideal for Gifting: Great as DIY food gifts, these treats are bound to impress friends and family when wrapped up in festive packaging.
For more easy holiday treat ideas, check out my Santa Crunch Popcorn or my delightful Corn Cheese Bites!
Santa Claus Pretzel Bites Ingredients
For the Pretzel Base
- Rold Gold Tiny Twists Pretzels – These provide the crunchy foundation for your Santa bites; any mini pretzel twists can be used as a substitute.
For the Chocolate Coating
- Wilton Red Candy Melts – Perfect for creating Santa’s hat and nose, adding a splash of color and sweetness; feel free to swap with other red melting chocolates if needed.
- Wilton White Candy Melts – Essential for forming Santa’s face, contributing to the overall cuteness; you can use chocolate coating for a different flavor.
- Wilton Bright White Candy Melts – Ideal for the hat brim and beard, ensuring a delightful visual contrast; maintaining color variations makes the design pop.
For the Facial Features
- Semi-Sweet Chocolate Chips – These are used to create the eyes, giving your Santa personality; dark chocolate or royal icing can be a fun alternative.
These Santa Claus Pretzel Bites are not only visually delightful but also easy to whip up for your holiday gatherings!
Step‑by‑Step Instructions for Santa Claus Pretzel Bites
Step 1: Prep Candy Melts
Begin by preparing your candy melts. Place about 25–30 each of red, white, and bright white Wilton candy melts into separate sandwich bags. Make sure to seal them well to prevent spills. Set these aside while you prepare to melt them, as this will ensure that your Santa Claus Pretzel Bites come together smoothly.
Step 2: Melt Candy Melts
Next, melt the candy melts by microwaving each bag for 30 seconds on high. After that, knead the bag to mix the melts. Continue to microwave in 10-second intervals, kneading in between, until melted and smooth. You’ll want the consistency to be pourable but not too runny. This process will create the colorful coatings for your adorable Santa Claus Pretzel Bites.
Step 3: Arrange Pretzels
While your melts are cooling slightly, lay a sheet of parchment paper on your working surface. Arrange the Rold Gold Tiny Twists Pretzels on the parchment, positioning them sideways to mimic the letter “C” or “E”. This preparation will create the perfect little faces for your Santa Claus Pretzel Bites, setting the stage for decorating.
Step 4: Apply Red Candy
With your red candy melts ready, snip a tiny corner of the bag. Squeeze the melted red chocolate onto the top of the pretzels to form Santa’s hat, creating a little peak. Be generous but controlled, as you want it to look cute! Allow the red candy to set at room temperature for about 10 minutes, ensuring it hardens properly.
Step 5: Apply White Candy
Now, take your bag of white candy melts and snip another small corner. Use the white melts to cover the top portion of each pretzel, forming Santa’s face. Try to create a nice round edge at the bottom to enhance the facial look. Let these sit undisturbed for another 10 minutes, allowing the white candy to firm up beautifully.
Step 6: Form Hat Brim and Beard
Grab your bright white candy melts for the next step. Create zigzag shapes along the edge of Santa’s hat for the brim, and make similar shapes at the bottom of the face for the beard. This will add texture and depth to your Santa Claus Pretzel Bites. Allow these details to harden for a full 10-15 minutes to ensure they set perfectly.
Step 7: Finish Details
For the final touch, use a toothpick to insert a small piece of the red candy into the pretzel for Santa’s nose. Then, use melted chocolate chips to make his eyes above the nose, squeezing out just enough to create a sparkly twinkle. This playful detailing will bring your Santa Claus Pretzel Bites to life, making them irresistibly cute.
Step 8: Storage
Finally, once your Santa Claus Pretzel Bites have set and cooled completely, store them in an airtight container at room temperature. They can also be frozen for later enjoyment. Keep them wrapped carefully to maintain their festive charm and delicious flavors, ready to brighten up your holiday gatherings whenever you need them.
Make Ahead Options
These Santa Claus Pretzel Bites are perfect for savvy meal prep and can save you time during the bustling holiday season! You can prepare the pretzels and melt the candy up to 24 hours in advance. Simply follow the first three steps of the recipe to arrange the pretzels and melt the candy. Store everything separately in airtight containers at room temperature to maintain quality and prevent any moisture from seeping in. When you’re ready to finish, simply apply the red and white candy melts, and complete the cute details as instructed. This way, you’ll have these charming holiday treats ready to impress with minimal last-minute effort!
Expert Tips for Santa Claus Pretzel Bites
-
Assembly Line Method: Streamlining the decorating process helps you work quickly, keeping chocolate melts at the right consistency for your Santa Claus Pretzel Bites.
-
Tool Warm-Up: If your tools begin to cool, keep a small bowl of hot water nearby to warm them up—this prevents the candy from seizing.
-
Avoid Over-Melting: Be cautious not to over-melt the candy melts, as this can lead to clumping. Stop when the melts are smooth and pourable.
-
Mix Candy Colors: Don’t hesitate to use variations of candy melts to personalize your Santa bites. This can add visual appeal and flavor depth to the final product.
-
Be Generous with Details: When applying candy melts for features like Santa’s hat or beard, be generous; these highlights make your Santa Claus Pretzel Bites truly adorable!
What to Serve with Santa Claus Pretzel Bites
Looking to create a festive spread that will have your guests smiling and reaching for more?
- Hot Cocoa Bar: Include marshmallows, whipped cream, and candy canes for a warm and cozy drink that complements the sweetness of the pretzel bites.
- Cheese Platter: A variety of cheeses and crackers add a savory touch, balancing the sweet and salty flavors of the Santa Claus Pretzel Bites.
- Christmas Cookies: Serve alongside your favorite holiday cookies to create a delightful dessert table that sparks joy during the festive season.
- Fruit Salad: A fresh fruit salad brings a burst of color and refreshing tartness, perfectly offsetting the sugary pretzel treats.
- Peppermint Bark: This classic holiday treat adds another layer of sweetness and festive flair to your gathering, making it a great pairing.
- Spiced Apple Cider: Warm and fragrant, this beverage enhances the holiday vibe, making your celebration feel extra special.
- Nut Mix: Offer a savory nut medley that provides a crunchy contrast to the soft candy melts and adds a touch of earthiness to your spread.
- Gingerbread Houses: Set up a gingerbread house decorating station next to the pretzel bites, inviting guests to indulge in their creative sides!
- Red and Green Cupcakes: Festively decorated cupcakes echo the color scheme of your pretzel bites, creating a cohesive and vibrant dessert display.
How to Store and Freeze Santa Claus Pretzel Bites
- Room Temperature: Store your Santa Claus Pretzel Bites in an airtight container at room temperature for up to 5 days to maintain their charming texture and delightful taste.
- Fridge: If you prefer a cooler treat, you can place them in the fridge for a refreshing flavor; however, be aware that the chocolate may lose some of its original shine.
- Freezer: For longer storage, freeze the pretzel bites in a single layer on a baking sheet, then transfer them to an airtight container for up to 2 months.
- Reheating: To enjoy them again, let the bites thaw at room temperature rather than using a microwave, as this preserves their delightful crunch and prevents the chocolate from melting again.
Santa Claus Pretzel Bites Variations
Feel free to unleash your creativity and customize these festive treats with delightful twists that will make them uniquely yours!
-
Flavored Melts: Use chocolate melts like mint or caramel for a different flavor profile, adding a holiday surprise.
-
Crunchy Toppings: Add crushed nuts or festive sprinkles on top of the melts before they set, offering extra texture and a pop of color.
-
Mini Marshmallows: Use mini marshmallows for Santa’s beard instead of bright white candy melts; it adds fluffiness and whimsy.
-
Spicy Twist: Drizzle a bit of melted dark chocolate mixed with a pinch of cayenne pepper for a sweet and spicy kick.
-
DIY Candy Eyes: Create candy eyes with small round candies or even icing to personalize Santa’s expression.
-
Chocolate-Dipped Pretzels: For a texture twist, dip the entire pretzel in chocolate instead of melting specific colors; it’s a chocolate lover’s dream.
-
Themed Melts: Change the colors and shapes for different holidays—think red, white, and blue for the Fourth of July or pink and white for Valentine’s Day.
For more festive inspirations, try making my lovely Savory Rice Pancakes as appetizers or celebrate with some sweet Santa Crunch Popcorn for a delightful treat!
Santa Claus Pretzel Bites Recipe FAQs
How do I choose the best pretzels for this recipe?
Absolutely! For the best crunch and flavor, use Rold Gold Tiny Twists Pretzels as your base. These pretzels are perfectly sized for Santa’s little face. If you can’t find them, any mini pretzel twists will work just fine, but aim for ones that are sturdy enough to hold the candy melts.
What is the best way to store Santa Claus Pretzel Bites?
To maintain their delightful taste and texture, store your Santa Claus Pretzel Bites in an airtight container at room temperature for up to 5 days. If you prefer a cooler treat, you can refrigerate them, but beware that the chocolate may lose some shine.
Can I freeze Santa Claus Pretzel Bites?
Absolutely! For longer storage, place the pretzel bites in a single layer on a baking sheet and freeze until solid. Then, transfer them to an airtight container or freezer-safe bag, where they can last up to 2 months. When you’re ready to enjoy them again, let them thaw at room temperature for the best texture.
What should I do if the chocolate melts seize up?
If your candy melts become too thick or clump together while melting, don’t panic! Simply add a teaspoon of vegetable oil to the bag and knead it back to life. This should help restore smoothness. Just make sure to microwave it in short intervals and knead frequently to avoid overheating.
Can I make these Santa Claus Pretzel Bites gluten-free?
Very much so! Simply substitute the regular pretzels for gluten-free mini pretzel twists. Additionally, double-check that your candy melts are labeled gluten-free to ensure everyone can enjoy these festive treats without worry.
Are there any allergy considerations for this recipe?
Yes! This recipe contains pretzels and chocolate, which may present allergens for some individuals. Always check ingredient labels for allergens such as gluten, dairy, or nuts, depending on the brands used. If you are making these for kids or guests with allergies, raise awareness and consider alternatives like using dairy-free chocolate melts.
Santa Claus Pretzel Bites: Sweet, Salty Holiday Cheer
Ingredients
Equipment
Method
- Begin by preparing your candy melts. Place about 25–30 each of red, white, and bright white Wilton candy melts into separate sandwich bags. Make sure to seal them well to prevent spills. Set these aside while you prepare to melt them.
- Next, melt the candy melts by microwaving each bag for 30 seconds on high. After that, knead the bag to mix the melts. Continue to microwave in 10-second intervals, kneading in between, until melted and smooth.
- While your melts are cooling slightly, lay a sheet of parchment paper on your working surface. Arrange the Rold Gold Tiny Twists Pretzels on the parchment, positioning them sideways to mimic the letter 'C' or 'E'.
- With your red candy melts ready, snip a tiny corner of the bag. Squeeze the melted red chocolate onto the top of the pretzels to form Santa's hat. Allow the red candy to set at room temperature for about 10 minutes.
- Now, take your bag of white candy melts and snip another small corner. Use the white melts to cover the top portion of each pretzel, forming Santa’s face. Let these sit undisturbed for another 10 minutes.
- Grab your bright white candy melts for the next step. Create zigzag shapes along the edge of Santa's hat for the brim, and similar shapes at the bottom of the face for the beard. Allow these details to harden for 10-15 minutes.
- For the final touch, use a toothpick to insert a small piece of the red candy into the pretzel for Santa's nose. Then, use melted chocolate chips to make his eyes above the nose.
- Finally, once your Santa Claus Pretzel Bites have set and cooled completely, store them in an airtight container at room temperature.
Leave a Reply