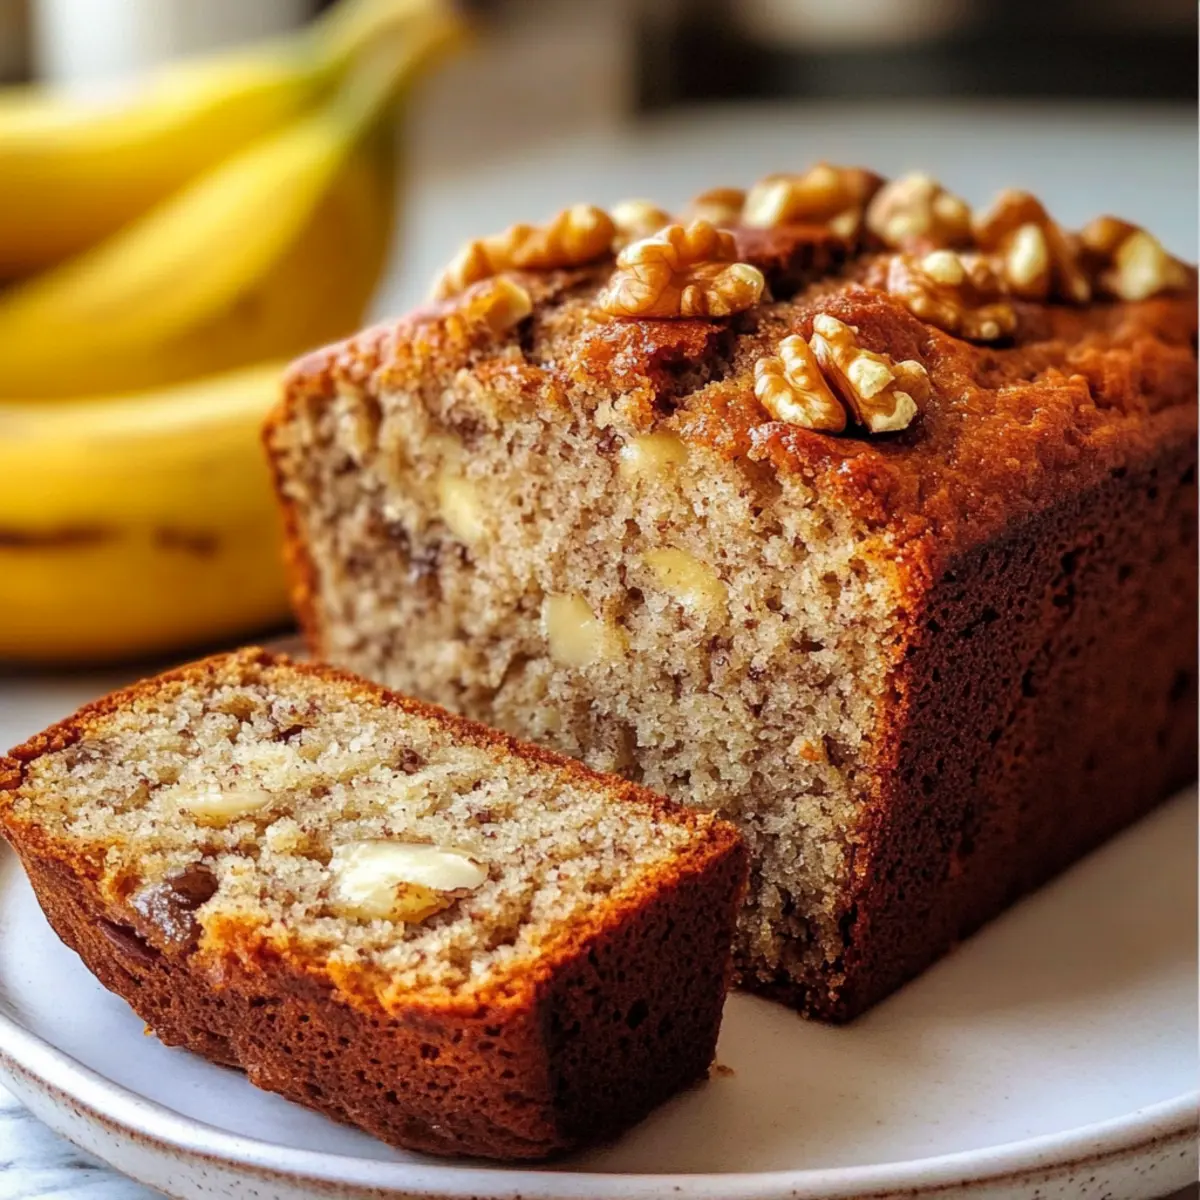
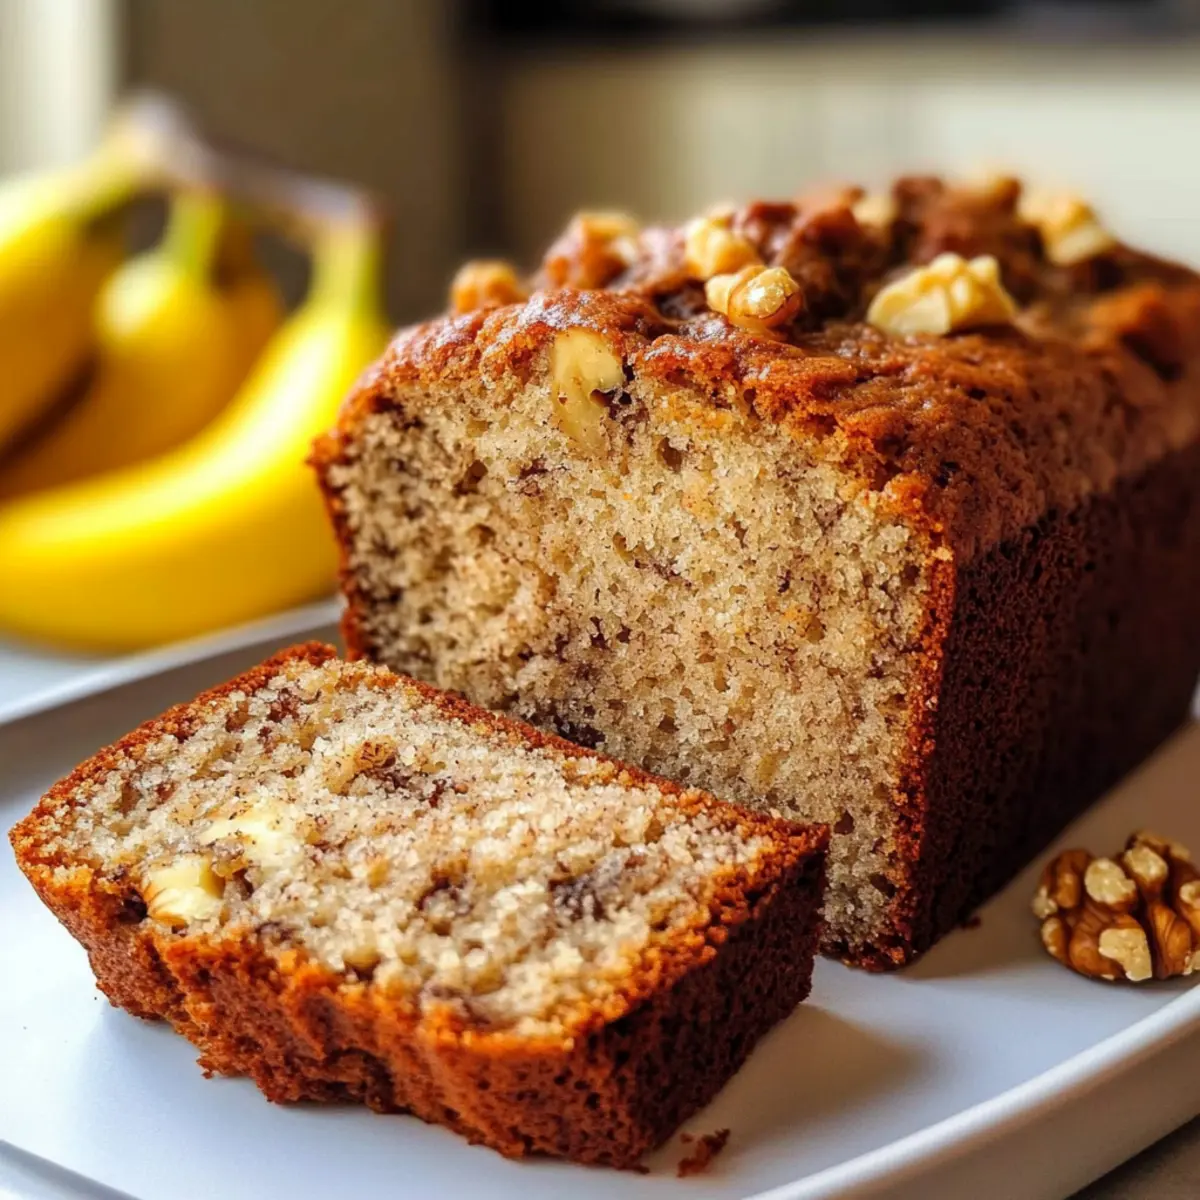
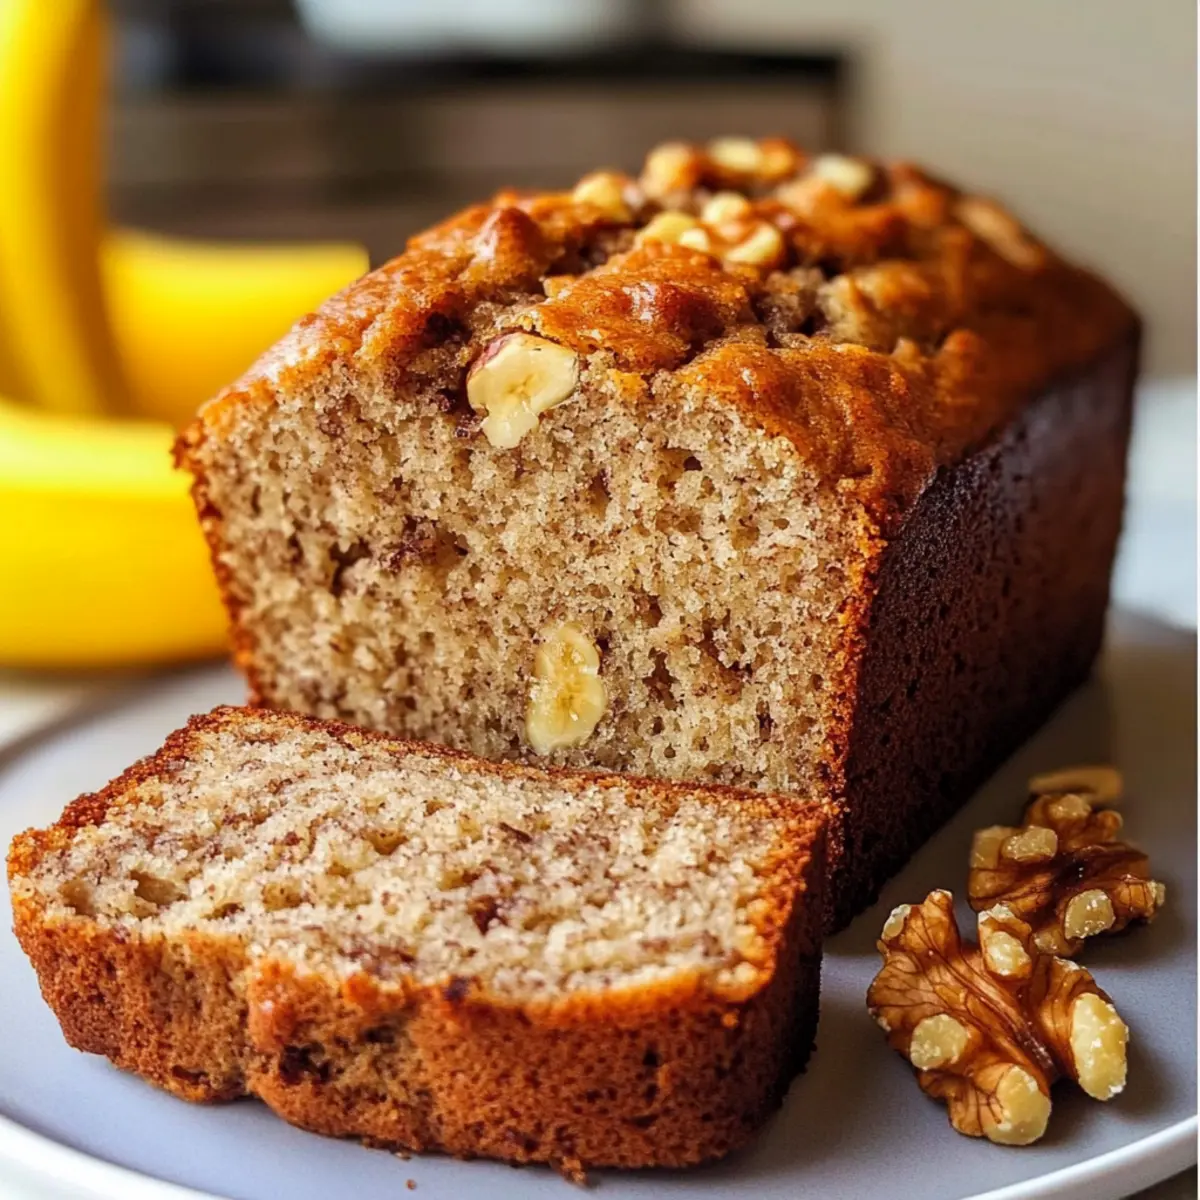
As the aroma of freshly baked banana nut bread wafts through my kitchen, I can’t help but feel a wave of nostalgia wash over me. This classic treat has a way of wrapping you in comfort, with its golden crust hiding a tender crumb filled with crunchy toasted nuts. My recipe for Banana Nut Bread not only transforms overripe bananas into a perfect snack or breakfast option but also comes together quickly, making it a favorite for busy days. Whether you prefer it plain, with a generous smear of butter, or even with a twist of chocolate chips, this recipe is an uncomplicated delight that everyone will love. Are you ready to indulge in a slice of pure homemade happiness?
Why is Banana Nut Bread a favorite?
Comforting Tradition: Banana nut bread is a nostalgic treat that warms the heart with every bite.
Easy to Make: This simple recipe requires minimal effort and ingredients, making it perfect for bakers of any level.
Versatile Options: Feel free to customize with chocolate chips or different nuts, tailoring it to your taste. You might also like incorporating flavors from my Luscious Banana Chocolate for an indulgent twist.
Crowd-Pleaser: Ideal for breakfast or a snack, this bread never fails to impress guests or family alike!
Time-Saving: Bake it ahead of time for quick snacks or breakfast on the go, making it a practical choice for any busy week.
Banana Nut Bread Ingredients
- For the Batter
• Ripe Bananas – Use soft, freckled bananas for best results, providing natural sweetness and moisture.
• Butter – Adds richness and flavor; can be substituted with vegetable oil for a lighter option.
• Sugar – Balances sweetness and contributes to browning; consider using brown sugar for added flavor.
• Egg – Helps bind ingredients and adds structure; for an egg-free version, use 1/4 cup unsweetened applesauce.
• Vanilla Extract – Enhances overall flavor; can be omitted for a simpler taste.
• Baking Soda – Acts as a leavening agent for rise; ensure it’s fresh for best results.
• Salt – Balances sweetness and enhances flavor.
• All-Purpose Flour – Provides structure to the bread; whole wheat flour can be used for a healthier alternative.
• Chopped Nuts (e.g., walnuts) – Adds crunch and toasty flavor; can substitute with pecans or omit for a nut-free version.
Step‑by‑Step Instructions for Banana Nut Bread
Step 1: Preheat and Prepare
Preheat your oven to 350°F (175°C) and grease a 4×8 inch loaf pan liberally with butter or non-stick spray. This step is essential to ensure your delicious banana nut bread releases easily after baking, so don’t skip it! Set the prepared pan aside while you mix the batter.
Step 2: Mash the Bananas
In a large mixing bowl, combine the ripe bananas with the melted butter. Use a fork or a potato masher to mash the bananas until the mixture is mostly smooth but still has some small chunks for texture. This step infuses your banana nut bread with natural sweetness and moisture, making it irresistibly tender.
Step 3: Mix in Baking Ingredients
Stir in the baking soda and salt until fully incorporated, ensuring you blend them well to avoid any clumps. This combination is vital for achieving the perfect rise and flavor in your banana nut bread. The mixture should take on a slightly glossy appearance as you mix thoroughly.
Step 4: Add the Sweetness
Next, add the sugar, beaten egg, and vanilla extract to the banana mixture. Stir until everything is well combined and the batter appears smooth and shiny. The egg serves to bind your ingredients together, so make sure to mix until there are no visible streaks of egg remaining.
Step 5: Incorporate the Flour
Gently fold in the all-purpose flour using a spatula or wooden spoon until just combined. Be cautious not to overmix, as this could lead to a dense loaf. You want to see a few small streaks of flour remaining to ensure a soft and tender banana nut bread.
Step 6: Add the Nuts
Carefully fold in the chopped nuts of your choice, such as walnuts, making sure they are evenly distributed throughout the batter. Optionally, you can dust the nuts lightly with flour before adding them to prevent them from sinking in the batter. This extra step enhances the nutty flavor as they toast while baking.
Step 7: Pour and Smooth
Pour the batter into your prepared loaf pan, using a spatula to smooth out the top evenly. This ensures your banana nut bread has a nice rise and cooks uniformly. Once smooth, tap the pan gently on the counter to remove any air bubbles that may have formed.
Step 8: Bake to Perfection
Bake your banana nut bread in the preheated oven for 60–65 minutes. To check for doneness, insert a toothpick into the center of the loaf; it should come out clean or with just a few moist crumbs attached. The top should be golden-brown and slightly firm to the touch when ready.
Step 9: Cool Before Serving
Allow the bread to cool in the pan for about 10 minutes, then carefully transfer it to a wire rack to cool completely. This step is important for flavor development and ensures that your banana nut bread maintains its structure when sliced. Enjoy the delightful aroma as it fills your kitchen!
Storage Tips for Banana Nut Bread
- Room Temperature: Store banana nut bread wrapped in plastic wrap or aluminum foil for up to 2 days. This helps maintain its moisture and freshness.
- Fridge: For refrigerator storage, place the bread in an airtight container for up to 4 days. This keeps it from drying out while extending its shelf life.
- Freezer: Freeze slices or the complete loaf in a heavy-duty freezer bag for 2–3 months. To enjoy later, simply thaw overnight in the refrigerator.
- Reheating: For a delightful warm treat, reheat slices in the microwave for about 10-15 seconds or toast them lightly for a crispy edge and warm interior.
Expert Tips for Banana Nut Bread
- Banana Quality: Use very ripe bananas for maximum sweetness and moisture. Look for those with brown spots or a soft texture for the best results.
- Avoid Overmixing: Gently fold in the flour to avoid a dense loaf. Overmixing can lead to tough banana nut bread, so mix just until combined.
- Check Doneness Early: Ovens can vary, so start checking the bread at 55 minutes. A toothpick should come out clean or with a few moist crumbs attached.
- Customize Nuts: Feel free to mix in your favorite nuts! Pecans offer a delicious alternative to walnuts, so don’t hesitate to switch things up.
- Storage Tips: Keep leftover banana nut bread wrapped at room temperature for up to 2 days. For longer storage, slice and freeze, allowing for easy snacking later!
Make Ahead Options
Preparing your Banana Nut Bread in advance is a fantastic way to save time during your busy weekdays! You can mash the ripe bananas and mix them with melted butter up to 24 hours ahead, storing the mixture in an airtight container in the refrigerator to maintain freshness. Additionally, you can pre-measure and combine the dry ingredients (flour, baking soda, salt) for up to 3 days in advance, keeping them in a sealed jar. When you’re ready to bake, simply combine the prepped ingredients, fold in the nuts, and pour the batter into the loaf pan. Bake as instructed, and you’ll enjoy delicious, homemade Banana Nut Bread with minimal effort, making breakfast or snack time a breeze!
What to Serve with Classic Banana Nut Bread
As delightful as a warm slice of bread can be, pairing it with the right accompaniments elevates the experience to new heights.
- Creamy Butter: Slathering your banana nut bread with rich, creamy butter adds an irresistible richness that enhances each bite.
- Greek Yogurt Parfait: Layer yogurt with fresh fruits and granola; the tartness of yogurt beautifully complements the sweetness of the bread.
- Fresh Fruit Salad: A colorful mix of berries, melons, and citrus brings a refreshing contrast, balancing the density of the bread.
- Nutty Granola: Serve a side of crunchy granola for texture; it offers a delightful nibble to counterbalance the soft bread.
- Coffee or Tea: A warm cup enhances the cozy comfort of banana nut bread—try a nutty coffee or herbal tea as an aromatic pairing.
Imagine enjoying a generous slice of moist bread with creamy butter while sipping on a rich dark roast, each bite making your taste buds rejoice!
Banana Nut Bread Variations & Substitutions
Feel free to make this beloved banana nut bread your own with these delightful variations—each one adds a unique twist to your classic home-baked treasure!
-
Nut Alternatives: Swap walnuts for pecans for a sweeter, milder flavor. Both nuts lend a delightful crunch, but pecans will add a buttery richness.
-
Chocolate Indulgence: Add 1 cup of chocolate chips for a luscious, decadent twist. The melted chocolate pairs perfectly with banana’s sweetness, making each slice a treat.
-
Spice It Up: Sprinkle in 1 teaspoon of cinnamon or nutmeg for a warm, cozy flavor. These spices not only elevate the taste but also fill your home with an irresistible aroma.
-
Fruit Fusion: Add 1/2 cup of dried fruit like cranberries or apricots for a chewy burst of flavor. This will give your banana nut bread an exciting twist with every bite.
-
Coconut Lovers: Stir in 1/2 cup of shredded coconut for tropical flair. The coconut adds a lovely chewiness that complements the banana perfectly.
-
Vegan Swap: For a plant-based version, use 1/4 cup of unsweetened applesauce in place of the egg. This keeps the bread moist while catering to vegan diets.
-
Grain-Free Option: Substitute all-purpose flour with almond or coconut flour to make a gluten-free banana nut bread. Just remember to adjust the liquid slightly, as these flours absorb more moisture.
-
Nut-Butter Swirl: For an even creamier texture, swirl in 1/2 cup of your favorite nut butter (like peanut or almond) before baking. It gives the bread a delightful nutty richness with every bite.
With these variations, your creation will shine brightly among your family favorites. If you love the banana experience, don’t forget to try my Moist Banana Bread or indulge in a rich Luscious Banana Chocolate for some serious flavor inspiration!
Banana Nut Bread Recipe FAQs
How do I choose the perfect ripe bananas for banana nut bread?
Absolutely! Look for bananas that are soft with lots of brown or dark spots; these indicate peak ripeness for maximum sweetness and moisture. The more spots, the better—this is what transforms them into a deliciously moist banana nut bread!
How should I store my banana nut bread to keep it fresh?
For short-term storage, wrap your banana nut bread tightly in plastic wrap or aluminum foil and keep it at room temperature for up to 2 days. If you’re keeping it longer, store it in an airtight container in the fridge for up to 4 days to maintain its soft texture.
Can I freeze banana nut bread? If so, how?
Absolutely! You can freeze your banana nut bread for up to 2-3 months. To freeze, wrap the whole loaf tightly in plastic wrap and then place it inside a freezer bag. For individual portions, slice the bread, wrap each piece, and store them in a labeled freezer bag. When you’re ready to enjoy a slice, just thaw it overnight in the refrigerator.
What should I do if my banana nut bread is too dense?
Very often, banana nut bread can turn out dense if it’s overmixed. When adding the flour, fold gently until ingredients are just combined, leaving a few streaks of flour. Another tip is to ensure you’re using very ripe bananas; if they’re just slightly ripe, they won’t provide enough moisture and sweetness, affecting the texture.
Can my pet enjoy banana nut bread?
It’s best to keep banana nut bread away from pets. While bananas are safe in small quantities, other ingredients like sugar, butter, and nuts might not be suitable for dogs or cats. Always consult your veterinarian before sharing homemade treats with your furry friends!
What variations can I try for my banana nut bread?
The possibilities are endless! You can mix in chocolate chips for a sweeter cookie-like version or substitute walnuts with pecans for different flavors. If you’re in the mood for something unique, add a sprinkle of cinnamon or a swirl of peanut butter into the batter. Feel free to experiment and create your own delicious concoction!

Irresistible Banana Nut Bread for Cozy Mornings
Ingredients
Equipment
Method
- Preheat your oven to 350°F (175°C) and grease a 4x8 inch loaf pan liberally with butter or non-stick spray.
- In a large mixing bowl, combine the ripe bananas with the melted butter and mash until mostly smooth.
- Stir in the baking soda and salt until fully incorporated.
- Add the sugar, beaten egg, and vanilla extract to the banana mixture, stirring until well combined.
- Gently fold in the all-purpose flour until just combined.
- Carefully fold in the chopped nuts.
- Pour the batter into the prepared loaf pan, smoothing out the top.
- Bake for 60–65 minutes, checking for doneness with a toothpick.
- Allow the bread to cool in the pan for about 10 minutes, then transfer to a wire rack.
Leave a Reply