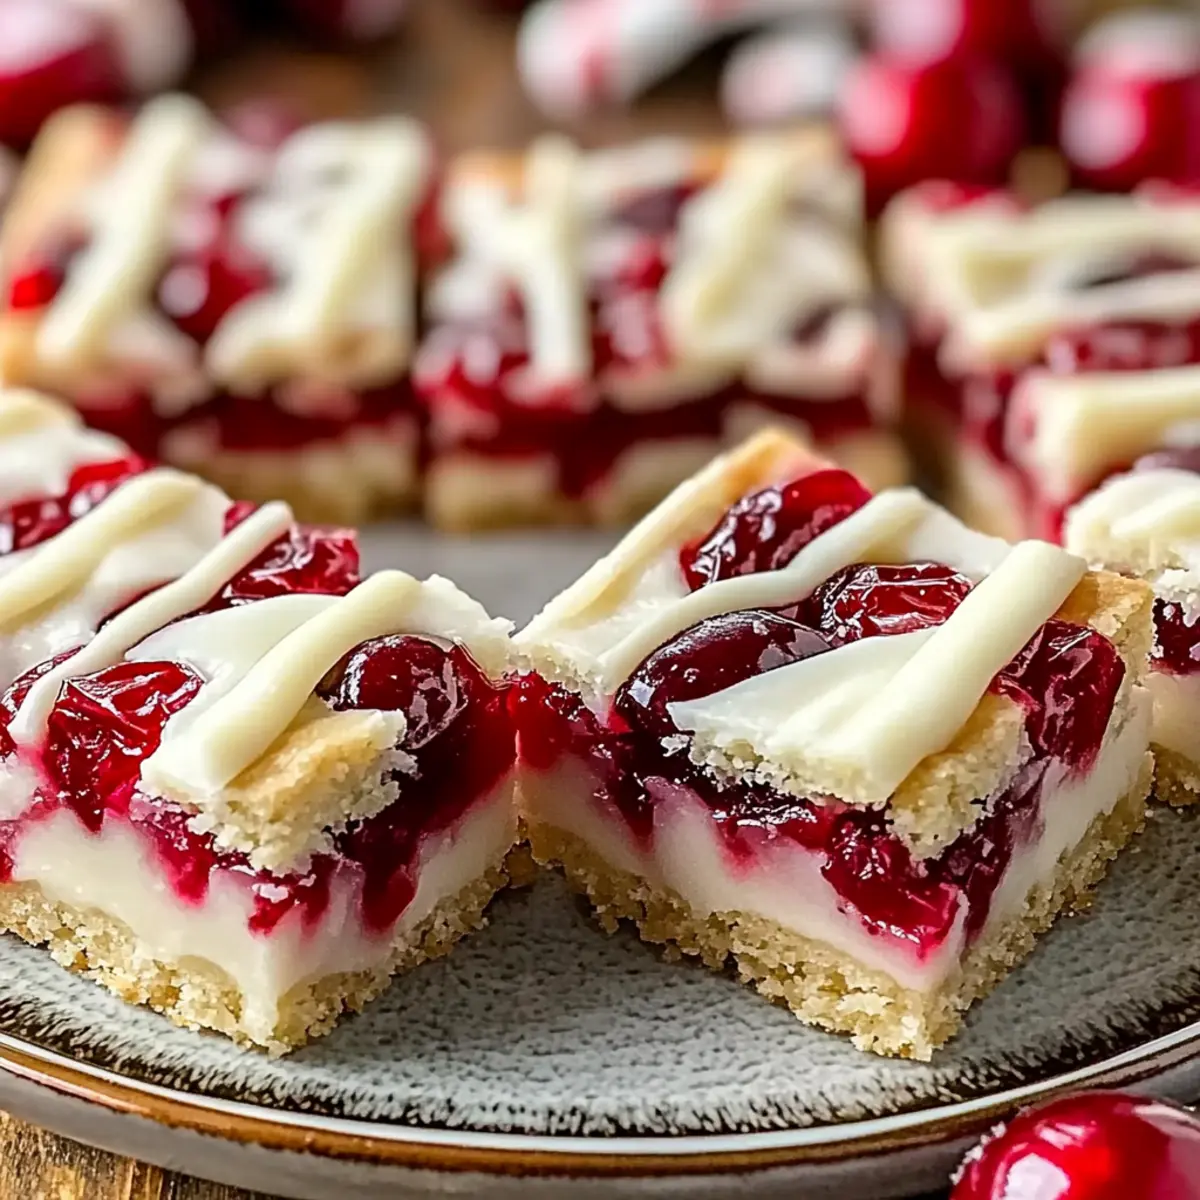
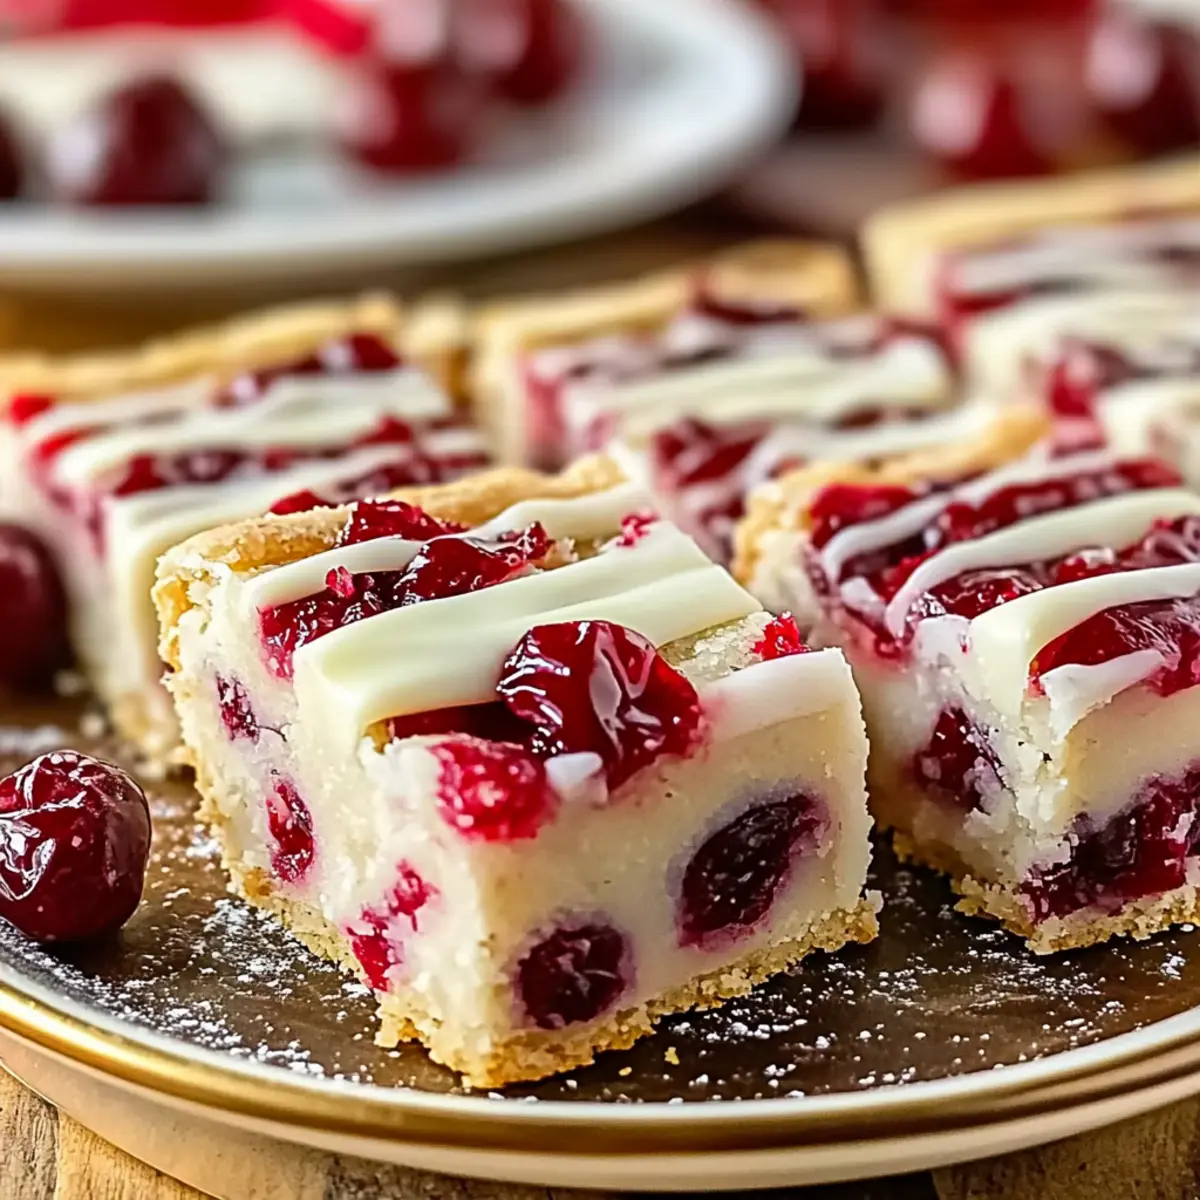
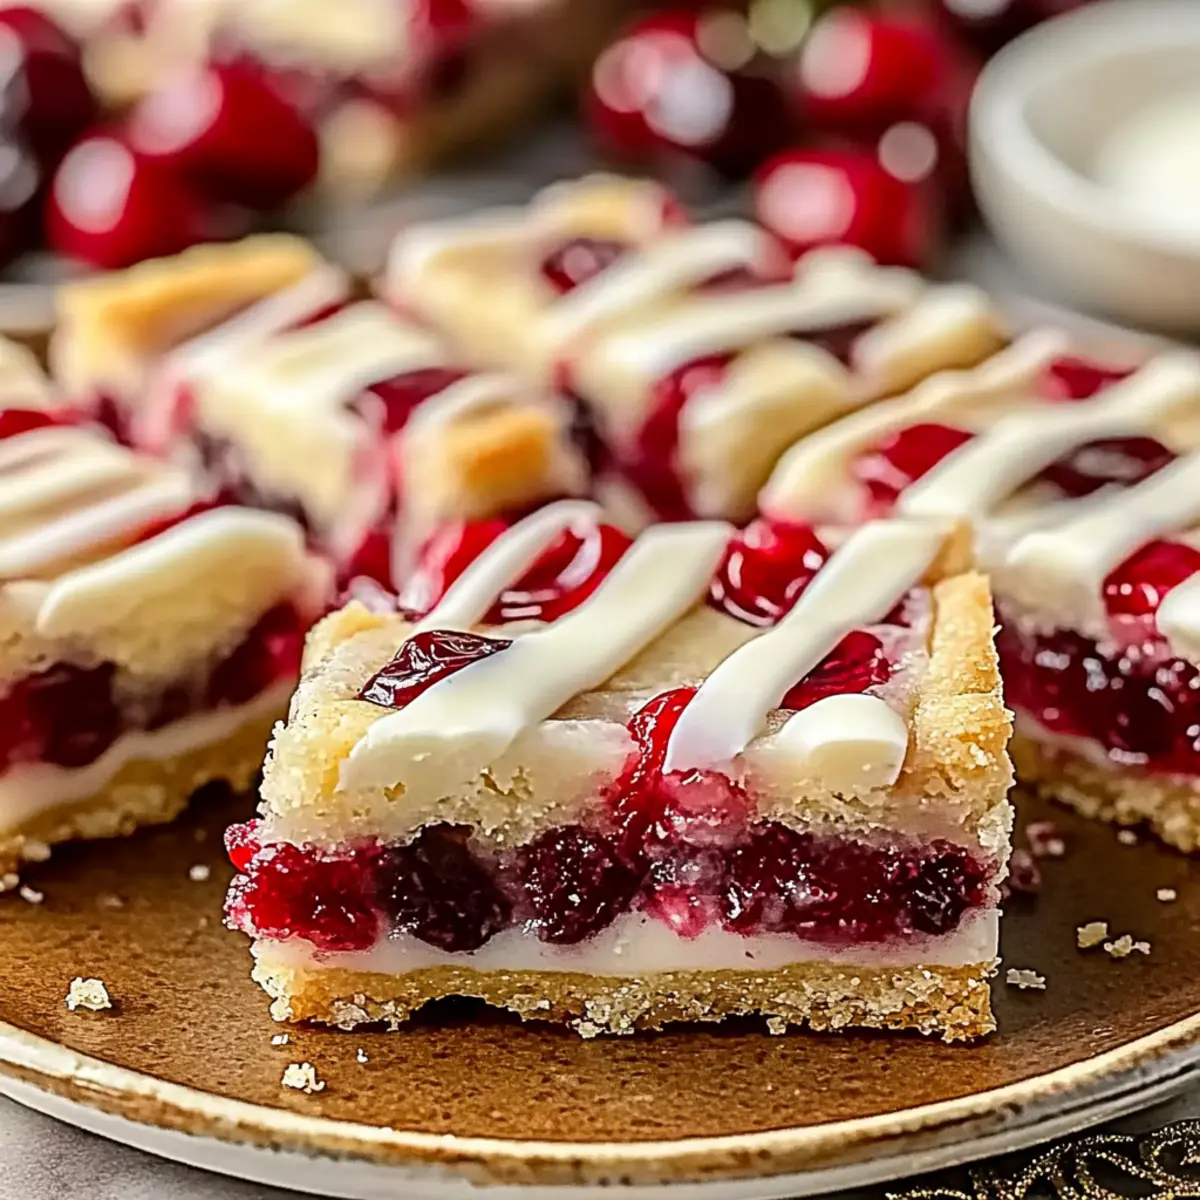
The kitchen fills with warmth as the smell of baking sugar and cherries wafts through the air, instantly transforming any ordinary day into a festive occasion. These Christmas Cherry Bars with White Chocolate encapsulate the perfect blend of sweet and tart, making them an irresistible treat during the holiday season. What I love most about this recipe is how easy it is to whip up—no skills required here—and how they look stunning on a dessert platter, making them a hit for cookie exchanges or family gatherings. Plus, you can customize them with fun twists like adding dark chocolate or pistachios! Are you ready to make these joyful bars that will delight your friends and family? Let’s dive into the recipe!
Why are Christmas Cherry Bars a must-try?
Irresistible Flavor: The combination of sweet-tart cherries and creamy white chocolate elevates these bars to a festive delight, perfect for holiday cravings.
Focus on Simplicity: With just a few simple steps, you’ll be on your way to a delicious batch that requires minimal skill, making it a great choice for novice bakers.
Versatile Options: Want to get creative? Add pistachios for a wonderful crunch or swap in dark chocolate for a richer flavor to truly make them your own!
Crowd-Pleasing Appeal: Perfect for cookie exchanges, these bars charm anyone who tries them, ensuring they’ll be the star of your holiday spread.
Quick and Convenient: In just 35 minutes, you can bake these beauties, allowing you to enjoy more quality time with loved ones during the busy holiday season.
Christmas Cherry Bars Ingredients
• These simple yet delightful ingredients come together to create the perfect festive treat!
For the Base
- Butter – Provides richness and tenderness to the shortbread; substitute with vegan butter for a dairy-free option.
- Granulated Sugar – Sweetens the base and contributes to structure; brown sugar can be used for a deeper flavor.
- All-Purpose Flour – Gives structure to the bars; swap for gluten-free flour to cater to dietary needs.
- Salt – Enhances flavors throughout the recipe; use sea salt for a more pronounced taste.
For the Cherry Filling
- Dried Cherries – Adds a sweet-tart flavor and chewy texture; consider substituting with dried cranberries or raisins for variety.
- White Chocolate Chips – Brings creaminess and sweetness; can be replaced with dark chocolate chips for a richer alternative.
- Egg – Binds the ingredients together; for a vegan version, use flaxseed meal mixed with water.
These key components come together to create delicious Christmas Cherry Bars that will wow your guests!
Step‑by‑Step Instructions for Christmas Cherry Bars
Step 1: Preheat and Prepare
Start by preheating your oven to 350°F (175°C). While the oven warms, grease a 9×9-inch baking dish to ensure your Christmas Cherry Bars easily release after baking. You can also line the dish with parchment paper for added ease. This sets a solid foundation for the buttery shortbread base you’ll be creating.
Step 2: Cream Butter and Sugar
In a large mixing bowl, cream together 1 cup of softened butter and 1 cup of granulated sugar until the mixture is light and fluffy, about 3-5 minutes. Use a hand mixer or stand mixer for best results. The mixture should appear pale and increased in volume, indicating it’s ready for the next ingredients.
Step 3: Combine Dry Ingredients
Gradually mix in 2 cups of all-purpose flour and a pinch of salt into the butter-sugar mixture until just combined. Be careful not to overmix as this can toughen the texture of your Christmas Cherry Bars. The dough should start coming together but remain slightly crumbly, perfect for a tender shortbread base.
Step 4: Add the Egg
Next, crack in 1 egg and mix until just incorporated. This will bind your ingredients together, resulting in a cohesive batter. You should see the dough coming together more fully, creating a smooth consistency that’s still slightly crumbly, offering a great contrast to the chewy cherries and creamy chocolate additions.
Step 5: Fold in Dried Cherries and Chocolate
Gently fold in 1 cup of dried cherries and 1 cup of white chocolate chips using a spatula. This step ensures that the festive flavors are evenly distributed throughout the batter. The cherry and chocolate pieces should be visible, creating a colorful, inviting base that showcases all the delightful textures of your Christmas Cherry Bars.
Step 6: Spread in Baking Dish
Transfer the batter into the greased baking dish, spreading it evenly with a spatula. Make sure the mixture is smoothed out to the edges, creating a nice even layer. This ensures uniform baking, where your Christmas Cherry Bars develop a beautiful golden edge and firm structure during the baking process.
Step 7: Bake to Perfection
Place the baking dish in your preheated oven and bake for 25-30 minutes. Watch for the edges to turn golden brown and feel firm to the touch, indicating that the bars are done. A light golden crust will form, providing a contrast to the soft interior filled with sweet-tart cherries.
Step 8: Cool and Slice
Once baked, remove the dish from the oven and let the bars cool completely in the pan on a wire rack. This cooling period helps the bars set properly. After they are cool, slice them into squares, revealing the delightful layers of cherries and chocolate that make your Christmas Cherry Bars so special.
Step 9: Optional Decorative Drizzle
For an extra touch of indulgence, consider melting a little white chocolate and drizzling it over the cooled bars. This optional step adds a beautiful finish and extra sweetness, making your Christmas Cherry Bars a stunning centerpiece for any holiday gathering!
Make Ahead Options
These Christmas Cherry Bars are the perfect treat to make ahead of time, saving you precious moments during the busy holiday season! You can prepare the base mixture up to 24 hours in advance; simply follow the first five steps and store the batter covered in the refrigerator. When you’re ready to bake, just spread the mixture in the baking dish, pop it in the oven, and you’ll have fresh, delicious bars in no time. Additionally, you can slice the cooled bars and store them in an airtight container for up to 3 days at room temperature, ensuring they remain just as delightful. This way, you’ll always have a festive treat on hand without the last-minute rush!
What to Serve with Christmas Cherry Bars
Indulge in a festive feast by pairing delightful accompaniments with your sweet-tart Christmas Cherry Bars.
- Rich Vanilla Ice Cream: The creamy texture complements the bars’ chewy cherries beautifully, creating a luxurious dessert experience.
- Festive Hot Cocoa: The warm, rich flavors of cocoa enhance the holiday spirit, making each bite of the cherry bar even more delightful.
- Spiced Apple Cider: A warm cup of spiced apple cider adds a cozy, aromatic element, balancing the sweetness of the bars perfectly.
- Roasted Nuts: A mix of roasted almonds and pecans provides a crunchy contrast, offering an irresistible texture alongside the soft bars.
- Fresh Fruit Salad: Bright, tangy fruits add freshness and a pop of color, creating a refreshing palate cleanser between sweet bites.
- Chai Tea: The spices in chai tea harmonize beautifully with the flavors of the cherry bars, making them the perfect cozy pairing for chilly evenings.
Enjoy experimenting with these pairings to elevate your dessert table and create cherished holiday memories!
Helpful Tricks for Christmas Cherry Bars
-
Room Temperature Butter: Ensure your butter is at room temperature for easy creaming. This is crucial in achieving that light and fluffy base for your Christmas Cherry Bars.
-
Don’t Overmix: Avoid overmixing once you add the flour; this helps maintain the tender texture. Aim for just combined to keep those bars soft.
-
Cooling Time Matters: Allow your bars to cool completely in the pan. Cutting too soon may lead to messy squares, so patience is key for clean edges!
-
Customizable Choices: Feel free to use dark chocolate or different dried fruits like cranberries. Experimenting with substitutions can elevate your Christmas Cherry Bars!
-
Storage Smart: To keep bars fresh, store them in an airtight container at room temperature. They stay delicious for up to a week, perfect for holiday snacking!
Storage Tips for Christmas Cherry Bars
-
Room Temperature: Keep the Christmas Cherry Bars in an airtight container at room temperature for up to 5 days, ensuring they maintain their delightful flavor and texture.
-
Fridge: For longer freshness, store the bars in the refrigerator, where they can last up to 1 week. Just be sure to wrap them well to prevent drying out.
-
Freezer: You can freeze the bars for up to 3 months. Wrap them tightly in plastic wrap and then in foil or a freezer bag to protect against freezer burn.
-
Reheating: When ready to enjoy, allow the bars to thaw in the fridge overnight or at room temperature for 1-2 hours. Reheat them in the microwave for a few seconds for a freshly-baked experience!
Christmas Cherry Bars Customizations
Feel free to let your creativity shine by personalizing these delightful bars in ways that reflect your taste!
-
Nutty Boost: Stir in chopped pistachios for an added crunch and a pop of color that enhances both flavor and presentation.
This nut variation not only brings a delightful texture but also complements the sweet-tart cherries beautifully. -
Rich Chocolate Swap: Try dark chocolate chips instead of white for a more decadent and bold chocolate experience.
The deep, rich flavor pairs stunningly with the cherries, perfect for any chocolate lover! -
Fruit Variation: Switch dried cherries for dried cranberries or raisins to create a different sweet-tart balance.
This can offer a fresh twist that keeps the recipe versatile, surprising your guests with new depths of flavor. -
Vegan Delight: Substitute regular butter with vegan butter and use flaxseed for the egg to make a scrumptious vegan version.
This way, everyone can enjoy these festive treats, no matter their dietary preferences. -
Flavorful Additions: Consider adding a dash of almond extract for a nutty flavor that complements the cherries beautifully.
Just a little can elevate your bars, giving everyone more reasons to reach for another piece! -
Texture Twist: Mix in shredded coconut for a chewy texture that pairs nicely with the cherries and chocolate.
The coconut will add a tropical flair, transforming your Christmas Cherry Bars into an enchanting delight. -
Spicy Kick: For a little heat, add a sprinkle of cayenne pepper or cinnamon to the batter.
This unexpected twist can create an exciting flavor profile, perfect for adventurous taste buds.
For more festive ideas, check out these delightful recipes like the Christmas Spice Cake with Eggnog Buttercream or the fun 3-ingredient Christmas Jello Balls. Enjoy exploring the variations!
Christmas Cherry Bars Recipe FAQs
How do I choose ripe dried cherries for my Christmas Cherry Bars?
Absolutely! When selecting dried cherries, look for ones that are plump and brightly colored, with minimal dark spots. Dark spots can indicate that the cherries are overripe or have been overly processed. If possible, opt for organic cherries to avoid any added preservatives, ensuring a clean, vibrant flavor in your bars.
What is the best way to store Christmas Cherry Bars?
To keep your Christmas Cherry Bars fresh, store them in an airtight container at room temperature for up to 5 days. If you’d like to extend their freshness, place them in the refrigerator where they can last up to a week. Just be sure to wrap them well to prevent drying out!
Can I freeze Christmas Cherry Bars for later?
Yes, you can! To freeze your Christmas Cherry Bars, first, let them cool completely. Then, wrap them tightly in plastic wrap and place them in a freezer bag or wrap them in foil for added protection. They can be stored in the freezer for up to 3 months. When you’re ready to enjoy them, thaw in the fridge overnight or at room temperature for 1-2 hours. A quick 10-15 seconds in the microwave will revive their just-baked warmth!
What if my Christmas Cherry Bars are too dry?
Very! If you find your bars are a little dry after baking, it might be due to overmixing the batter or baking them a bit too long. Always ensure you’re mixing just until combined after adding flour. If they remain dry, consider adding a bit more butter or a touch of cream cheese next time for moisture and richness.
Are Christmas Cherry Bars suitable for people with food allergies?
Absolutely! For a nut-free option, make sure to choose derived white chocolate that’s free from any cross-contamination. To make them dairy-free and suitable for vegans, use vegan butter and substitute the egg with 1 tablespoon of flaxseed meal mixed with 2.5 tablespoons of water. With a few gentle ingredient swaps, you can create this festive treat for everyone!

Delicious Christmas Cherry Bars That Will Wow Your Guests
Ingredients
Equipment
Method
- Preheat your oven to 350°F (175°C) and grease a 9x9-inch baking dish.
- Cream together the softened butter and granulated sugar until light and fluffy, about 3-5 minutes.
- Gradually mix in the all-purpose flour and salt until just combined.
- Add the egg and mix until just incorporated.
- Fold in the dried cherries and white chocolate chips gently.
- Spread the batter evenly in the greased baking dish.
- Bake for 25-30 minutes until edges are golden brown.
- Let the bars cool completely in the pan before slicing into squares.
- Optional: Drizzle melted white chocolate over cooled bars for decoration.
Leave a Reply