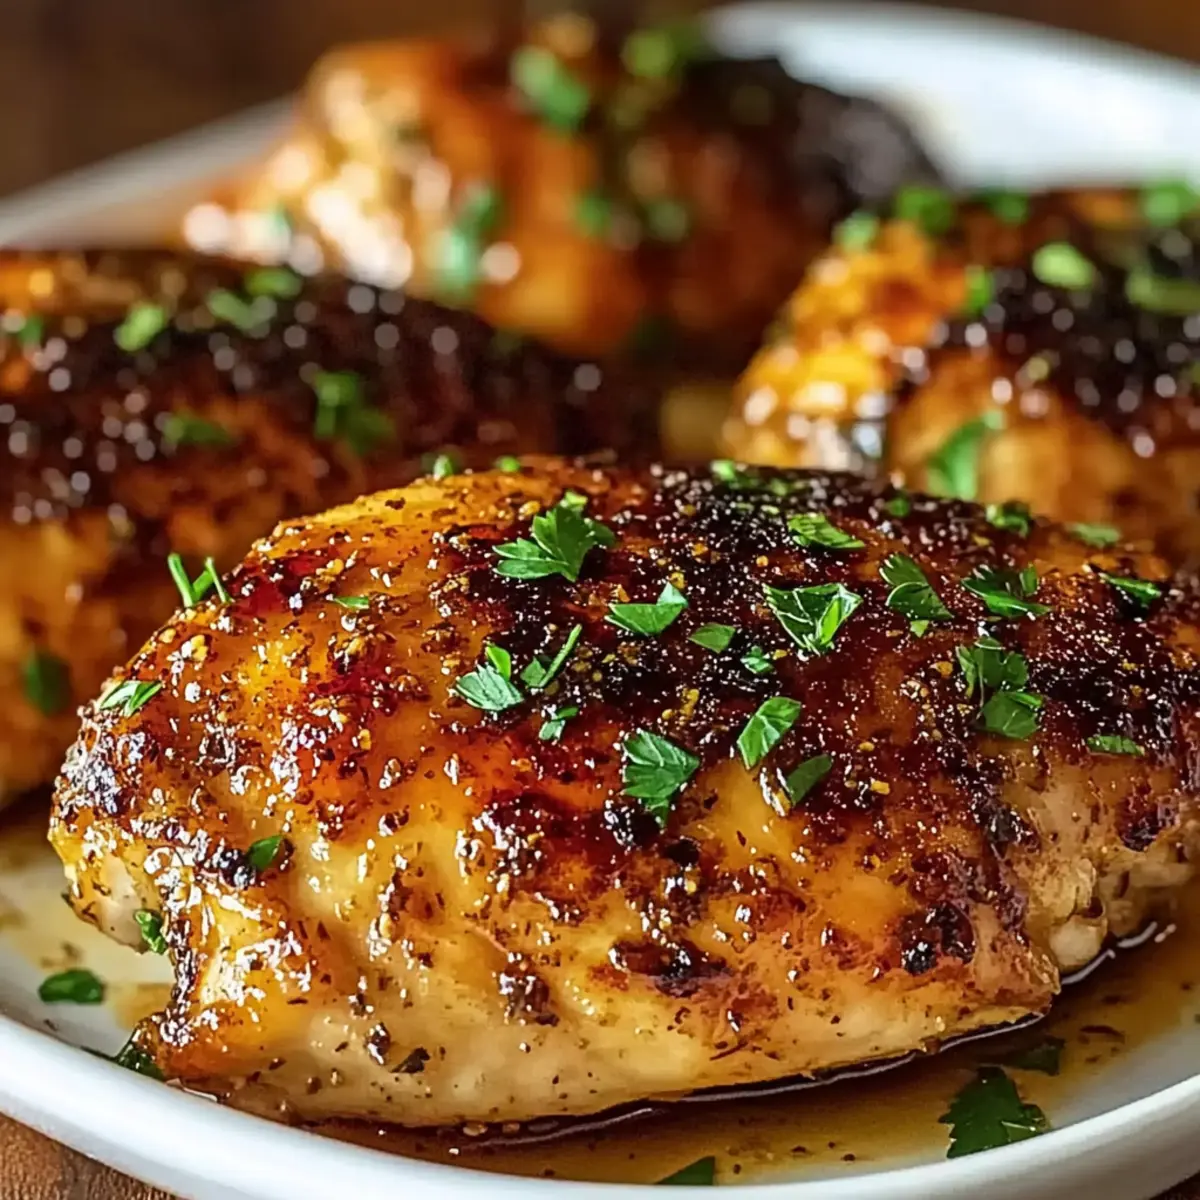
As I stood in my kitchen, the rich aroma of garlic mingling with the sweet notes of brown sugar filled the air, enveloping me in a comforting hug. It was time to whip up my favorite Garlic Brown Sugar Chicken, a dish that’s not only a crowd-pleaser but also ideal for those busy weeknights when dinner needs to come together quickly. This recipe offers juicy, tender chicken, generously coated in a sticky glaze that balances sweetness with savory depth. Plus, it’s versatile enough to cater to everyone—whether you prefer thighs or breasts, or even a low-carb twist! Join me as I guide you through this simple yet delightful journey, perfect for feeding your loved ones and bringing a touch of homemade magic back into your dinner routine. Are you ready to transform your weeknight meals?
Why is Garlic Brown Sugar Chicken a Must-Try?
Flavor Explosion: The sweet and savory combination of brown sugar and garlic creates an indulgent taste that’s simply irresistible.
Quick and Easy: This recipe comes together in no time, making it perfect for busy weeknights when you crave a home-cooked meal.
Versatile Options: Whether you use boneless thighs for juiciness or breasts for a leaner choice, there’s a delicious option for everyone—plus low-carb variations for those watching their diets!
Meal Prep Friendly: Prepare in advance and pop it in the oven when you’re ready, just like my Honey Garlic Chicken or Crack Chicken Tenders.
Crowd-Pleasing: Perfect for family dinners or gatherings, this dish will have your loved ones asking for seconds in no time!
Garlic Brown Sugar Chicken Ingredients
-
For the Chicken
• Boneless, Skinless Chicken Breasts or Thighs – Thighs offer juiciness and tenderness, while breasts keep it lean and healthy. -
For the Glaze
• Olive Oil – This helps prevent sticking and encourages a beautiful caramelization on the chicken.
• Garlic – Fresh minced garlic is essential for an aromatic and flavorful glaze.
• Light Brown Sugar – This provides the perfect sweetness to complement the garlic; feel free to swap for a low-carb sweetener if desired.
• Soy Sauce – Adds depth and richness; choose tamari or coconut aminos for a gluten-free option.
• Apple Cider Vinegar – A splash of this enhances flavor and balances the sweetness.
• Smoked Paprika – Gives a subtle smokiness that elevates the dish.
• Salt & Black Pepper – Essential seasonings for bringing all the flavors together.
• Onion Powder – An excellent way to add extra flavor without the fuss.
• Crushed Red Pepper Flakes (optional) – For those who enjoy a gentle kick of heat. -
For Finishing Touches
• Unsalted Butter – This adds richness and gives the sauce a glossy finish.
• Fresh Parsley – A lovely optional garnish that adds color and a hint of freshness to your dish.
Step‑by‑Step Instructions for Garlic Brown Sugar Chicken
Step 1: Preheat the Oven
Begin by preheating your oven to 375°F (190°C). While the oven heats up, grab a baking dish and coat it with a drizzle of olive oil to ensure the chicken doesn’t stick. This crucial first step sets the stage for a beautifully caramelized Garlic Brown Sugar Chicken that everyone will love.
Step 2: Prepare the Chicken
Take your boneless, skinless chicken breasts or thighs, and pat them dry with paper towels. This helps the seasonings stick better. Next, season both sides generously with salt, black pepper, smoked paprika, and onion powder. Arrange the seasoned chicken in a single layer in your oiled baking dish, ensuring even cooking.
Step 3: Make the Sauce
In a mixing bowl, combine melted unsalted butter with light brown sugar, soy sauce, apple cider vinegar, and minced garlic. Whisk everything together until well combined, and you achieve a smooth, sticky consistency. This flavorful mixture will become the glaze that transforms your chicken into a delightful Garlic Brown Sugar Chicken dish.
Step 4: Coat the Chicken
Pour the prepared sauce evenly over the seasoned chicken in the baking dish. Use a spatula or spoon to ensure each piece is generously coated in the sweet-savory glaze. This step is crucial to infusing flavor into the chicken as it bakes and caramelizes beautifully in the oven.
Step 5: Bake the Chicken
Place the baking dish in the preheated oven and bake uncovered for 25–35 minutes. Halfway through the baking time, baste the chicken with the sauce to enhance the flavor and keep it moist. You’ll know it’s ready when the chicken reaches an internal temperature of 165°F (74°C) and the glaze is bubbly and slightly caramelized.
Step 6: Final Touch
In the last 5 minutes of baking, keep a close eye on the chicken as the sauce thickens and caramelizes. This step enhances the flavors even more, giving you a glossy glaze that clings beautifully to the chicken, making it irresistibly appealing for your Garlic Brown Sugar Chicken feast.
Step 7: Rest Before Serving
Once cooked, remove the baking dish from the oven and let the chicken rest for about 5 minutes. This allows the juices to redistribute, keeping the chicken tender and flavorful. After resting, serve your delicious Garlic Brown Sugar Chicken, and get ready for compliments around the dinner table!
Storage Tips for Garlic Brown Sugar Chicken
-
Fridge: Store leftover Garlic Brown Sugar Chicken in an airtight container for up to 4 days to maintain freshness and flavor.
-
Freezer: For longer storage, freeze the chicken in airtight containers or freezer bags for up to 2 months. Label with the date for easy tracking.
-
Reheating: When ready to enjoy, thaw in the refrigerator overnight. Reheat in the oven at 350°F (175°C) for about 15–20 minutes, covered to retain moisture.
-
Make-Ahead Option: Assemble the Garlic Brown Sugar Chicken and refrigerate it for up to 24 hours before baking for a convenient meal prep solution.
Expert Tips for Garlic Brown Sugar Chicken
-
Fresh Garlic Wins: Using fresh minced garlic rather than jarred significantly enhances the flavor of your Garlic Brown Sugar Chicken. The fresh flavor makes all the difference!
-
Thicker Glaze: If you find the glaze too runny, simmer it in a saucepan after baking to thicken it up. This creates a luxurious coating for your chicken.
-
Prep Ahead: For a seamless dinner experience, assemble the dish and refrigerate it for up to 24 hours before baking. Simply pop it in the oven when you’re ready to eat!
-
Avoid Overcrowding: Make sure to space chicken pieces evenly in the baking dish. Overcrowding can lead to uneven cooking and prevent browning, resulting in less than perfect chicken.
-
Experiment with Sweetness: Don’t hesitate to replace half the brown sugar with honey in the glaze for a floral sweetness. Your taste buds will thank you!
What to Serve with Garlic Brown Sugar Chicken?
Elevate your dining experience with delightful accompaniments that balance out the sweet and savory notes of your chicken.
-
Creamy Mashed Potatoes: The buttery richness of mashed potatoes enhances the sticky glaze, making every bite a comforting indulgence. Smooth, velvety, and oh-so-satisfying!
-
Garlic Roasted Green Beans: These crunchy green beans bring a fresh pop of flavor, complementing the richness of the chicken. The caramelized edges sync beautifully with the dish’s garlic profile.
-
Honey-Glazed Carrots: Their natural sweetness and slight crunch add a lovely contrast to the savory chicken. Plus, they create a delightful visual appeal on your plate.
-
Fluffy Jasmine Rice: Perfect for soaking up the extra glaze, jasmine rice offers a fragrant cushion beneath the chicken. It’s a light and satisfying addition to your meal.
-
Herbed Quinoa Salad: A nutty combination of quinoa with fresh herbs and veggies gives a healthy twist. It balances out the rich flavors and adds texture to the dinner.
-
Caesar Salad: The crisp romaine and creamy dressing create a refreshing bite that cuts through the richness of the chicken. A classic pairing for a reason!
-
Iced Tea or Lemonade: A chilled beverage with hints of citrus offers a refreshing contrast to the warm, savory flavors of the Chicken. Perfect for quenching your thirst!
-
Chocolate Chip Cookies: For a sweet endnote, homemade cookies are an absolute treat. They’re a nostalgic way to finish off this deliciously comforting meal.
Garlic Brown Sugar Chicken Variations
Feel free to get creative with these mouthwatering twists on Garlic Brown Sugar Chicken that will spark your culinary imagination.
-
Thighs or Breasts: Use chicken thighs for juicier bites or opt for breasts for a leaner dish; both will shine.
-
Honey Garlic Variation: Substitute half the brown sugar with honey for a floral sweetness that elevates the dish even more.
-
Spicy Kick: Add chili garlic sauce or extra red pepper flakes for a delightful heat that wakes up your taste buds.
-
Air Fryer Twist: Cook in an air fryer at 375°F for about 12–15 minutes, brushing with sauce halfway through for extra flavor.
-
Low-Carb Option: Use a low-carb sweetener in place of brown sugar, making it keto-friendly without sacrificing flavor.
-
Vegetable Medley: Mix in green beans, carrots, or beetroot alongside your chicken for a nutritious one-pan meal bursting with color.
-
Herb Infusion: Add a sprinkle of fresh thyme or rosemary to the glaze for an aromatic touch that complements the garlic beautifully.
-
Asian Flair: Drizzle sesame oil over the chicken before baking and sprinkle with sesame seeds for a nutty twist that enhances the dish.
Each variation offers a distinct opportunity to create a new favorite! Pair your meal with fresh sides or try it alongside my Mexican Lime Chicken for an exciting flavor fusion!
Make Ahead Options
These Garlic Brown Sugar Chicken are perfect for meal prep enthusiasts! You can assemble the dish—including seasoning the chicken and coating it with the sauce—up to 24 hours in advance. Simply cover the baking dish and refrigerate it until you’re ready to bake. To maintain that mouthwatering quality, be sure to store it in an airtight container to prevent any moisture loss. When you’re ready to enjoy this delicious dinner, preheat your oven and simply pop the chicken in, following the baking instructions as usual. This makes for a simple and stress-free dinner, ensuring your busy weeknights are filled with the comforting flavors of Garlic Brown Sugar Chicken!
Garlic Brown Sugar Chicken Recipe FAQs
What type of chicken is best for Garlic Brown Sugar Chicken?
Absolutely! You can use either boneless, skinless chicken breasts or thighs for this recipe. Thighs tend to be juicier and more forgiving if slightly overcooked, while breasts provide a leaner option. Both deliver delicious results, so choose according to your preference!
How should I store leftovers of Garlic Brown Sugar Chicken?
Leftover Garlic Brown Sugar Chicken should be stored in an airtight container in the refrigerator for up to 4 days. This keeps the chicken fresh and flavorful for your next meal.
Can I freeze Garlic Brown Sugar Chicken?
Certainly! Wrap the Garlic Brown Sugar Chicken in airtight containers or freezer bags, ensuring to remove as much air as possible. It can be frozen for up to 2 months. When you’re ready to eat, simply thaw it in the refrigerator overnight and reheat it in the oven at 350°F (175°C) for about 15–20 minutes for the best results!
What should I do if the glaze is too thin?
If your glaze turns out runny, don’t fret! Simply transfer the remaining sauce into a small saucepan after baking. Heat it over medium heat, stirring occasionally until it thickens to your liking. This will create a luxurious coating that enhances the flavor beautifully!
Are there any dietary adjustments I can make for this recipe?
Very! To make this Garlic Brown Sugar Chicken gluten-free, substitute soy sauce with tamari or coconut aminos. Additionally, for a low-carb version, replace the brown sugar with a suitable low-carb sweetener like erythritol or monk fruit. Just be sure to check the sweetness levels to get that delightful balance!
Is Garlic Brown Sugar Chicken safe for pets?
It’s best not to share Garlic Brown Sugar Chicken with pets, particularly because ingredients like garlic can be toxic to dogs and cats in larger amounts. Always serve them plain, unseasoned food instead!
Garlic Brown Sugar Chicken: Your New Favorite Dinner Delight
Ingredients
Equipment
Method
- Preheat your oven to 375°F (190°C) and coat a baking dish with olive oil.
- Pat chicken dry and season with salt, black pepper, smoked paprika, and onion powder. Arrange in baking dish.
- In a bowl, combine melted butter, brown sugar, soy sauce, apple cider vinegar, and minced garlic. Whisk until smooth.
- Pour the sauce evenly over the chicken, ensuring each piece is coated.
- Bake uncovered for 25–35 minutes. Baste halfway through. Chicken is done at 165°F (74°C).
- In the last 5 minutes, watch as the sauce thickens and caramelizes for a glossy finish.
- Let the chicken rest for 5 minutes before serving to allow juices to redistribute.
Leave a Reply