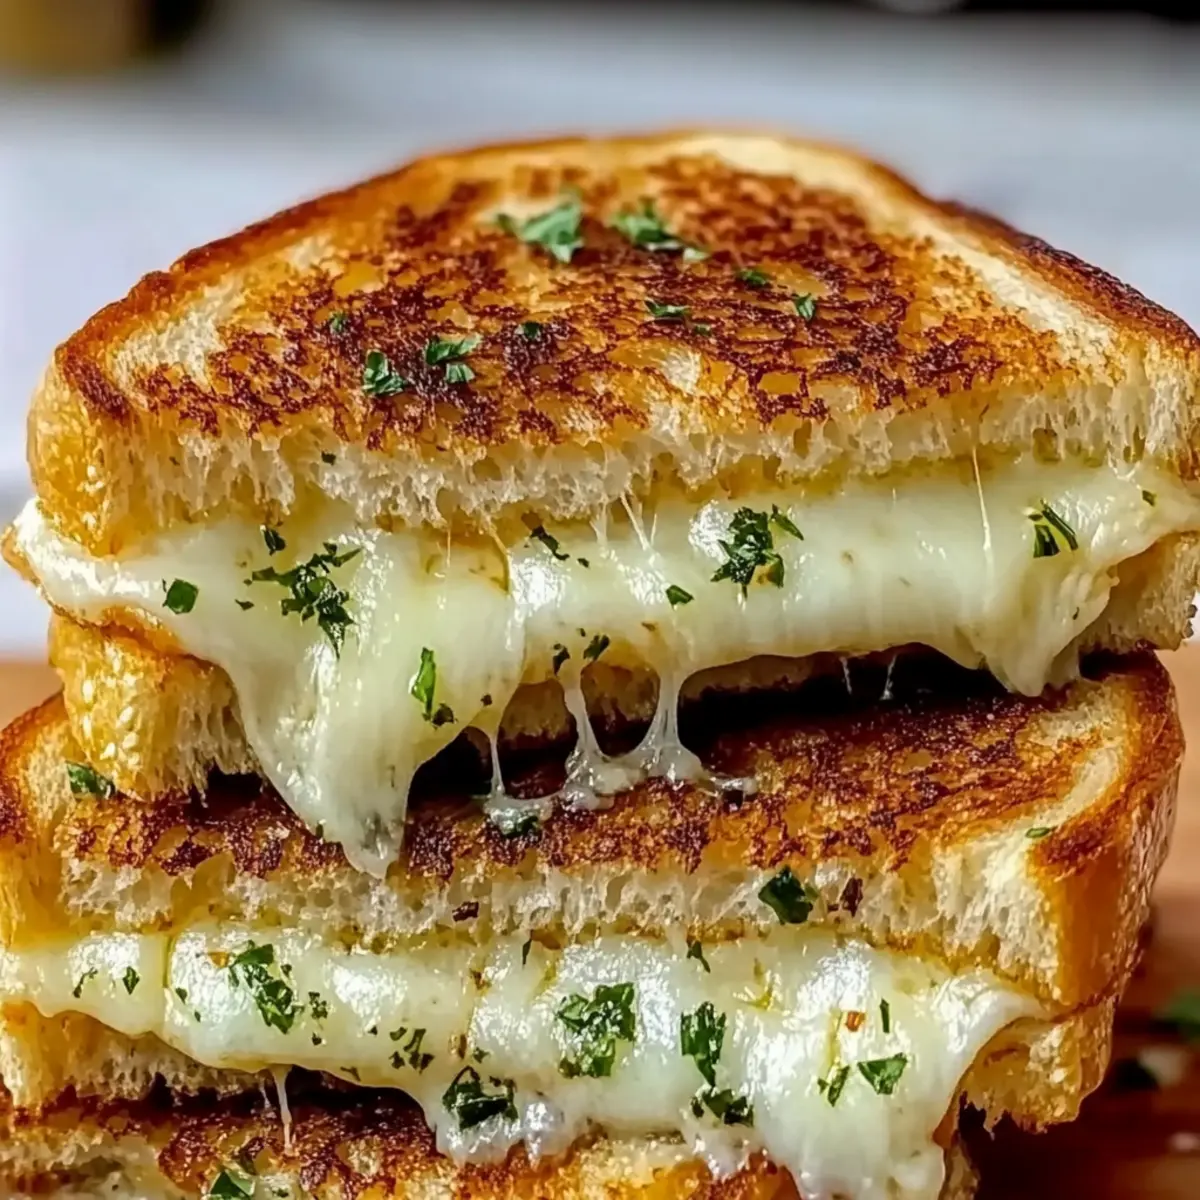
There I was, staring at the fridge, caught in that familiar battle between hunger and indecision. In just 15 minutes, I turned a few simple ingredients into pure bliss: Garlic Bread Grilled Cheese. This quick lunch idea is the perfect remedy for those moments when you crave something warm and comforting, yet don’t have the time to fuss over complicated recipes. The golden, crispy crust pairs beautifully with gooey, melted cheese, making this vegetarian delight a true crowd-pleaser. Plus, it’s ridiculously easy to customize with your favorite cheese types or a fun twist of extras like tomatoes or jalapeños. Ready to transform your lunch game? Let’s dive in!
Why Is This Grilled Cheese Special?
Quick and Easy: In just 15 minutes, you’ll have a warm, gooey sandwich that beats any takeout.
Flavor Explosion: The garlic butter crust adds a savory kick, elevating the classic grilled cheese to new heights.
Versatile Choices: Easily switch up your cheeses for a personalized touch—try aged provolone or even a melty gouda!
Perfect Pairing: Enjoy it dipped in tomato soup or alongside a creamy mushroom soup for a comforting meal.
Crowd-Pleaser: This Garlic Bread Grilled Cheese is sure to impress everyone at the table, whether it’s a cozy lunch at home or a casual get-together.
Your taste buds will thank you for this delightful twist on a classic! For more delicious ideas, check out this Fryer Grilled Cheese and easy Honey Garlic Chicken recipe!
Garlic Bread Grilled Cheese Ingredients
• The secret to the best grilled cheese!
For the Garlic Butter Spread
- Butter – A rich base that creates a crispy, golden crust; try olive oil for a lighter touch.
- Garlic Powder – Gives that easy garlic flavor without the prep; fresh garlic adds more punch if preferred.
- Dried Parsley – Adds a pop of color and flavor; feel free to use fresh parsley for extra freshness.
For the Sandwich
- Bread – Choose a favorite like sourdough or whole grain for varied textures and flavors.
- Shredded Mozzarella and Cheddar Cheese Blend – This combo offers that classic gooey melt; explore Swiss, provolone, or gouda for exciting twists!
Dive into this delicious Garlic Bread Grilled Cheese recipe and experience comfort in every gooey bite!
Step‑by‑Step Instructions for Garlic Bread Grilled Cheese
Step 1: Make the Garlic Butter
In a small bowl, blend softened butter, garlic powder, and dried parsley until well combined and creamy. Ensure the garlic powder is evenly distributed to enhance the flavor throughout. This mixture is the key to the irresistible garlic butter crust that will make your Garlic Bread Grilled Cheese truly special.
Step 2: Prepare the Bread
Spread the garlic butter mixture generously on one side of each slice of your chosen bread. Make sure to cover the entire surface for maximum flavor. This step is crucial as it creates that mouth-watering garlic crust we all love. Choose a thick slice for a heartier sandwich.
Step 3: Assemble the Sandwich
Heat a skillet over low-medium heat. Place two slices of bread, butter-side down, onto the skillet. Quickly add half of your shredded mozzarella and cheddar cheese blend on top of each slice, allowing the cheese to start melting while the bread crisps up. This will ensure a gooey center in your Garlic Bread Grilled Cheese.
Step 4: Top and Complete
Carefully place the remaining slices of bread on top, butter-side up, to form complete sandwiches. Press down lightly to compact the filling. This encourages even melting and helps achieve that perfect grilled texture. Let the sandwiches sizzle as the skillet works its magic.
Step 5: Cook the First Side
Cook the sandwiches on low heat for about 4 to 5 minutes. Keep an eye on them; you want the bread to turn a beautiful, golden brown. If you see it starting to brown too quickly, reduce the heat to ensure the cheese melts perfectly inside without burning the bread.
Step 6: Flip and Finish
Once golden, flip each sandwich carefully using a spatula. Cook the other side for an additional 4 to 5 minutes until it’s crispy and the cheese is fully melted. This is where the magic happens, transforming your Garlic Bread Grilled Cheese into a delightful, gooey treat.
Step 7: Serve Immediately
Remove the sandwiches from the skillet and let them rest for a minute. Slice them diagonally for presentation, revealing the glorious melted cheese inside. Serve hot with a side of your favorite tomato soup for dipping, and indulge in this comfort food staple!
Garlic Bread Grilled Cheese Variations
Feel free to explore new dimensions of flavor and texture with these delightful twists on your Garlic Bread Grilled Cheese!
-
Spicy Kick: Add a sprinkle of crushed red pepper flakes inside the sandwich for a pleasant heat that awakens your taste buds.
-
Herbaceous Twist: Mix fresh chopped basil or oregano into the garlic butter for an aromatic experience that complements the gooiness of the cheese. Fresh herbs can transform this into an exciting Mediterranean delight!
-
Creamy Addition: Spread a thin layer of cream cheese on the bread before adding the cheddar for an ultra-creamy texture and a flavor boost. It pairs beautifully with the garlic butter spread.
-
Cheese Swap: Replace the mozzarella and cheddar blend with a smoky gouda or tangy feta for a unique flavor profile that will have everyone coming back for more.
-
Texture Variation: Use thick-cut sourdough or even a fluffy brioche for a different mouthfeel that truly enhances each bite. The bread itself becomes a star in its own right!
-
Veggie Boost: Layer in some fresh spinach or sliced tomatoes to add freshness and color while also providing extra nutrients. Every bite will be bursting with life!
-
Sweet Touch: For a sweet-savory combo, add thinly sliced apples or pears inside the sandwich before grilling. The sweetness balances the savory cheese, creating an unexpected yet delightful contrast.
Feel like indulging further? Pair your creation with a warm bowl of Honey Garlic Chicken or enjoy the nostalgia of some divine Fryer Grilled Cheese alongside your masterpiece!
Expert Tips for Garlic Bread Grilled Cheese
Low Heat Magic: Keep the skillet on low heat to ensure the bread crisps up without burning while the cheese melts perfectly.
Rest for Crispiness: Allow the sandwiches to rest on a wire rack after cooking, rather than on a plate, to maintain their crunchy texture.
Avoid Overstuffing: While it’s tempting to load up on cheese, stick to a moderate amount for even melting and to prevent soggy bread.
Customize Wisely: Experiment with cheeses and toppings like tomatoes or jalapeños, but be cautious not to overwhelm the delicate garlic flavor.
Perfectly Slice: Use a sharp knife to slice the sandwiches diagonally. This not only looks appealing but creates easier-to-manage pieces for dipping!
Make Ahead Options
These Garlic Bread Grilled Cheese sandwiches are perfect for meal prep enthusiasts looking to save time on busy weeknights! You can prepare the garlic butter mixture (butter, garlic powder, and parsley) up to 3 days in advance and store it in an airtight container in the refrigerator. Additionally, you can assemble the sandwiches by spreading the garlic butter on the bread and layering the cheese, then wrap them tightly and refrigerate for up to 24 hours. When you’re ready to enjoy, simply heat a skillet and cook the sandwiches as directed, flipping until golden brown. This way, you can savor the same delicious comfort of the Garlic Bread Grilled Cheese with minimal effort!
What to Serve with Garlic Bread Grilled Cheese
Elevate your quick lunch experience with delectable sides that beautifully complement the rich flavors of garlic bread and gooey cheese.
-
Tomato Soup: A classic pairing, the creamy richness contrasts perfectly with the crunch of the grilled cheese, creating a comforting experience.
-
Side Salad: A fresh, crisp salad loaded with greens and a bright vinaigrette offers a refreshing balance to the hearty sandwich while adding vibrant colors to the plate.
-
Pickles or Pickled Vegetables: The tanginess cuts through the richness of the cheese, enlivening each bite with a zesty crunch that perfectly complements the dish.
-
Roasted Veggies: A medley of roasted seasonal vegetables adds a nutritious element; their natural sweetness pairs wonderfully with the savory grilled cheese.
-
Sweet Potato Fries: A delightful twist, these crispy fries give a satisfying crunch and a hint of sweetness, enhancing the overall meal experience.
-
Classic Chips: For some irresistible crunch, serve with classic potato chips or kettle-cooked varieties for a nostalgic touch.
-
Fruit Salad: A bowl of fresh, juicy fruits provides a refreshing contrast and a little sweetness that beautifully balances the richness of the sandwich.
-
Herbal Iced Tea: Opt for a refreshing herbal iced tea with mint tones, providing a cooling counterpoint to the warm, cheesy sandwich.
-
Brownies: For a sweet finish, serve fudgy brownies. Their rich chocolate flavor makes for a decadent dessert following your savory meal.
Storage Tips for Garlic Bread Grilled Cheese
Room Temperature: Serve your Garlic Bread Grilled Cheese immediately for the best flavor. If needed, it can sit out for up to 2 hours at room temperature.
Fridge: Store leftover sandwiches in an airtight container in the fridge for up to 1 day. Reheat carefully to preserve the crispy texture.
Freezer: For longer storage, wrap each sandwich tightly in foil and freeze for up to 2 months. Thaw in the fridge before reheating.
Reheating: To revive the crunch, reheat in an air fryer or oven for about 5-10 minutes at 350°F until hot and crispy.
Garlic Bread Grilled Cheese Recipe FAQs
What type of bread is best for Garlic Bread Grilled Cheese?
You can use any bread you love! Sourdough and whole grain are popular choices for their texture and flavor. For a fun twist, try ciabatta or even a baguette. The key is to pick a sturdy bread that can hold up to the melting cheese and garlic butter.
How long can I store leftover Garlic Bread Grilled Cheese?
For the best taste, enjoy your Garlic Bread Grilled Cheese immediately. However, if you have leftovers, store them in an airtight container in the fridge for up to 1 day. If you’re dealing with a few hours, it’s fine to let them sit out at room temperature for about 2 hours.
Can I freeze Garlic Bread Grilled Cheese, and how?
Absolutely! To freeze your sandwiches, wrap each one tightly in aluminum foil or plastic wrap and store them in a freezer-safe bag. They can be frozen for up to 2 months. When you’re ready to enjoy them, thaw in the fridge overnight, then reheat as needed to restore their crispy exterior.
What if my grilled cheese isn’t getting crispy?
If your Garlic Bread Grilled Cheese isn’t crisping up, it’s likely due to cooking at too high a heat. Make sure you’re using low heat to allow the bread to toast without burning while giving the cheese time to melt correctly. Also, remember to check for the right amount of garlic butter spread; it’s vital for that golden crust!
Are there any dietary considerations for Garlic Bread Grilled Cheese?
This recipe is vegetarian-friendly, but if you’re cooking for those with dietary restrictions, consider alternative spreads for the garlic butter, like vegan butter or olive oil. When selecting cheese, opt for dairy-free options or check labels if dairy allergies are a concern. Enjoy this comfort food while catering to your loved ones’ needs!
Can I make Garlic Bread Grilled Cheese for my kids?
Absolutely! Kids love this delicious twist on a classic sandwich. Just make sure to use mild cheeses like mozzarella or cheddar, and keep the garlic flavor subtle. You can also let them customize their own sandwiches with fun add-ins like tomatoes or their favorite veggies for a nutritious boost!
Garlic Bread Grilled Cheese: Comfort in Every Gooey Bite
Ingredients
Equipment
Method
- Make the Garlic Butter: In a small bowl, blend the softened butter, garlic powder, and dried parsley until well combined and creamy.
- Prepare the Bread: Spread the garlic butter mixture generously on one side of each slice of your chosen bread.
- Assemble the Sandwich: Heat a skillet over low-medium heat. Place two slices of bread, butter-side down, onto the skillet. Add half of the cheese blend on each slice.
- Top and Complete: Place the remaining slices of bread on top, butter-side up, to form complete sandwiches.
- Cook the First Side: Cook on low heat for about 4 to 5 minutes until golden brown.
- Flip and Finish: Carefully flip each sandwich and cook the other side for an additional 4 to 5 minutes.
- Serve Immediately: Remove the sandwiches, let them rest for a minute, slice diagonally, and serve hot.
Leave a Reply