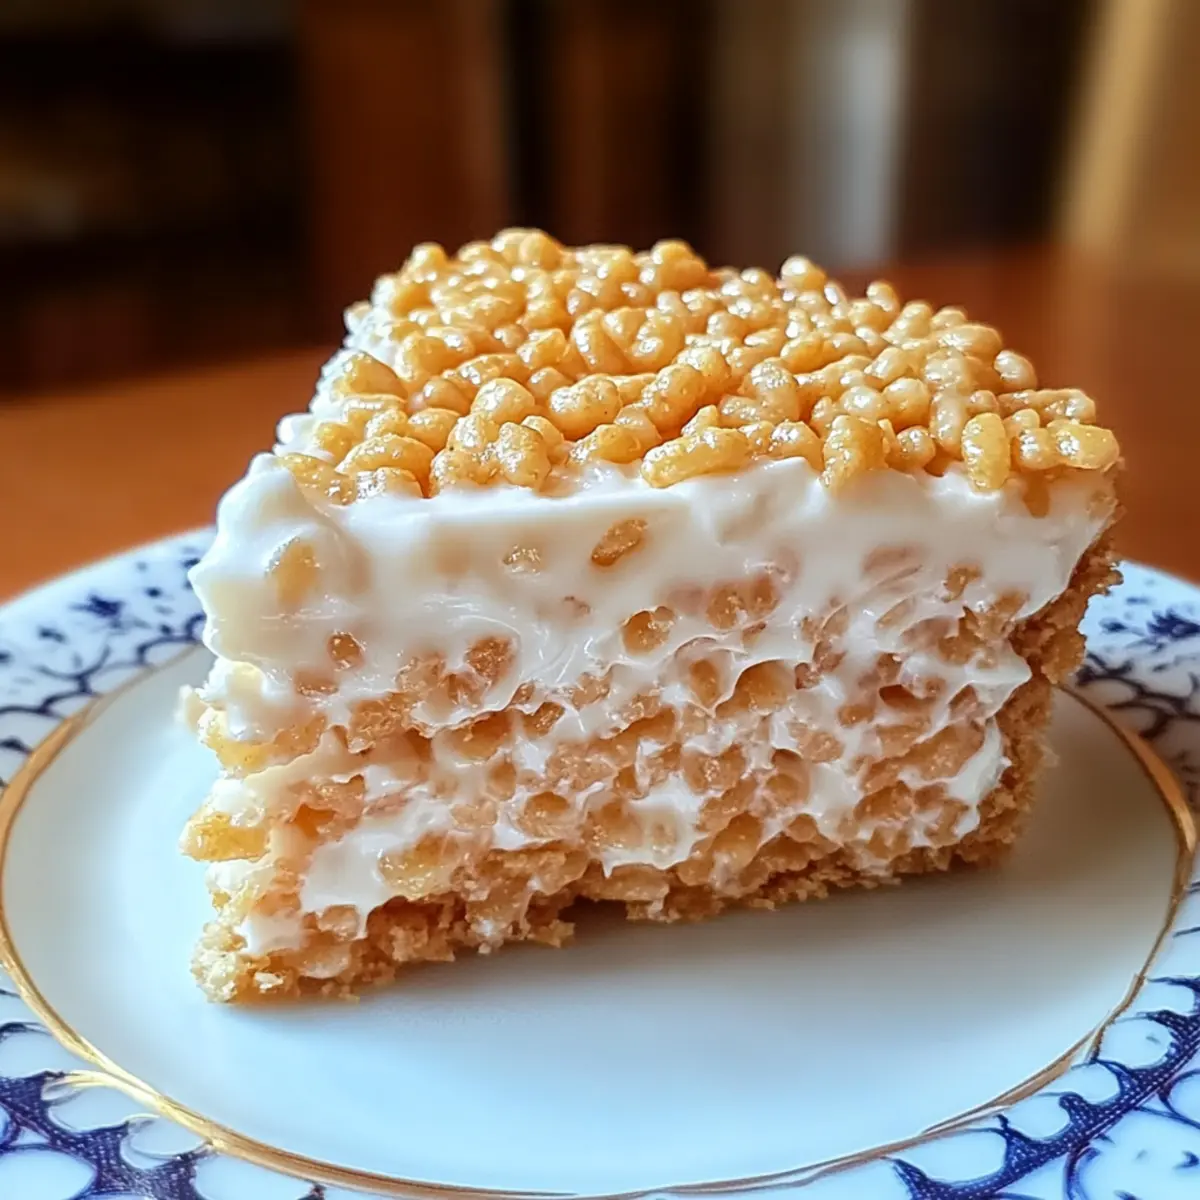
“Can you believe how simple it is to whip up a masterpiece?” That was the joy I felt when I first tasted a Rice Krispy Treat No-Bake Cheesecake. This delightful dessert marries the nostalgic crunch of Rice Krispy treats with the velvety richness of cheesecake, creating a show-stopping dish that’s as fun to make as it is to eat. What sets it apart? It’s a breeze to prepare, perfect for those hectic weeknights or impromptu gatherings, and it’s customizable to suit your taste buds. Whether it’s a dollop of peanut butter or a sprinkle of fresh fruit, the possibilities are endless! This cheesecake isn’t just a treat; it’s an experience that brings smiles and happy memories to every occasion. Ready to dive into the world of this easy, no-bake wonder? Let’s get started!
Why Is This Cheesecake So Special?
Irresistible Combination: This Rice Krispy Treat No-Bake Cheesecake offers the best of both worlds—the childhood nostalgia of crispy treats meets the creamy indulgence of classic cheesecake.
Effortless Preparation: No baking required means you’ll have more time to enjoy with family and friends, making it an ideal choice for busy days or spontaneous gatherings.
Customizable Delight: With options to add peanut butter, fresh fruits, or even crushed cookies, each version can be uniquely yours.
Crowd Favorite: Its playful texture and vibrant flavors make it a show-stopper at any gathering, ensuring everyone leaves with a smile and a satisfied sweet tooth.
Perfect for All Occasions: From birthdays to casual weeknight desserts, this cheesecake is ideal for any celebration. Need a quicker sweet fix? Grab ideas from our Rice Krispie Treat recipes!
Rice Krispy Treat No-Bake Cheesecake Ingredients
-
For the Crust
-
Rice Krispies Cereal – Provides the crunchy base. Substitute with gluten-free cereal for a gluten-free option.
-
Salted Butter – Adds richness to the crust. Use unsalted butter if preferred, adjusting salt in the recipe accordingly.
-
Miniature Marshmallows – Key in creating the sticky crust. If unavailable, regular marshmallows can be cut into smaller pieces.
-
For the Filling
-
Cream Cheese – Forms the primary filling. Ensure it’s at room temperature for smooth mixing.
-
Granulated Sugar – Sweetens the cheese filling. Can substitute with sweeteners like honey or agave for a healthier version.
-
Pure Vanilla Extract – Enhances flavor. Use fresh vanilla bean for an elevated taste.
-
Marshmallow Crème (e.g., Fluff) – Adds sweetness and stability. Melted mini marshmallows can be used as a substitute if needed.
-
Cool Whip – Lightens the filling and adds airiness. Homemade whipped cream can be used as a healthier alternative.
-
For Garnish
-
Whipped Cream – Adds a decorative touch. Ensure to add just before serving to maintain texture.
-
Cubed Rice Krispy Treats – Provides extra crunch. Use homemade or store-bought varieties for added flavor.
Step‑by‑Step Instructions for Rice Krispy Treat No-Bake Cheesecake 🍚
Step 1: Prep the Pan
Begin by greasing a 9- or 10-inch springform pan with nonstick spray to ensure your dessert comes out smoothly. This tiny but crucial step sets the stage for your Rice Krispy Treat No-Bake Cheesecake, preventing sticking and making sure that all your hard work beautifully displays once it’s time to serve.
Step 2: Make the Crust
In a medium saucepan, melt 4 tablespoons of salted butter along with 2 cups of miniature marshmallows over low heat. Stir continuously until the mixture is completely smooth and bubbly. Once melted, pour this buttery marshmallow blend over 6 cups of Rice Krispies cereal in a large bowl, mixing gently until every piece is thoroughly coated.
Step 3: Form the Crust
Transfer the Rice Krispies mixture into the prepared springform pan and press it down firmly with a spatula or your hands to create an even, compact crust. Aim for about a half-inch thickness. Allow the crust to cool for 15 to 20 minutes at room temperature; this will help it set up nicely, providing a sturdy base for your cheesecake.
Step 4: Prepare the Filling
In a mixing bowl, beat 8 ounces of softened cream cheese with ½ cup of granulated sugar and 1 teaspoon of pure vanilla extract until the mixture is smooth and free of lumps. Next, fold in 1 cup of marshmallow crème before gently incorporating 2 cups of Cool Whip, ensuring you maintain that airy texture for a light filling in your Rice Krispy Treat No-Bake Cheesecake.
Step 5: Assemble
Once your crust has cooled and your cheesecake filling is ready, pour the filling into the crust. Use a spatula to smooth the top evenly. The rich and creamy filling should be balanced with the crunchy crust underneath, setting the stage for a delightful dessert that will bring smiles to everyone at the table.
Step 6: Chill
Cover the assembled Rice Krispy Treat No-Bake Cheesecake with plastic wrap, then refrigerate it for at least 2 hours, or ideally overnight. This chilling time is essential for the filling to firm up, allowing all the flavors to meld together beautifully, making it a dream to slice and serve later.
Step 7: Garnish & Serve
When you’re ready to enjoy your masterpiece, remove the cheesecake from the springform pan. Just before serving, add a dollop of whipped cream on top and sprinkle cubed Rice Krispy treats for that extra crunchy element. Serve slices with a warm knife for neat cuts, and watch as everyone delights in this nostalgic, creamy dessert!

What to Serve with Rice Krispy Treat No-Bake Cheesecake
Imagine a delightful spread that enhances your creamy, dreamy creation and elevates your dessert experience to new heights.
-
Fresh Berries: Juicy strawberries, blueberries, or raspberries add a refreshing burst of flavor, perfectly balancing the rich cheesecake.
-
Chocolate Drizzle: A warm pour of melted chocolate not only looks elegant but adds a decadent touch that chocolate lovers will adore.
-
Whipped Cream: Light and airy, a dollop of homemade whipped cream enhances the cheesecake’s fluffy texture and invites indulgence.
-
Peanut Butter Sauce: This nutty, creamy addition harmonizes beautifully, especially if you’ve opted for a peanut butter twist in your cheesecake.
-
Coconut Flakes: Toasted coconut adds a delicious crunch and tropical flair, enhancing both flavor and presentation.
-
Chocolate Chip Cookies: Serve them on the side for a fun, playful contrast to your cheesecake—perfect for dunking!
A selection of these additions will create an exciting dessert table that caters to a variety of tastes and encourages sharing delightful memories with family and friends.
Make Ahead Options
These Rice Krispy Treat No-Bake Cheesecakes are ideal for meal prep and can save you valuable time on busy days! You can prepare the crust up to 24 hours in advance; simply follow the crust-making steps, press it into your springform pan, and refrigerate it until you’re ready to assemble. The creamy filling can also be prepared and stored for up to 3 days in the fridge, making your dessert even easier to complete later. When it’s time to finish, just pour the filling over the chilled crust, let it set in the refrigerator for at least 2 hours, and add your garnishes right before serving to maintain that perfect texture. This way, you’ll impress guests with delicious results and minimal effort!
How to Store and Freeze Rice Krispy Treat No-Bake Cheesecake
- Fridge: Store leftover cheesecake in an airtight container or cover it with plastic wrap. It will stay fresh for up to 3–4 days, perfect for a quick sweet fix.
- Freezer: For longer storage, freeze the cheesecake for up to 1 month. Wrap it well in plastic wrap before placing it in a freezer-safe container.
- Thawing: When ready to enjoy, transfer the cheesecake to the fridge and let it thaw for several hours or overnight.
- Garnishing: Avoid adding whipped cream and toppings before freezing. Wait until after thawing to garnish for the best texture and presentation.
Expert Tips for Rice Krispy Treat No-Bake Cheesecake
-
Room Temperature Cream Cheese: Ensure your cream cheese is at room temperature to achieve a smoother filling, preventing any lumps in your Rice Krispy Treat No-Bake Cheesecake.
-
Firm Pressing: When forming the crust, press the Rice Krispies mixture firmly into the pan. This helps maintain its structure when slicing and serving.
-
Gentle Folding: Fold in the Cool Whip gently to keep the filling light and airy. Overmixing can lead to a denser texture.
-
Clean Cuts: For beautiful slices, dip your knife in hot water before cutting and wipe it clean between each cut. This technique keeps the cheesecake intact and presentation-ready.
-
Timing for Toppings: Add any garnishes, like whipped cream and cubed Rice Krispy treats, just before serving to prevent sogginess and ensure a crisp texture.
Rice Krispy Treat No-Bake Cheesecake Variations
Feel free to unleash your creativity and personalize this dessert to your heart’s desire! The flavors and options are endless.
-
Peanut Butter Swirl: Stir in 2 tablespoons of creamy peanut butter into the marshmallow mixture for a delightful nutty flavor. Top with chopped peanut butter cups for a decadent finish!
-
Strawberry Cheesecake: Add fresh strawberries or a splash of strawberry puree for a fruity twist. For an extra crunch, mix in some crushed freeze-dried strawberries into the crust!
-
Oreo Cheesecake: Mix crushed chocolate sandwich cookies into both the crust and filling for a cookies-and-cream vibe. This twist is sure to delight Oreo fans!
-
Chocolate Drizzle: Drizzle melted chocolate on top before serving for a rich, sweet finish. It elevates the look and taste to new delicious heights!
-
Coconut Bliss: Mix in shredded coconut into your filling for a tropical flair. Pair it with a sprinkle of toasted coconut on top for an added crunch!
-
Mint Chocolate Chip: Add a few drops of mint extract to your filling and fold in mini chocolate chips. This refreshing variation will be a hit, especially in warmer months!
-
Nutty Crunch: Incorporate chopped nuts, like almonds or walnuts, into the crust for an extra layer of texture. It gives that delightful crunchy bite in every slice!
-
Spiced Pumpkin: In the fall, replace some of the cream cheese with pumpkin puree and add fall spices like cinnamon and nutmeg for a seasonal twist that’ll warm your heart!
No matter which variation you choose, this Rice Krispy Treat No-Bake Cheesecake is bound to impress! And if you’re in the mood for treats beyond just this cheesecake, check out our delightful Strawberry Cream Cheesecake or the deliciously tempting Bake Biscoff Cheesecake for inspiration!
Rice Krispy Treat No-Bake Cheesecake Recipe FAQs
How do I know if my ingredients are ripe or good to use?
For the best flavor and texture, use fresh, high-quality ingredients. Ensure your cream cheese is smooth and without lumps; check the expiration date on all dairy products. If your mini marshmallows or marshmallow crème have a weird texture or smell, it’s best to replace them.
What is the best way to store leftover Rice Krispy Treat No-Bake Cheesecake?
Store any leftovers in an airtight container or cover the pie with plastic wrap. In the fridge, it will remain fresh for up to 3 to 4 days. Ensure it’s completely cooled before wrapping, to avoid condensation ruining that delightful crust!
Can I freeze this cheesecake, and if so, how should I do it?
Absolutely! To freeze your Rice Krispy Treat No-Bake Cheesecake, first cover it tightly in plastic wrap, ensuring there are no air pockets. Then, place it in a freezer-safe container. It can be stored for up to 1 month. When you’re ready to enjoy, let it thaw in the fridge for several hours or overnight, and garnish it just before serving for the best texture.
My cheesecake didn’t set properly. What might have gone wrong?
There are a few reasons why it may not have set. First, ensure you chilled it for at least 2 hours or overnight after assembling. If your cream cheese wasn’t at room temperature, it might not have blended smoothly, leading to lumps. Make sure your Rice Krispies crust is firmly pressed down for stability, too. Next time, do give it enough chilling time!
Is this cheesecake safe for people with dietary restrictions?
Great question! To make this Rice Krispy Treat No-Bake Cheesecake gluten-free, simply use gluten-free Rice Krispies. For those with lactose intolerance, swap the cream cheese for a lactose-free alternative and use coconut whipped cream instead of Cool Whip. Always check labels for any specific allergies or dietary preferences to ensure safety for everyone.
Can I add my pets’ favorite treats as toppings?
While it’s tempting to share, be cautious! Many dessert ingredients like chocolate and certain nuts can be toxic to pets. Instead, why not prepare a separate pet-friendly treat? They can join in the fun without risking their health!

Rice Krispy Treat No-Bake Cheesecake: Easy, Creamy Bliss
Ingredients
Equipment
Method
- Step 1: Prep the Pan - Grease a 9- or 10-inch springform pan with nonstick spray.
- Step 2: Make the Crust - Melt 4 tablespoons of salted butter and 2 cups of miniature marshmallows over low heat until smooth. Pour over 6 cups of Rice Krispies and mix gently.
- Step 3: Form the Crust - Transfer the mixture into the pan and press down firmly to create a compact crust. Let cool for 15 to 20 minutes.
- Step 4: Prepare the Filling - Beat 8 ounces cream cheese, ½ cup sugar, and 1 teaspoon vanilla until smooth. Fold in 1 cup marshmallow crème and 2 cups Cool Whip.
- Step 5: Assemble - Pour the filling into the cooled crust and smooth the top.
- Step 6: Chill - Cover with plastic wrap and refrigerate for at least 2 hours, or ideally overnight.
- Step 7: Garnish & Serve - Remove from the pan, add whipped cream and cubed Rice Krispy treats just before serving.
Leave a Reply