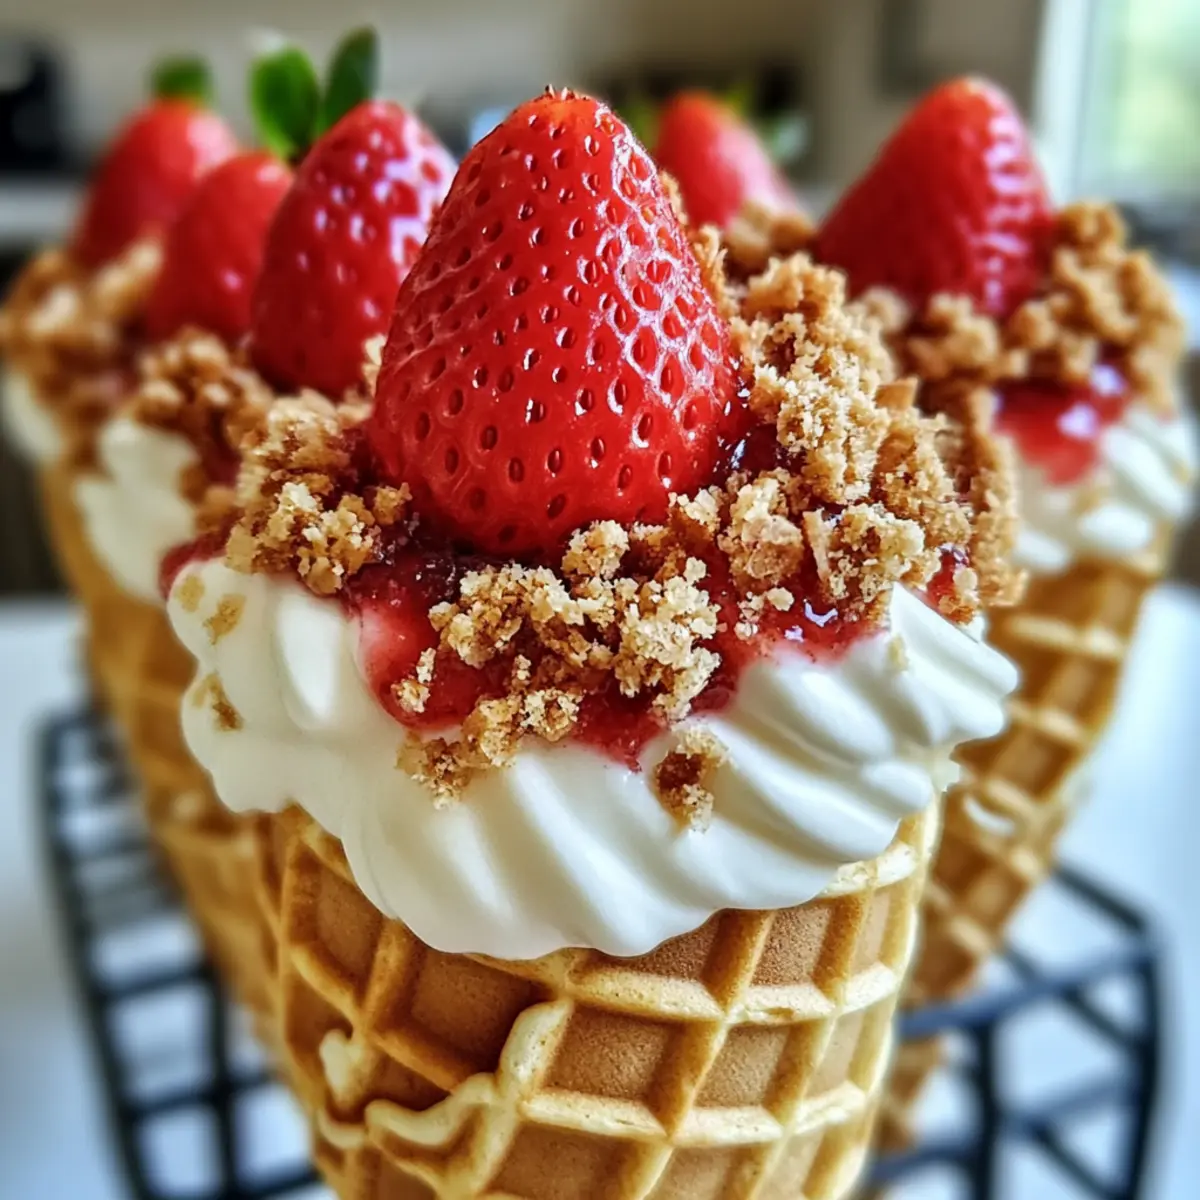
As I stood in my kitchen this sunny afternoon, the sweet scent of fresh strawberries drifted through the air, instantly whisking me back to sun-soaked summers filled with laughter and family gatherings. That’s when the idea for these Strawberry Crunch Cheesecake Cones blossomed in my mind—an elegant fusion of creamy cheesecake and juicy strawberries presented in crunchy waffle cones! Not only are these cones a delightful treat that’s quick to whip up, but they also effortlessly elevate any summer gathering with their fun, portable format. Perfect for impressing guests or treating yourself, they pack a punch of flavor and nostalgia with every bite. So, are you ready to dive into this deliciously simple dessert adventure? Let’s make these Strawberry Crunch Cheesecake Cones together!
Why are Strawberry Crunch Cones so irresistible?
Uniqueness: These cones offer a delightful twist on traditional cheesecake, combining creamy sweetness with a refreshing crunchy topping.
Quick and Easy: With minimal prep time, you can whip these up faster than ordering takeout, making them a go-to dessert for any occasion.
Crowd-Pleaser: Perfect for summer events or casual get-togethers, everyone will be reaching for a second (or third!) cone.
Versatile Options: Switch out strawberries for your favorite berries, or try a mix—like in my Strawberry Cheesecake Protein for a fun twist!
Meal Prep Friendly: Prep the filling and sauce a day ahead, allowing you to focus on assembling and serving. Enjoy these cone delights that truly capture the essence of summer!
Strawberry Crunch Cheesecake Cones Ingredients
For the Cheesecake Filling
• Cream Cheese – Provides the creamy base for the cheesecake filling; remember to soften it well for a smooth blend.
• Heavy Cream – Creates a light and fluffy texture; whip to stiff peaks but be careful not to overwhip for the best results.
• Powdered Sugar – Sweetens the filling; you can swap it with granulated sugar if preferred.
• Vanilla Extract – Adds warmth to the flavor; using a pure extract can elevate your cheesecake experience.
For the Strawberry Sauce
• Fresh Strawberries – Adds natural sweetness and vibrant flavor; use ripe strawberries for the most delicious sauce.
• Sugar – Helps to sweeten the sauce; adjust to taste based on the sweetness of the strawberries.
For the Crunch Topping
• Vanilla Wafer Cookies – Provides a delightful crunch; to intensify the flavor, consider toasting them lightly.
• Butter – Binds the topping together; for a dairy-free option, use a vegan butter alternative.
• Freeze-Dried Strawberries – Enhances the strawberry flavor in the topping; if not available, crushed graham crackers can be a fantastic substitute for a different twist.
For Assembly
• Waffle Cones – The perfect vessel for this creamy, crunchy delight; ensure they are sturdy enough to hold the filling without breaking.
With these Strawberry Crunch Cheesecake Cones ingredients ready to go, it’s time to create a mouthwatering dessert that balances sweetness and crunch beautifully!
Step‑by‑Step Instructions for Strawberry Crunch Cheesecake Cones
Step 1: Prepare the Strawberry Sauce
In a medium saucepan, combine your fresh strawberries with sugar over medium heat. Stir occasionally for about 10-12 minutes until the mixture thickens and bubbles gently. You’ll know it’s ready when it coats the back of a spoon. Once thickened, remove it from heat and let it cool completely at room temperature before using it in your cheesecake cones.
Step 2: Make the Cheesecake Filling
In a large mixing bowl, beat the softened cream cheese with an electric mixer on medium speed until creamy and smooth, about 2-3 minutes. Gradually add in the powdered sugar and vanilla extract, mixing until fully incorporated. Gently fold in the whipped heavy cream until the filling is light and fluffy, ensuring no lumps remain. This creamy cheesecake filling is now ready for your Strawberry Crunch Cheesecake Cones!
Step 3: Prepare the Crunch Topping
Crush the vanilla wafer cookies until they resemble coarse crumbs, and place them in a mixing bowl. Then, melt the butter in a microwave-safe bowl or saucepan and pour it over the crushed cookies. Stir until well combined, then spread the mixture on a baking sheet and toast it at 350°F (175°C) for about 5-7 minutes or until lightly golden. This crunchy topping will add delightful texture to your cones.
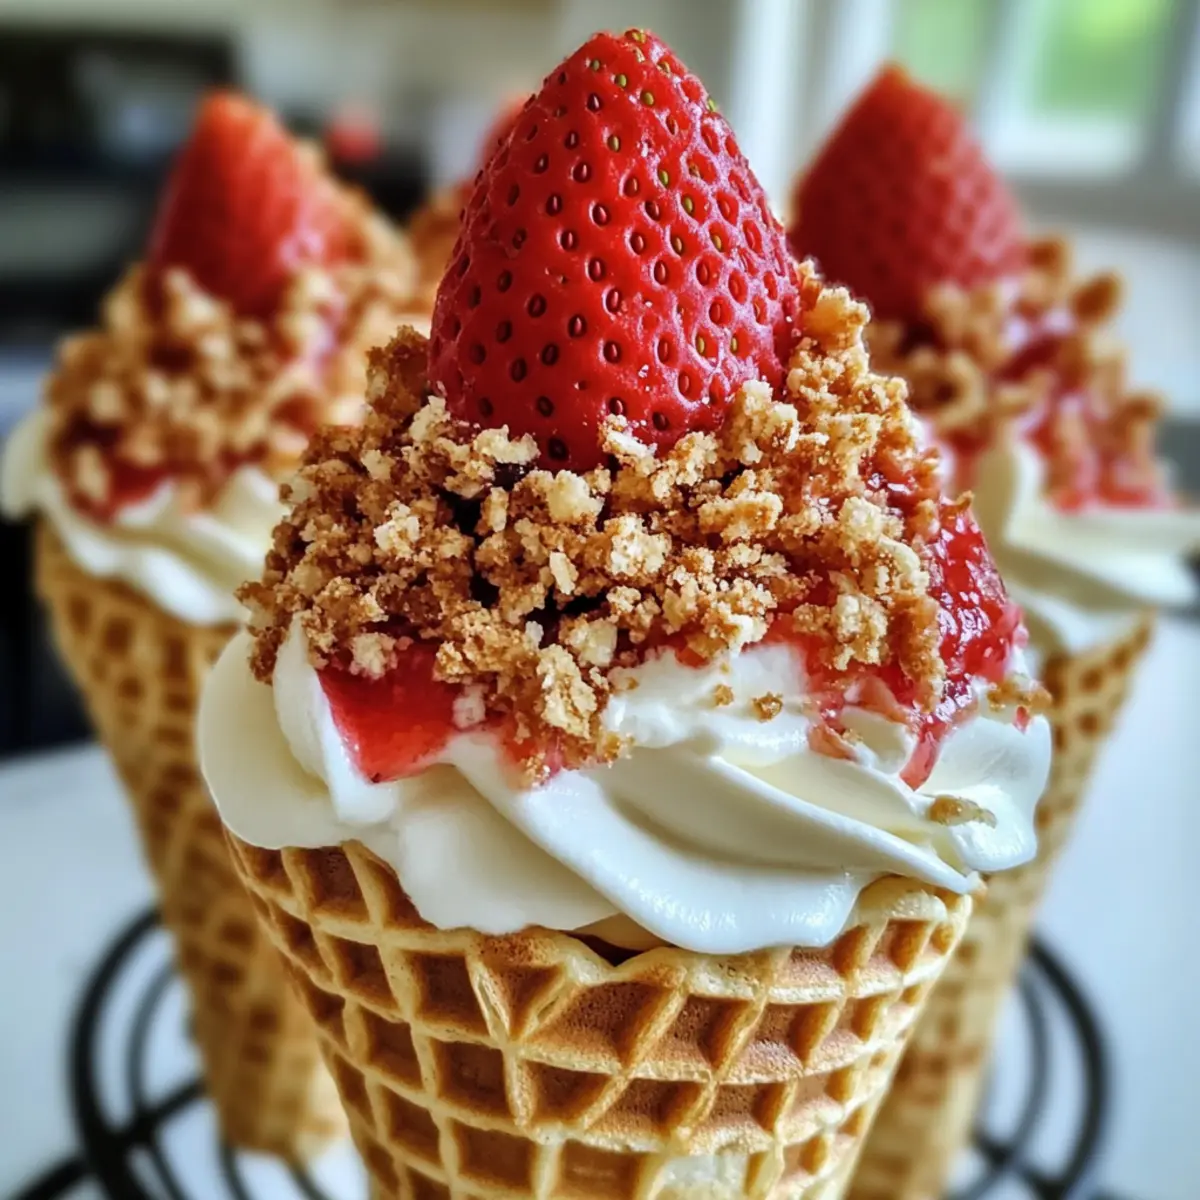
Step 4: Assemble the Cones
Grab your sturdy waffle cones and begin filling them by layering spoonfuls of the cheesecake filling into each cone, creating a prominent point at the top. Drizzle the cooled strawberry sauce generously over the cheesecake filling, allowing it to cascade down slightly. Finally, sprinkle the toasted crunch topping on top to give the Strawberry Crunch Cheesecake Cones a beautiful finish that beckons dessert lovers to take a bite.
Step 5: Chill Cones
Once assembled, place the cones on a plate or stand and refrigerate them for at least 1 hour. This chilling time allows the flavors to meld and the cheesecake filling to set properly, making your Strawberry Crunch Cheesecake Cones even more delicious. When ready to serve, take them out and enjoy the refreshing creamy delight with friends and family!
Expert Tips for Strawberry Crunch Cheesecake Cones
• Soften Well: Ensure your cream cheese is fully softened to prevent lumps in your cheesecake filling, giving a smooth texture.
• Whip Carefully: When whipping the heavy cream, stop just as stiff peaks form. Overwhipping can lead to a grainy cheesecake filling.
• Cool Strawberry Sauce: Always allow the strawberry sauce to cool completely before mixing it into the filling to maintain the right consistency of your Strawberry Crunch Cheesecake Cones.
• Sturdy Cones: Choose sturdy waffle cones to hold the filling securely. This helps prevent any breakage during assembly or serving.
• Toast for Flavor: Lightly toasting the vanilla wafer cookies not only enhances their flavor but also improves the crunchiness of the topping.
How to Store and Freeze Strawberry Crunch Cheesecake Cones
Fridge: Keep your assembled Strawberry Crunch Cheesecake Cones in the refrigerator, tightly wrapped in plastic wrap or stored in an airtight container for up to 2 days. This helps maintain their freshness and texture.
Freezer: While it’s best to enjoy cones fresh, you can freeze the cheesecake filling and strawberry sauce separately for up to 1 month. Just make sure to store them in freezer-safe containers.
Assembly Tip: Avoid assembling the cones before freezing, as the waffle cones can become soggy when thawed. Only fill them just before serving for the best experience!
Reheating: If you have leftover filling, you can repurpose it as a topping for pancakes or on toast. Simply dethaw the filling and serve chilled for a delightful twist!
What to Serve with Strawberry Crunch Cheesecake Cones
As you savor the creamy, fruity goodness of these cones, complementing dishes and drinks can brighten your dessert table even more.
- Fresh Fruit Salad: A medley of seasonal fruits adds a refreshing touch, enhancing the fruity notes in the cheesecake cones.
- Vanilla Ice Cream: Creamy and smooth, vanilla ice cream perfectly balances the sweet crunch and strawberries, creating a delightful duo.
- Lemonade Sparkler: The zingy freshness of lemonade brings a vibrant contrast, cleansing your palate between bites of the rich cones.
- Chocolate Dipped Pretzels: Crunchy and salty yet sweet, these bites provide a fun contrast that enhances the overall dessert experience.
- Coconut Whipped Cream: A dollop of light coconut cream adds tropical flair, harmonizing the dessert’s flavors with a soft, airy texture.
- Minty Iced Tea: Refreshing and aromatic, this drink provides a soothing finish to your dessert, while the mint brings a pleasant note of freshness.
- Chocolate Covered Strawberries: A classic pairing that elevates the experience, these decadent treats echo the flavors of the cones with a touch of elegance.
Each pairing invites a new aspect of nostalgia and joy to your summer gatherings!
Make Ahead Options
These Strawberry Crunch Cheesecake Cones are perfect for busy home cooks looking to save time during a hectic week! You can prepare the cheesecake filling and strawberry sauce up to 24 hours in advance, allowing the flavors to deepen. Simply store the cheesecake filling in an airtight container in the refrigerator, and similarly, refrigerate the cooled strawberry sauce. The crunch topping can be made and stored in a separate container for up to 3 days to keep its crispiness. When you’re ready to serve, assemble the cones by filling them with the cheesecake, drizzling with sauce, and topping with the crunch right before digging in. This way, you’ll enjoy a delightful dessert without the last-minute rush!
Strawberry Crunch Cheesecake Cones Variations
Feel free to get creative and customize your Strawberry Crunch Cheesecake Cones with these fun twists!
-
Berry Bonanza: Swap fresh strawberries for raspberries or blueberries for a vibrant and tangy flavor profile. Mix and match your favorite berries for a colorful cone experience.
-
Vegan Delight: Use dairy-free cream cheese and a plant-based whipped cream to make this recipe entirely vegan, ensuring everyone can enjoy these cones.
-
Gluten-Free: Opt for gluten-free waffle cones and vanilla wafer cookies to accommodate gluten-sensitive friends without sacrificing flavor.
-
Chocolate Drizzle: Add a rich chocolate sauce drizzle atop your cones to elevate the sweetness and add an irresistible layer of flavor. Melt dark or white chocolate for a heavenly touch!
-
Nutty Crunch: Incorporate chopped nuts like almonds or pecans into your crunch topping for added texture and nutty flavor. This twist not only enhances crunch but also provides healthy fats.
-
Caramel Crunch: Mix crushed toffee pieces into your topping for a salted caramel flavor explosion in every bite. It complements the sweetness of strawberries beautifully!
-
Banana Boost: Add sliced bananas to the layers of cheesecake filling for a creamy texture and a delicious banana-strawberry combination. Bananas also add a lovely sweetness that works perfectly!
-
Spicy Addition: For a touch of warmth, add a pinch of cinnamon or nutmeg to the cheesecake filling, or try a dash of cayenne pepper in the strawberry sauce for a unique twist that intrigues your taste buds.
Each variation brings its own delightful personality to your Strawberry Crunch Cheesecake Cones. Dive into these delicious twists, and feel free to explore beyond the possibilities of traditional cheesecake! If you’re craving more sweet treats, check out my recipe for Summer Strawberry Banana shakes, or try the luscious Strawberry Cream Cheesecake dessert for another layer of summer indulgence that will surely delight your taste buds. Enjoy the sweet journey!

Strawberry Crunch Cheesecake Cones Recipe FAQs
What kind of strawberries should I use?
Absolutely use ripe, fresh strawberries for the best flavor! Look for strawberries that are vibrant and free from dark spots; these ensure natural sweetness and brightness in your sauce. If you can’t find fresh ones, frozen strawberries can be a good alternative, but be sure to thaw and drain them beforehand.
How should I store leftover Strawberry Crunch Cheesecake Cones?
Store your assembled Strawberry Crunch Cheesecake Cones in the refrigerator for up to 2 days. Cover them tightly with plastic wrap or place them in an airtight container to maintain their freshness. Keeping them in the fridge helps preserve that delightful crunch and creamy filling!
Can I freeze the cheesecake filling or strawberry sauce?
Yes! You can freeze the cheesecake filling and strawberry sauce separately for up to 1 month. Just ensure they’re in freezer-safe containers. When you’re ready to enjoy, let them thaw in the refrigerator overnight, and assemble the cones fresh just before serving to maintain the cone’s crunchiness!
What if my cream cheese is too lumpy when making the filling?
No need to fret! If your cream cheese ends up lumpy, try beating it for a bit longer with an electric mixer until it’s smooth. If you’re still having trouble, a quick way to fix this is to microwave the cream cheese for about 10-15 seconds before mixing; this can help soften it further.
Can I make these Strawberry Crunch Cheesecake Cones ahead of time?
Definitely! To save time, prepare the cheesecake filling and strawberry sauce a day in advance and store them in the refrigerator. Just wait to assemble the cones until you’re ready to serve, ensuring that they stay crisp and delicious.
Are there any allergy considerations for this recipe?
Yes! If you have guests with dietary restrictions, consider substituting the cream cheese with a dairy-free alternative. For those with gluten allergies, using gluten-free vanilla wafer cookies will make this dessert more inclusive. Always check ingredient labels to ensure they’re safe for your guests!

Refreshing Strawberry Crunch Cheesecake Cones for Sweet Joy
Ingredients
Equipment
Method
- In a medium saucepan, combine fresh strawberries with sugar over medium heat. Stir occasionally for about 10-12 minutes until thickened.

- In a large bowl, beat softened cream cheese with an electric mixer until creamy. Gradually add powdered sugar and vanilla, mixing until incorporated. Fold in whipped heavy cream gently.
- Crush vanilla wafer cookies and melt butter. Combine melted butter with crushed cookies, then spread on a baking sheet and toast at 350°F for 5-7 minutes.
- Fill waffle cones with layers of cheesecake filling, drizzle with strawberry sauce, and sprinkle with crunch topping.
- Refrigerate the assembled cones for at least 1 hour before serving.
Leave a Reply